
Fall Reset: Repair Hair Damage This September
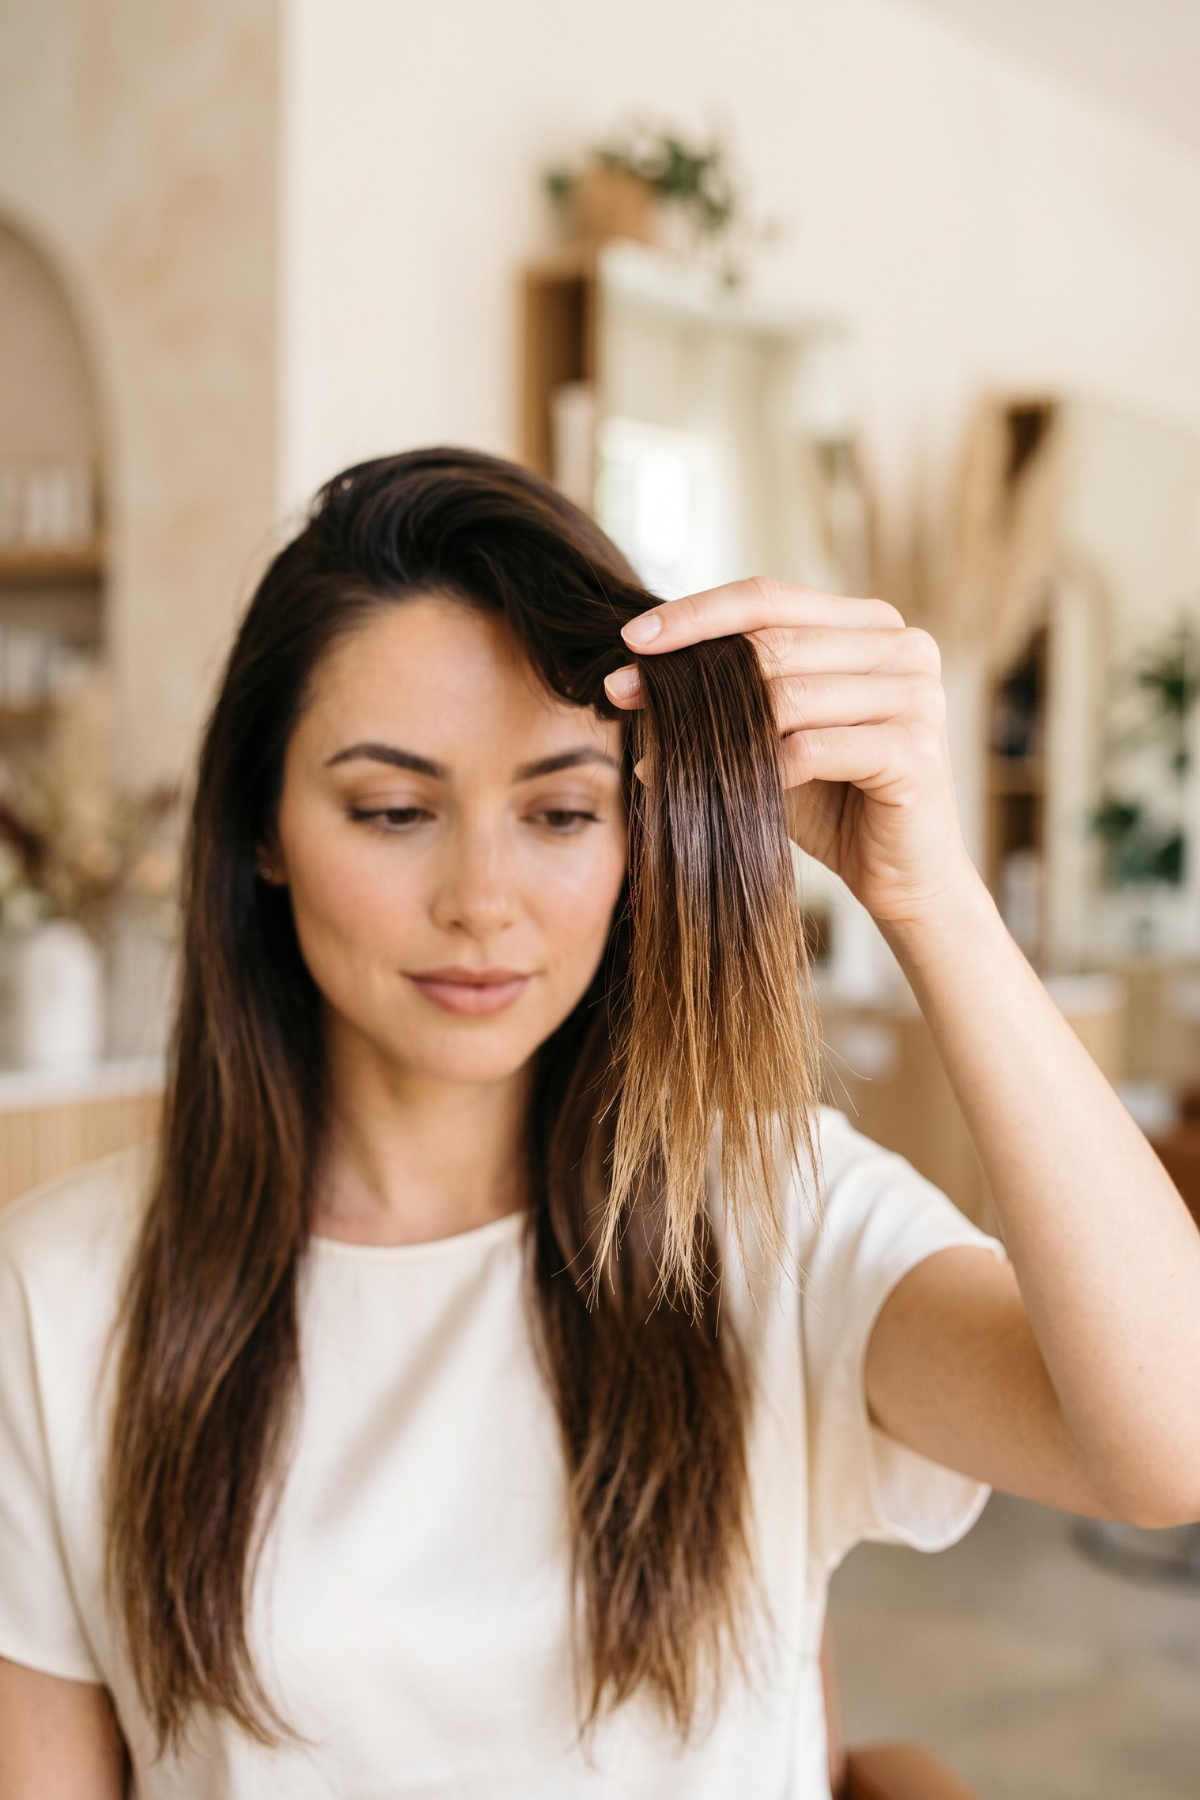
TL;DR
Summer damage doesn't undo itself, and it doesn't undo in one wash. It comes off in an order. You can reset it by clarify three months of chlorine, salt, and SPF off first, rebuild the broken bonds inside the strand, layer moisture back on top, trim what's genuinely gone, then protect every new inch before the next round of heat touches it.
Run it in that sequence over four weeks and hair that felt like straw at the start of fall behaves again a month later. Skip the order and you're just stacking product on damage.
Dealing with shedding or a cranky scalp on top of the damage? My free Ultimate Hair Growth and Scalp Health Guide covers the part a reset alone can't.
You noticed it on the first cool morning.
Your ends feel like straw, your brush snags two inches from the bottom, and the shine you had in June is gone. Your hair drank pool water, salt water, and sun for three months, and fall is when the bill comes due.
A fall hair reset can undo most of that summer damage. The catch is that it's a sequence, and the order matters more than any single product you buy.
Every fall my chair fills with the same story. Red, sunburned scalps at the part line. Ends so tangled and brittle I need a palmful of product just to get a comb through them. Most of the time I can tell what someone's summer looked like before they say a word.
Almost everything that ranks for summer hair repair is written by the product brands themselves, and surprise, their answer is always their own line.
I don't care whose products you use.
I care that you do the right steps in the right order.
So this is the plan I actually walk damaged clients through: a triage to figure out which damage you have, a week-by-week reset, and the honest trim conversation most blogs tiptoe around.
Why Does Summer Damage Hair?
Summer damages hair in three separate ways, and understanding each one is the first step to actually fixing it instead of guessing.
The sun breaks down the protein your strands are built from, which is also what fades your color. At the same time, chlorine and salt water strip away the natural oils that normally keep your cuticle, the outer layer of each strand, lying smooth like shingles on a roof.
Once those oils are gone and the shingles lift, hair starts to feel rough, look dull, and tangle more than usual. Heat styling on top of all that just compounds the damage, since it's working on hair that's already weakened.
Because these are three genuinely different injuries, treating all of them the same way with one all-purpose product is exactly why so many people finish summer still frustrated with their hair.
By the time fall rolls around, I can usually read a client's whole summer off her head. The first tell is the scalp. I part the hair, and it's bright red and irritated from months of sun, because almost nobody thinks to protect their scalp or wear a hat that actually covers their part.
The second tell is the ends. If someone's been in salt water and chlorine on vacation, or bleached and colored through the summer, the ends come in brittle, dry, and rough. They're hard to comb through wet or dry, and they need a serious amount of detangler before a comb will even move.
None of that means your hair is ruined. It means your hair took a specific kind of hit, and the first step is figuring out which kind.
How to Tell What Kind of Summer Hair Damage You Have
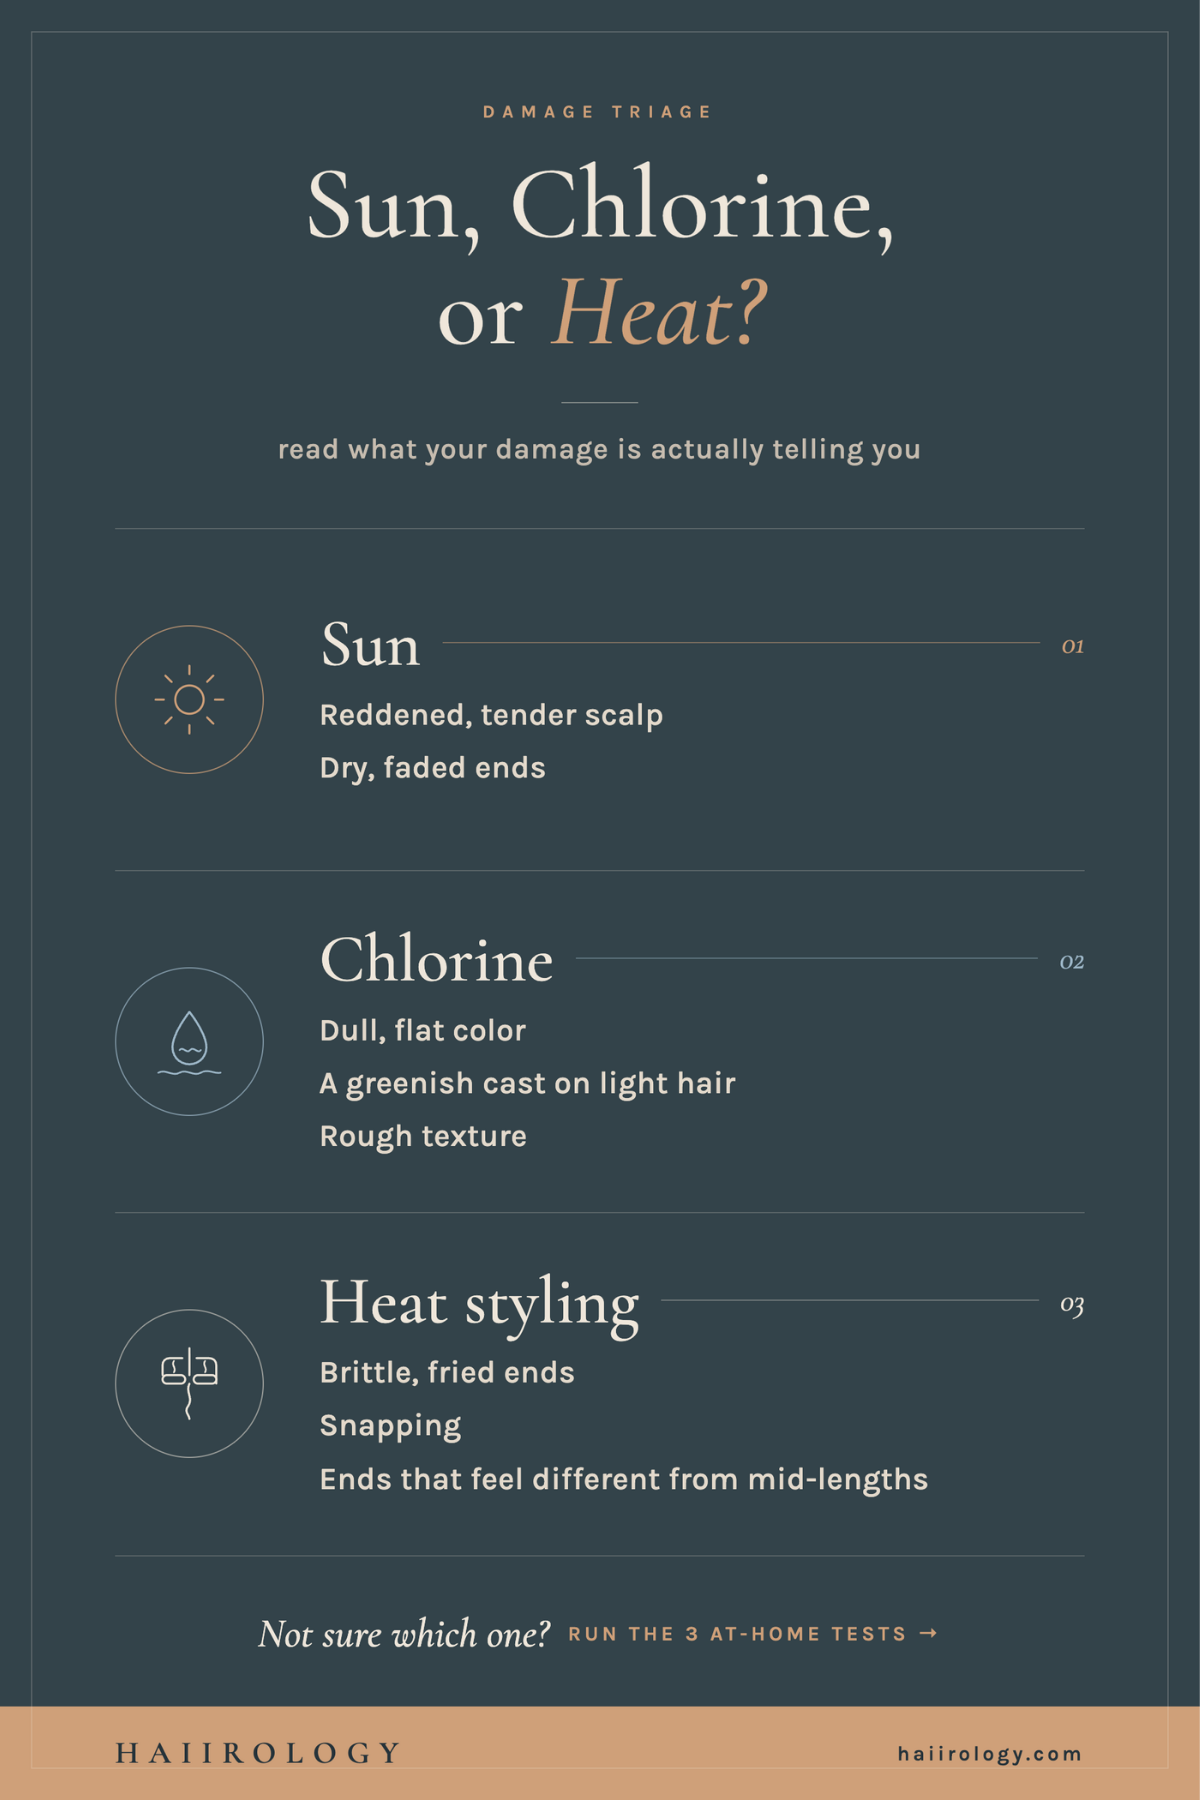
Before you buy anything, match what you're seeing to what actually caused it, because the right fix depends entirely on the right diagnosis.
Sun damage tends to show up at your scalp first and then as faded, dry lengths, while chlorine usually leaves behind a dull, murky film you can feel as much as see.
Salt water, on the other hand, leaves hair parched and crunchy rather than filmy, and heat styling goes straight for the ends, frying them from repeated exposure.
Color and bleach damage looks and feels different again, making hair stretchy and fragile instead of dry or coated.
Here's the quick triage I actually run in the chair, so you can figure out which one, or which combination, you're dealing with before you spend a dollar on a fix you don't need.
| What you're seeing | Likely culprit | What it needs |
|---|---|---|
| Red, irritated scalp, worse at your part and front hairline | Sun | Soothing scalp care first, then sun protection |
| A dull, murky, greenish cast and hair that won't shine | Chlorine | Clarify first, then moisture |
| Crunchy, parched hair after every beach day | Salt water | Clarify, then heavy hydration |
| Fried, brittle ends that drink product and still feel dry | Heat | Bond repair, lower heat, a trim |
| Hair that stretches like gum when wet, snaps, fights the comb | Color or bleach | Bond repair and an honest trim |
Summer Hair Damage You Can Have
Sun Damage
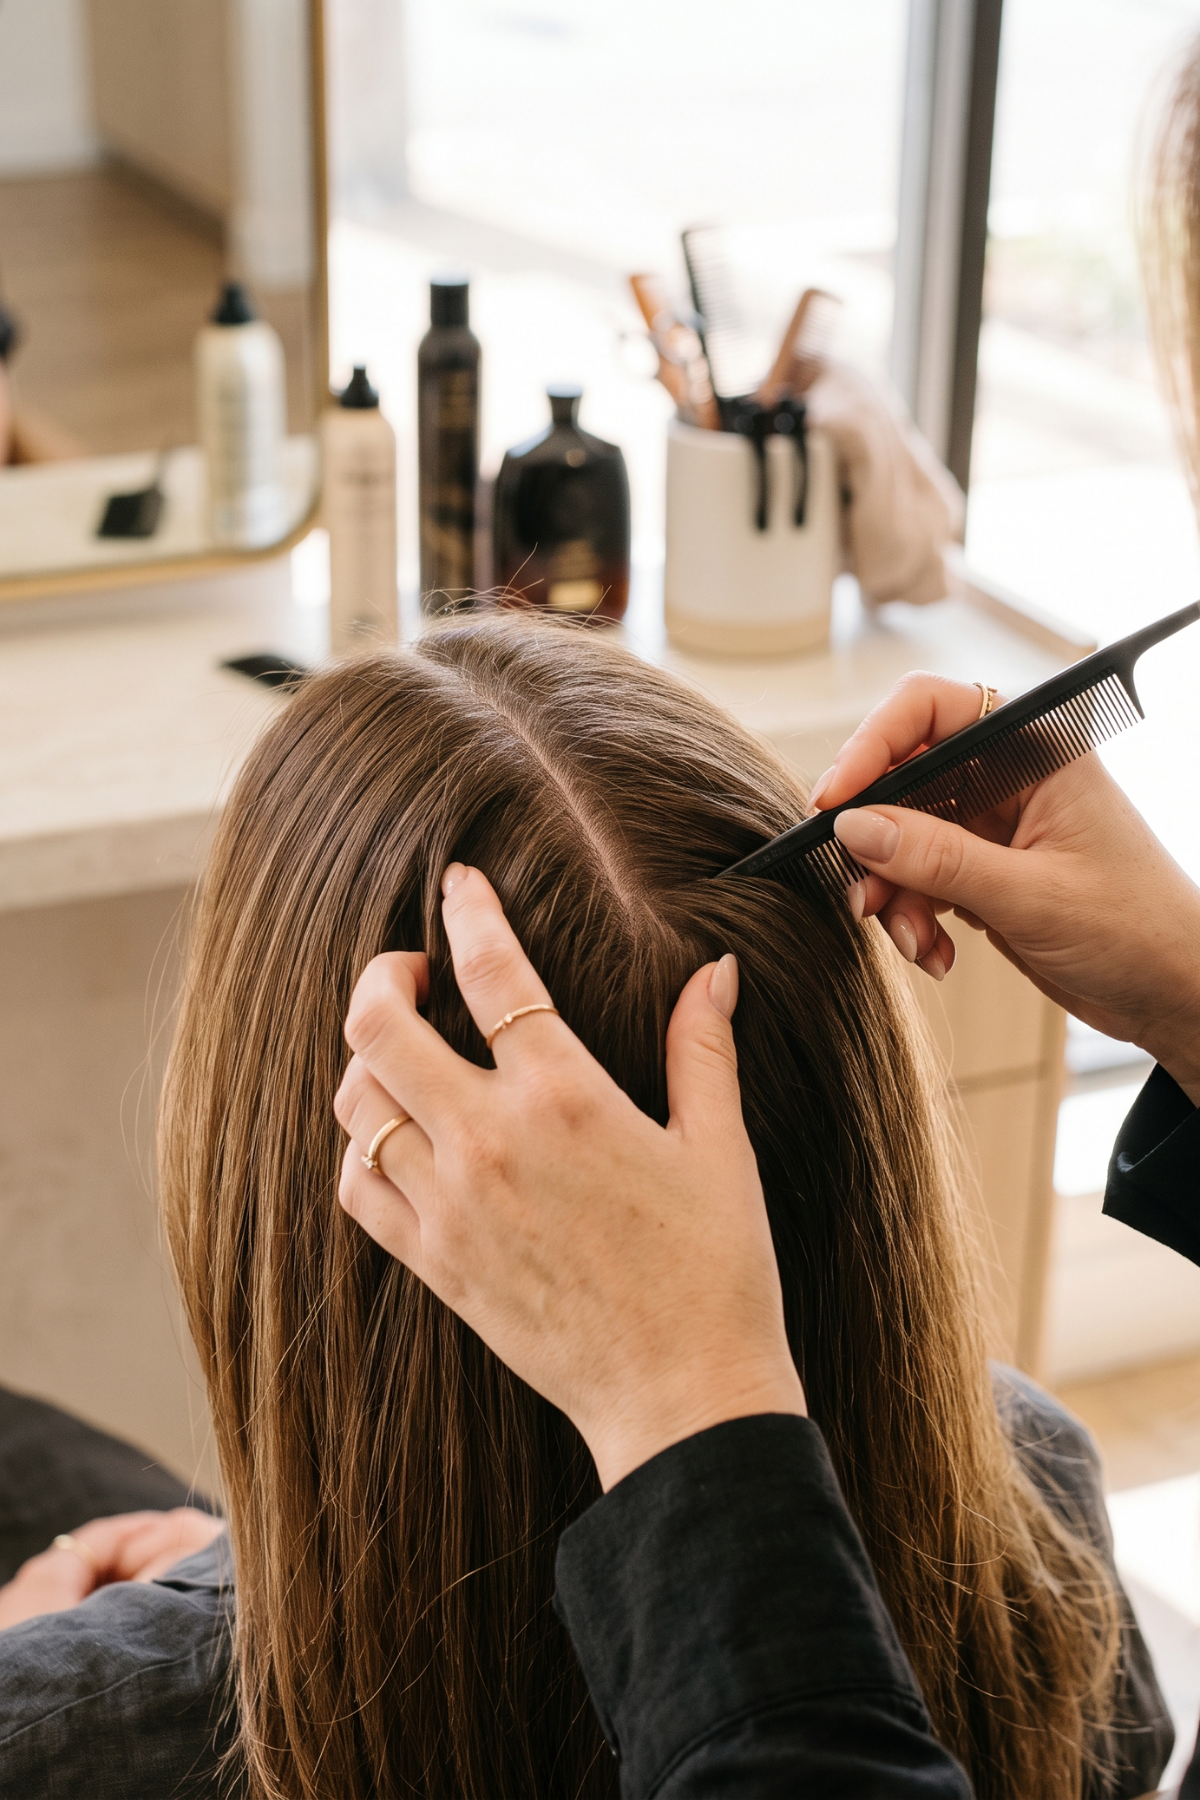
I confirm with a quick front-to-back check. Part your hair near your bangs and look at the scalp, then part it at the back of your head and compare. The front will look inflamed and red because the sun hits the front of your head most directly, while the back stays much lighter under all that hair coverage. If you can see that difference, the sun got you.
One caution here: if your scalp is genuinely burned, not just pink but tender, flaking, or peeling, treat it gently before you do anything else in this plan.
Skip hot water and active scalp exfoliants for now and reach for something calming instead, since a repair routine layered on top of a burn just adds irritation on top of irritation.
Chlorine Damage
Chlorine is easier to spot than people think. It reads as a murky, almost green cast sitting over the hair, with a film of buildup that kills shine. You can see it even on dark hair, and on blonde it visibly dulls or shifts the color.
Caring for blonde hair after a pool-heavy summer is honestly its own conversation. If you're still swimming regularly while you run this reset, rinse your hair with clean water and coat it in conditioner before you get in the pool.
That barrier makes a real difference in how much chlorine your hair actually absorbs while you're trying to repair it.
Heat Damage
I confirm by asking, because most people use far more heat in summer than they realize, with all the weddings, trips, and events. The giveaway is the ends. They look fried and brittle, and they won't hold on to moisture no matter what you put on them.
If heat was your main culprit, my step-by-step heat-damaged hair repair routine goes deeper than this reset does.
And if your curls came out of summer looser and limp, that's usually the same damage showing up in your pattern, and fixing damaged curly hair has a few steps of its own.
While you're running this reset, treat every hot tool as optional. If heat did the damage, more heat during recovery just works against you.
Bleach and Color Damage
This one is the stretchiest of the bunch. If your hair moves like gum when it's wet, start with the bond-repair weeks below and go easy on everything else.
Was lightener your whole summer? Then the full bleach-damaged hair care routine is the deeper companion to this plan.
One important precaution: don't book another lightening or color service until your hair passes the stretch test below. Processing hair that's already this fragile is how a bad summer turns into a chemical cut you didn't plan for.
Three Hair Damage Tests You Can Run at Home
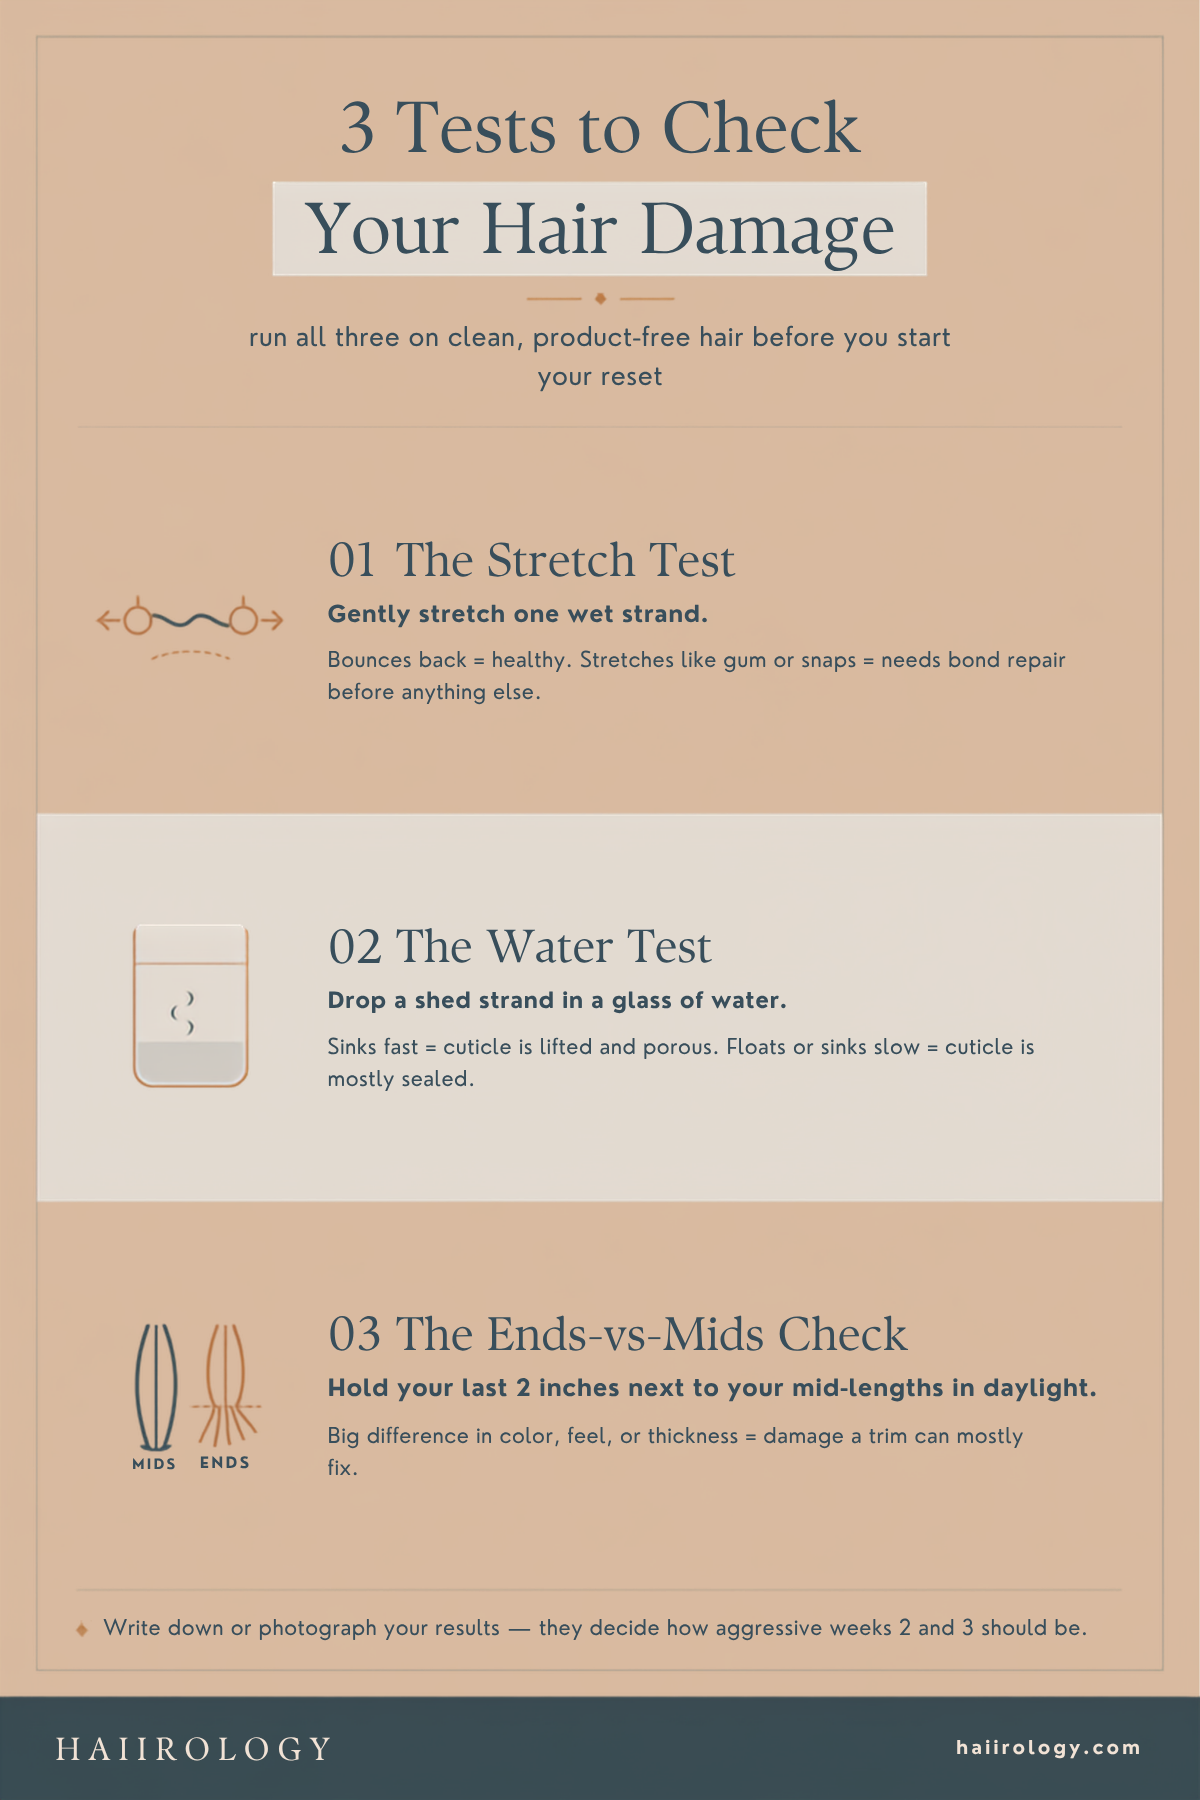
The stretch test.
Take a single wet strand and gently stretch it. Healthy hair stretches slightly and bounces back. If it keeps stretching like gum or snaps immediately, its internal structure needs to recover before you do anything else. No color, no hot tools yet.
The water test.
Drop a clean strand of hair into a glass of water. If it sinks fast, the cuticle is lifted and porous from damage, so your hair is drinking in water and losing it just as quickly. A slow sink or a float means the cuticle is mostly sealed and healthy.
The ends-versus-mids check.
Hold your last two inches next to your mid-lengths in daylight. A big difference in color, feel, or thickness means the damage is concentrated where a trim can solve most of it.
Do You Have to Cut Damaged Hair to Fix It?
Not all of it.
But ends that are truly split or broken off aren't coming back, and I'd be lying if I told you otherwise. You can use as many products and home remedies as you want. The only way to actually get rid of damage that's already there is to cut it off.
That doesn't mean I'm taking four inches. If you don't want to lose length, we do a small trim to take off the worst of it, then put a recovery system behind it so the rest doesn't get worse.
If your hair is fine and you wear it long, this part matters twice as much. Fine hair kept long tends to break at the ends anyway, and summer speeds that up. Getting those dead ends off makes your hair look ten times better and helps it grow in healthier.
Long hair absolutely works on fine hair. You just trim a little more often, even a micro-trim every 4–6 months, so the ends never get the chance to thin out.
And if you're truly not ready to trim right now, I get it. The goal changes from fixing to containing. We can't repair what's already split, but we can stop it from getting worse with a hydrating shampoo, a reparative conditioner with bond-building technology, and oil on the ends to put moisture back in.
Can Damaged Hair Actually Be Repaired, or Only Trimmed?
Partially, and it's worth doing. Bond-repair treatments can reconnect some of the broken bonds inside the strand, which leaves hair stronger and less prone to snapping. Moisture and softness can be rebuilt almost completely. What can't be rebuilt is structure that's already gone. A split end stays split.
So when I say reset, I mean getting your hair to the strongest, smoothest version of what's still on your head, then trimming away what's past saving. That's an honest goal, and hair that's had a real reset behaves so differently you'll stop thinking about the inch you lost. If you want to go deeper on the treatment side, there's a whole category of bond-repair treatments for damaged hair worth knowing before you spend.
| Keep Repairing: More Damage-Rescue Reads |
|---|
| Once you know which damage you're dealing with, these go deeper on each fix: Whatever your summer threw at your hair, you'll find the deeper fix here. |
How Long Does a Hair Reset Take?
Weeks, not washes.
One mask makes your hair feel better for a day. It won't rebuild three months of damage. Plan on about four weeks of consistent care before you feel a real difference in strength and smoothness, with the biggest visible jump coming after the trim.
You also don't need a 12-step routine to get there. I tell clients this constantly. Pick a handful of steps you'll actually repeat and be really consistent with them.
Consistency is what gets you the long-term result.
If your summer damage comes with shedding, a cranky scalp, or hair that stalls at one length, I made you something free.
The Ultimate Hair Growth and Scalp Health Guide covers the scalp-and-growth side of recovery that a reset alone can't. Grab it and run it alongside the plan below.
Get the Free Hair Growth GuideYour 4-Week September Hair Reset Plan (Step-by-Step)
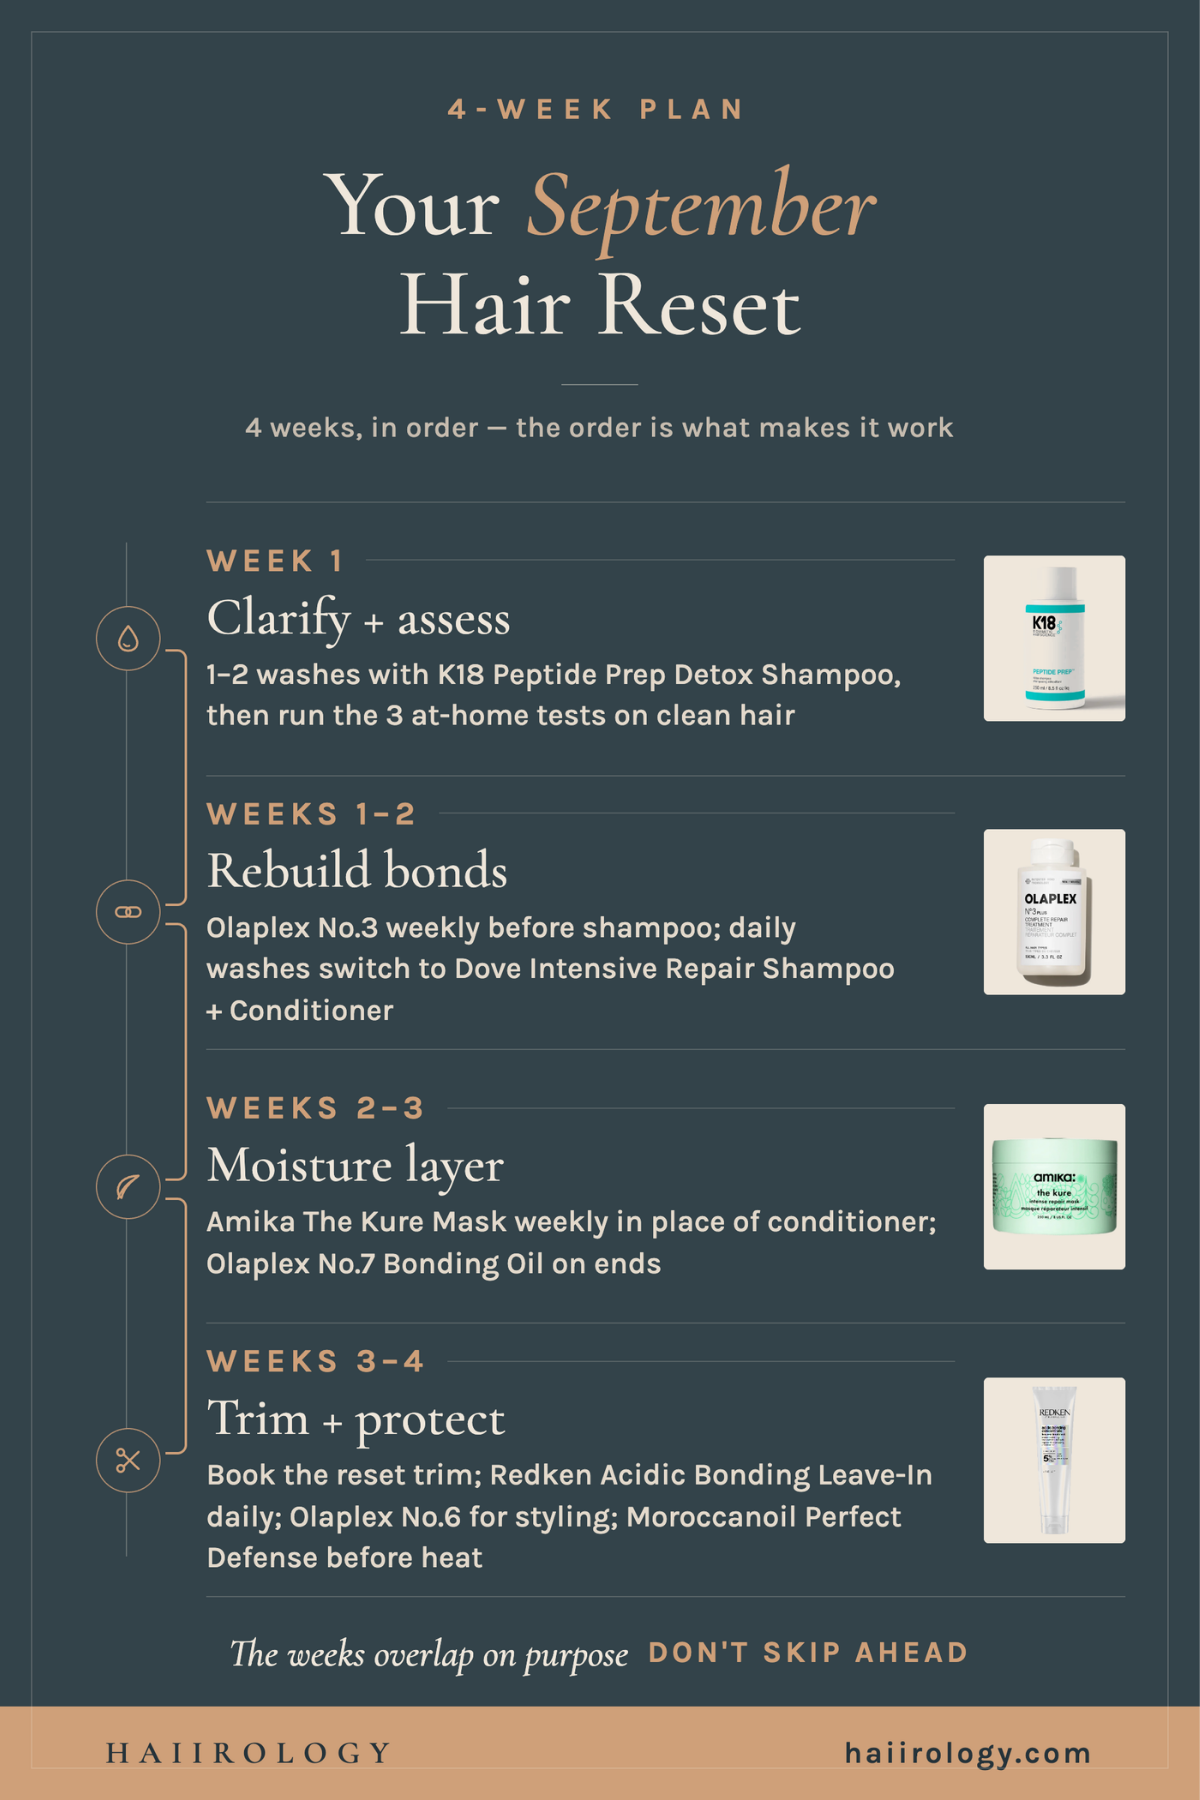
The reset runs in four phases.
Clarify and assess in week one, rebuild bonds through weeks one and two, layer moisture back in through weeks two and three, then trim and protect in weeks three and four. Each phase sets up the next, which is why the order matters more than the shopping list.
Before you buy a single thing, do what I do in every damage consult. I start by going through what a client already has at home, how she's using it, and what she's noticing.
You usually don't need a whole new system. A lot of the time I switch out one or two products, or fix how someone's using the ones she already owns.
Then check your scalp, because your scalp condition drives the whole routine. Dry, oily, or irritated changes which shampoo you should reach for.
And if your scalp is red and tender from the sun, calm it before anything else: a soothing scalp treatment with calming ingredients, applied to damp or dry hair after the shower, and a proper scalp care routine for an irritated scalp until it settles.
| Week | Focus | What to do |
|---|---|---|
| Week 1 | Clarify + assess | One or two washes with K18 Peptide Prep Color-Safe Detox Clarifying Shampoo, then run the three at-home tests on clean hair |
| Weeks 1–2 | Rebuild bonds | Olaplex No.3 Hair Perfector weekly before shampooing; switch daily washes to Dove Intensive Repair Shampoo + Dove Intensive Repair Conditioner |
| Weeks 2–3 | Moisture layer | Amika The Kure Intense Strength Repair Mask weekly in place of conditioner; Olaplex No.7 Bonding Oil on the ends; pre-wash jojoba oil on the roughest ends |
| Weeks 3–4 | Trim + protect | Book the reset trim; Redken Acidic Bonding Concentrate Leave-In Treatment daily; Olaplex No.6 Bond Smoother for styling; Moroccanoil Perfect Defense before any heat |
Week 1: Clarify and Assess
Everything starts with a clean slate. Three months of chlorine, salt, SPF, and styling products are sitting on your hair right now, and no repair treatment can work through that film. Clearing it is exactly what clarifying shampoo actually does, and the trick is stripping the buildup without stripping your color.
Here's exactly how I'd run this week:
Wash once with the K18 Peptide Prep Color-Safe Detox Clarifying Shampoo, working the lather into your scalp first and then down through the lengths. Rinse until the water runs clear, not just until it feels rinsed.
Check your hair once it's towel-dried. If it still looks a little dull or feels coated, wash a second time in the next day or two. If it already feels genuinely clean, stop there. You don't need two washes just because the plan says "one or two."
Once you're on clean, product-free hair, run the three at-home tests below (stretch, water, ends-versus-mids) and actually write down or photograph what you find. That result is what tells you how aggressive to be in weeks two and three.
If your hair still feels rough or looks dull after two clarifying washes, that's not a sign to wash a third time. It's a sign the damage lives deeper than surface buildup, so move straight into the bond-repair week below instead of chasing it with more shampoo.
One caution: don't reach for a clarifying shampoo more than twice in this first week.
Weeks 1 and 2: Rebuild Bonds
Rebuild the inside before you chase softness on the outside. Use Olaplex No.3 Hair Perfector once a week on damp hair before you shampoo. It's the at-home bond repair staple for a reason, and using Olaplex No.3 correctly makes a real difference in what you get out of it.
Here's the actual routine:
Towel-dry your hair so it's damp, not dripping and not soaking wet. Product spreads more evenly and does more work on damp hair than on fully wet hair.
Section your hair into four sections, apply the No.3 root to end while avoiding the scalp itself, then comb it through with a wide-tooth comb so it's evenly distributed.
Leave it on for the three to ten minutes the bottle recommends. If your hair leans toward the "stretches like gum" end of the damage scale, lean toward the longer end of that window.
Rinse, then shampoo and condition as normal.
For your daily washes in these two weeks, you don't need to spend a fortune. The Dove Intensive Repair Shampoo and Dove Intensive Repair Conditioner are the budget repair pairing I point clients to while they're rebuilding, made for damaged hair and cheap enough to use generously. Leave the conditioner on for a full one to two minutes instead of a quick rinse-and-go, so it actually has time to work.
By the end of week two, you should notice less breakage when you comb and less tangling in the shower. That's your sign the bonds are coming back, and you're ready to move into the moisture phase.
Weeks 2 and 3: Layer the Moisture Back In
With the bonds coming back, moisture can finally hold. If your hair is really damaged, skip your regular conditioner in the shower for these two weeks and use the Amika The Kure Intense Strength Repair Mask in its place.
Here's how to actually use it:
After you shampoo, apply the mask generously from your mid-lengths to your ends, the areas doing the most damage-recovery work, and comb it through so it's distributed evenly.
Leave it on for a full ten minutes. Set a timer if you tend to rush this step. The difference between a two-minute rinse and a full ten minutes is real.
Rinse thoroughly. Damaged hair drinks up a rich, creamy mask far better than a thin rinse-out, so don't be surprised if it takes a little longer to rinse clean than your regular conditioner does.
Out of the shower, work a few drops of Olaplex No.7 Bonding Oil through your ends, damp or dry, to seal moisture in and bring the shine back. Keep it to your ends. Applied too close to the roots, it can leave hair looking greasy instead of glossy.
For the roughest ends, add my old-school step once during this stretch: a pre-wash oil treatment. Coat your mid-lengths to ends in a plain 100% organic jojoba oil, comb it through so it's evenly distributed, and let it sit for 1–2 hours before you wash it out in the shower (a shower cap over it traps a little warmth and helps it absorb).
Your worst damage lives in those last few inches, and this gives them a head start before shampoo ever touches them.
One note if your hair or scalp runs oily or fine: keep the pre-wash oil to your ends only and skip the scalp entirely, since oil that close to the roots can leave fine hair looking weighed down and greasy instead of repaired.
Weeks 3 and 4: Trim and Protect
Now the trim. By week three, your hair is stronger and less fragile, and you and your stylist can see exactly what's worth keeping. Tell your stylist you're finishing up a damage reset and ask for a health trim or dusting rather than naming an inch count. Take off what's truly gone, even if that ends up being only half an inch.
From here, your daily routine is protection:
On damp hair, smooth on the Redken Acidic Bonding Concentrate Leave-In Treatment, one or two pumps through mid-lengths and ends. This is the step that keeps strengthening and shielding the strand between your weekly treatments, so your hair keeps gaining ground instead of slipping back between wash days.
For styling, smooth a small amount of Olaplex No.6 Bond Smoother through mid-lengths and ends to control frizz without reaching for a hot tool.
Any time you do use heat, mist Moroccanoil Perfect Defense through first, every single time. The fastest way to undo a reset is to blow-dry bare hair.
If you're wondering which Olaplex number does what across the No.3, No.6, and No.7, I've broken the whole line down separately.
And one honest caution on the trim itself: this is the one step in the whole reset I wouldn't do yourself. A DIY trim on hair that's already fragile is an easy way to create new damage while you're trying to fix the old kind, so this is worth the appointment.
Save this post for wash day. The plan only works if you actually run it, and nobody remembers what week three was supposed to be by the time it arrives.
Damaged Hair Mistakes to Avoid During Your Reset
The three mistakes I see most every fall are clarifying with a harsh stripping shampoo on color-treated hair, styling on max heat mid-repair, and skipping the trim while waiting for a product to fix split ends. Each one either stalls the reset or actively makes the damage worse.
Don't clarify with a harsh stripper on colored hair. A clarifying shampoo can strip your color if it's not color-safe. Use a color-safe detox formula and stop at one or two washes.
Don't style on max heat mid-repair. Your hair is at its most fragile in weeks one and two. If you have to use heat, turn the temperature down and use your protectant.
Don't skip the trim and hope. No product on the market fuses a split end back together. Repair products strengthen the hair that's still intact. That's the real mechanism, and it's exactly why the trim stays in the plan.
How to Protect Your Hair After the Reset: A Fall Prevention Routine
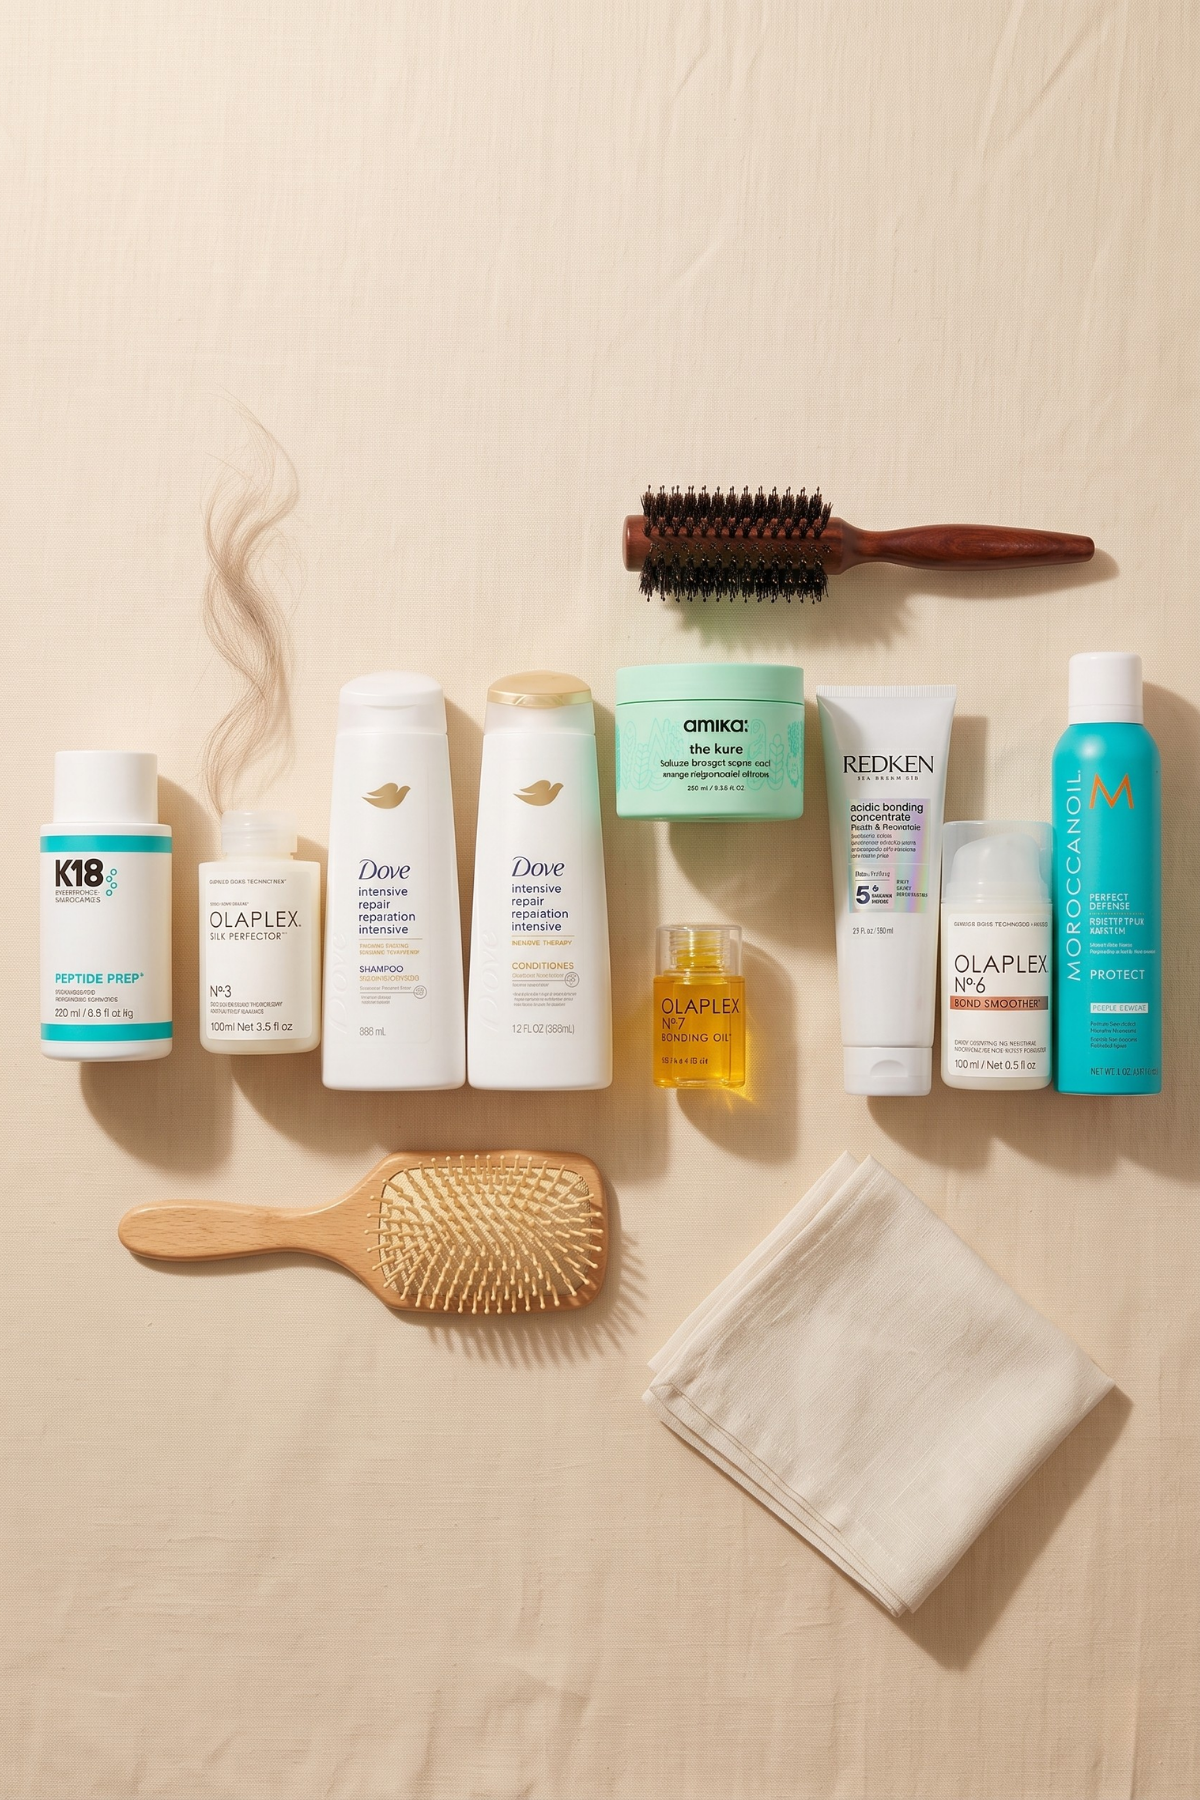
Prevention is a lot shorter than the reset, which is exactly why it's worth building into your routine now instead of waiting until next August.
It really comes down to three habits: protect your hair before every single pass of heat, keep your heat settings lower than you think you need, and build your wash routine around whatever your scalp is actually telling you it needs. Do that consistently, and next summer you can block the damage before it starts instead of undoing it every fall.
Keep the Moroccanoil Perfect Defense habit after the reset ends. Heat protectant only works when it's on the hair, and most of the heat damage I fix builds up slowly, one bare blow-dry at a time. Damage adds up through ordinary weeks, and preventing and repairing daily hair damage is a routine of its own.
If you're rebuilding your routine from scratch this fall, start with your scalp. Figure out whether it runs dry, oily, or normal and pick your shampoo based on that. Keeping your scalp healthy sets up everything else you'll do this fall.
And file this away for next June, because it's the one summer habit I wish every client would pick up. Before you get into a pool or the ocean, wet your hair with clean water and coat it in conditioner. It acts as a barrier that makes it much harder for chlorine and salt to get into the hair, and it leaves your hair more hydrated when you rinse off after a day in the water. One cheap bottle of conditioner in your beach bag can save you a fall like this one.
Tell me in the comments: what did your hair go through this summer- pool, ocean, or hot tools?
Your answers genuinely shape what I write next.
FAQs: Fall Hair Reset
How to repair heat damaged hair to smooth again?
Heat-damaged hair smooths back in stages. Start with one clarifying wash to clear buildup, then rebuild strength with a weekly bond-repair treatment like Olaplex No.3. Swap your conditioner for a rich repair mask until the ends behave, and put a bonding leave-in on damp hair every day. When you style, drop your heat setting and never skip protectant. Ends that are genuinely fried won't ever smooth back, because the structure is gone. Trim those, even a little, and the rest of your hair will respond to the routine within a few weeks.
How long does it take to reset hair?
Plan on about four weeks of consistent care before your hair feels noticeably stronger and smoother, and a few months before it fully behaves again. One mask makes hair feel better for a day, but rebuilding a summer of damage takes repetition: weekly bond repair, weekly masking, a daily leave-in, and less heat. The trim is the biggest single jump in how your hair looks, because it removes the worst of the damage in one appointment. Consistency matters more than the number of products you use, so pick steps you'll actually repeat.
What is the reset treatment for hair?
There's no single official reset treatment, whatever the marketing says. A hair reset is a sequence you run over about a month: a clarifying wash to strip summer buildup, weekly bond repair, a rich mask in place of your conditioner, a trim to remove what's past saving, and daily protection after that. Some salons offer in-chair repair treatments, and a good one is worth it as a head start, but no single appointment undoes a summer. Ask your stylist what the treatment actually does before you book it.
How to restore hair after summer?
Figure out what summer actually did first, because sun, chlorine, salt, and heat each need a different fix. Check your scalp for sun irritation, look for chlorine's dull cast, and feel whether your ends are brittle. Then run the order: clarify once, rebuild bonds weekly, replace conditioner with a rich mask, oil your ends, trim the worst of it, and protect everything going forward with a heat protectant. If your scalp took the sun hit, calm it with soothing scalp care first, since your scalp drives the rest of the routine.
Final Word from Haiirology
Fall doesn't have to be the season you quietly resent your ponytail. A fall hair reset after summer damage is four honest weeks: clarify, rebuild, hydrate, trim, protect. Your ends took the summer so the rest of you could enjoy it.
Now give them a month of consistency, and you'll be styling noticeably stronger hair by October. If you only do one thing from this post, book the trim.
If you'll do two, grab the free Ultimate Hair Growth and Scalp Health Guide and get your scalp in on the recovery too. And come hang out with me on Instagram; that's where the in-chair versions of resets like this show up first.

Free Hair Growth Guide
Get Your Ultimate Hair Growth & Scalp Health Guide
Build a healthier scalp routine and learn how to support stronger, healthier-looking hair from the root up.
- ✓ Learn how to create a healthier scalp environment
- ✓ Build a routine that supports healthy hair growth
- ✓ Discover what helps protect your length and density
No spam, just great hair advice!








Brassy, "not blonde enough," or unsure which highlights suit you? 15 blonde highlight looks, from money piece to balayage, and exactly who each one flatters.