
How to Get Root Volume Without Teasing: 5 Pro Ways

TL;DR
You don't need a teasing comb to get root volume.
You need one habit: shape your roots while they're warm, then leave them alone until they cool, because hair keeps whatever shape it cools in.
Here are the 5 ways I build that lift in the chair: set a velcro roller into each warm crown section straight off a round brush (my number one), pull the roots up and forward with a round brush as you dry, use an all-in-one blowout brush on a rushed morning, spray in a buildable volume spray and flip your head upside down to air-dry, or clip your crown roots upright and let them set overnight.
Pick the one that fits your hair and your morning, keep your hands off until it's fully cool or dry, and the lift holds all day.
And if you want my full at-home styling routine, grab my free Frizz-Free Styling Routine.
You blow-dry your hair, and it looks full walking out the door, but by lunch your roots are pressed flat against your scalp again. So you reach for a teasing comb, the height comes back for about an hour, and then you're left untangling a ratty knot that snaps your ends every time you brush it out.
If you've been trying to figure out how to get root volume without wrecking your hair the way teasing does, there's a better way, and it's the exact method I use on every client who asks why her hair never looks the way it did when she left my chair.
Below, I'll walk you through five real methods for lasting root volume, help you pick the right one for your hair, and teach you the step almost everyone skips: the cooling step.
Why Your Roots Fall Flat by Noon
Your roots don't fall flat because you're using the wrong product. They fall flat because of how your hair cools. Hair is easy to shape while it's warm. Once it cools, it locks into whatever shape it's in. So if your roots cool flat against your head, they stay flat all day. If they cool lifted, they stay lifted. That's the whole secret.
This is also why the way you dry your hair matters so much, especially if your hair is fine. Try one of these on your next wash day.
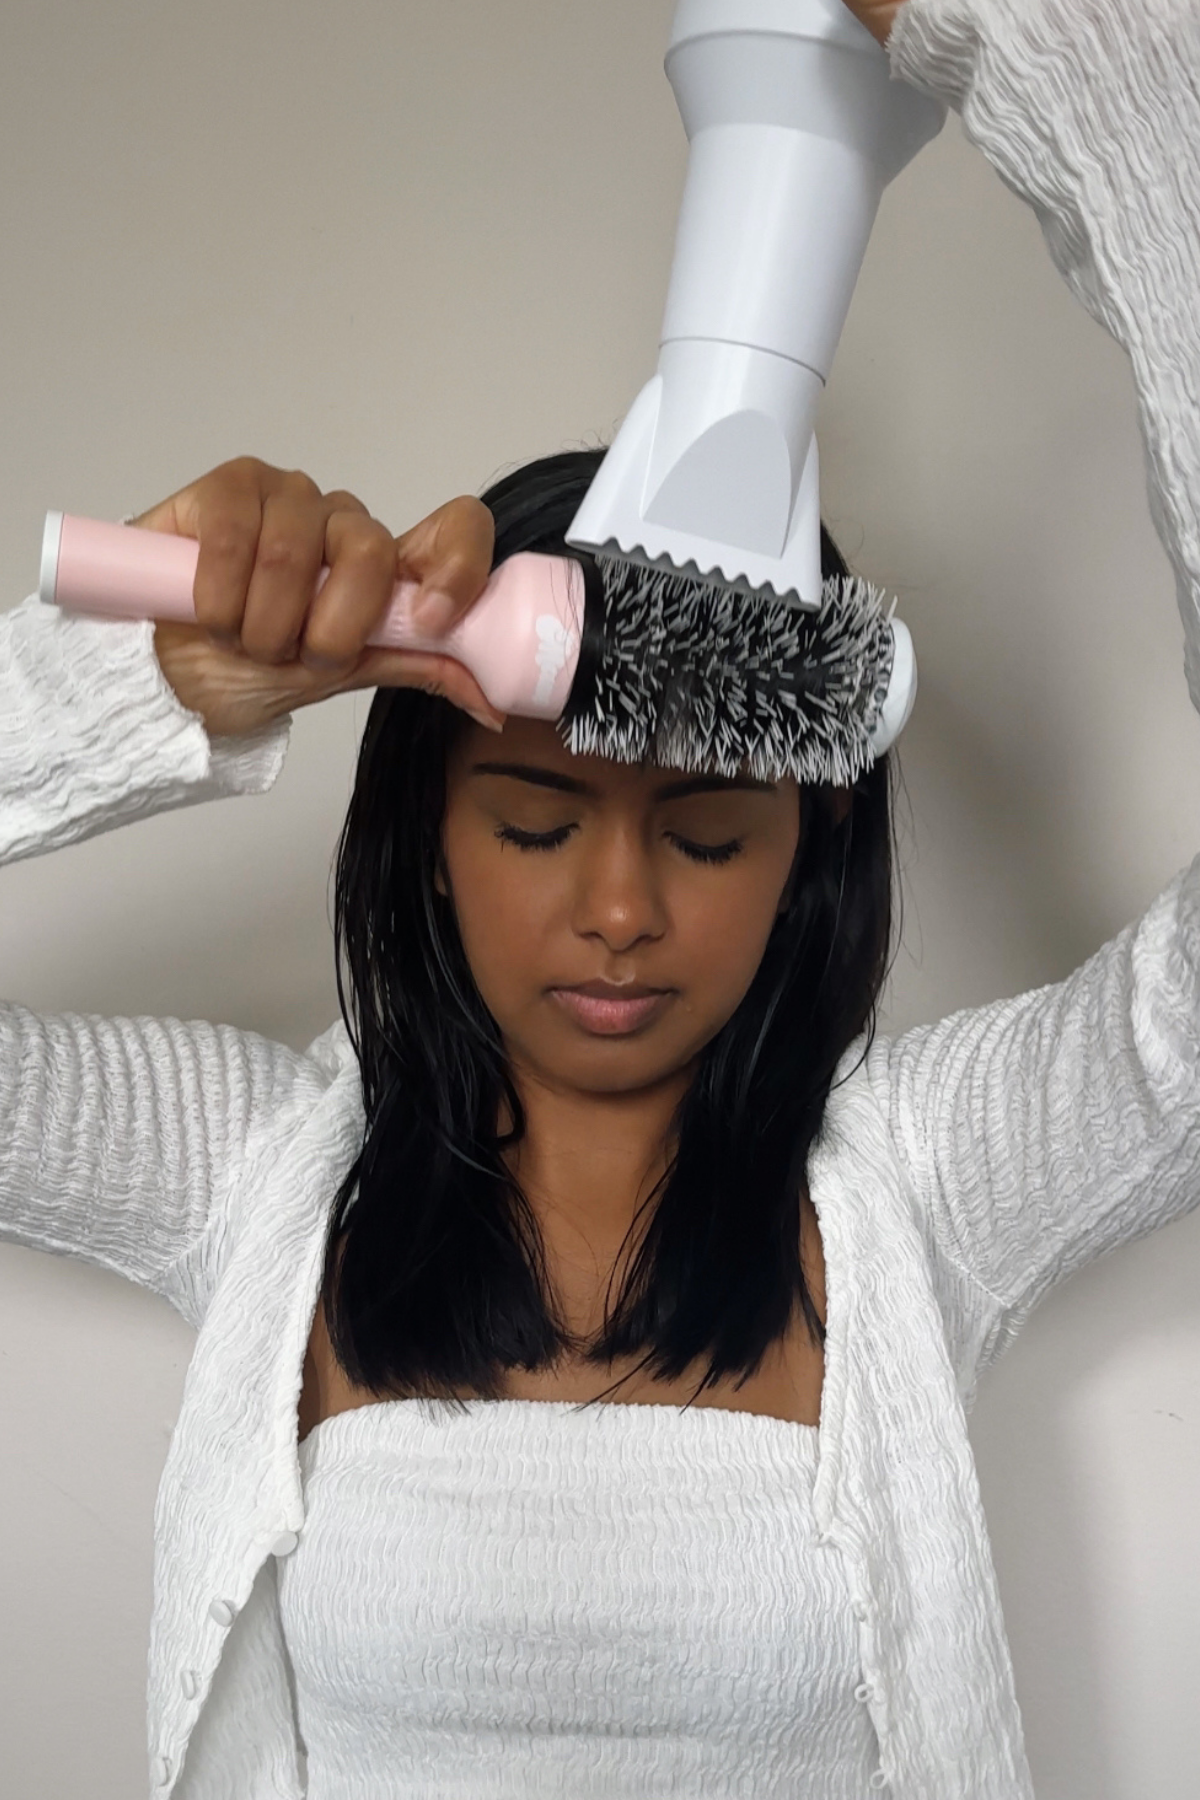
Flip your head upside down while you dry, so your roots dry pointing up instead of flat. Or take the top section of your hair with a round brush and pull it up and toward your face as you dry. Both do the same thing: they let your roots dry already lifted.
Every method below does the same one thing a different way. It gets your roots to cool in a lifted position. Pick the one that fits your hair and your morning.
Source: Personal Image
Tools You'll Need
You won't need all ten of these. Skim the methods first, pick yours, then come back for the two or three tools your method actually calls for. And if you're building a fuller kit, I've rounded up my favorite at-home blowout products separately.
| Tool/Product | Why I Recommend It | Buy |
|---|---|---|
| Kitsch Self-Grip (Velcro) Hair Rollers | The no-tease hero. Roll one into a warm section at the top of your head and it grips on its own while the hair cools. No clips, no plug, no added heat. | Buy |
| Conair Ceramic Hot Rollers (1¾" & 1½") | Plug-in rollers that heat themselves. The fast way to bring day-2 volume back without redoing your blow-dry. | Buy |
| Olivia Garden Ceramic + Ion Speed XL 2⅛" Round Brush | The wide round brush I use for the root-lift method. It grips the hair firmly so you can pull your roots up while they dry. | Buy |
| Lange Multi-Volume Series | A dryer and a brush in one tool. The easiest option if you're new to styling. | Buy |
| DESIGNME Puff.Me Volumizing Mousse | The mousse I reach for when fine hair needs volume that lasts through a long day or an event. | Buy |
| K18 AstroLift Reparative Volume Spray | My everyday volume spray. You can build it up layer by layer, and it won't stiffen fine hair or drag it down. | Buy |
| PUFF.ME Volumizing Powder by DESIGNME | Powder that lifts right at the root. No tools needed, and it fits in a purse. | Buy |
| Olaplex No.4 Fine Bond Maintenance Volumizing & Strengthening Shampoo | Volume starts in the shower. This one rinses clean instead of coating fine strands. | Buy |
| amika Perk Up Talc-Free Dry Shampoo | Your day-2 refresh. It soaks up the oil that's been dragging your roots down so the lift can come back. | Buy |
| Olaplex Volumizing Blow Dry Mist | Preps your hair for heat and adds body while you blow-dry. | Buy |
How to Prepare Your Hair for Volume
Root volume starts in the shower, and it takes less product than you think. If your shampoo and conditioner coat your hair, it's weighed down before you even pick up a dryer. No roller can rescue that.
Start with a volumizing shampoo that has a thin formula and rinses clean. Heavy, creamy formulas make it really hard to build any lift at the root. Olaplex No.4 Fine Bond Maintenance Volumizing & Strengthening Shampoo is the one I keep recommending to my fine-haired clients for exactly that reason. Pair it with a thinner conditioner, and keep the conditioner below your ears.
Then go easy on styling products. The more product you put on fine hair, the more you drag it down. That defeats the whole point. Two products cover almost every morning for me: K18 AstroLift Reparative Volume Spray for everyday volume you can build up, and DESIGNME Puff.Me Volumizing Mousse when the volume has to survive a long day or an event.
Putting that together, your prep routine has three parts.
First, wash for volume with a thin shampoo and conditioner that rinse clean, nothing rich and nothing buttery.
Next, put your styler at the roots only, whether that's a few sprays of the K18 or a small puff of the mousse, since the roots are where the lift actually happens, and it's worth going easy, especially with the mousse.
Finally, rough-dry your hair to about eighty percent before you pick up a brush or roller. That just means blasting your hair with the dryer, no brush yet, until most of the water is gone, so the styling tools you use afterward are working with hair that's already most of the way dry instead of fighting the extra weight of water.
If fine hair fights you beyond the roots too, my hair care routine for fine hair walks the whole system, wash day to styling day.
5 Best Methods to Add Root Volume Without Teasing
Here are the five methods I actually use in the chair to build root volume without teasing, and every single one is built around that same warm-then-cool principle from earlier.
Read the "Who It's For" line under each one first to find your match, based on your hair type, your morning routine, or how much time you actually have before you need to walk out the door; then follow the steps closely, because the technique matters far more here than which specific product you use.
If more than one of these sounds like you, start with whichever one fits today's schedule and try the others another day.
Method 1: The Velcro Roller Method
Source: Personal Image
Who It’s For:
- Fine or flat hair that loses lift within an hour
- Anyone with an extra 10–15 minutes on blow-dry mornings
- People looking to reduce heat styling without sacrificing volume
Why It Works:
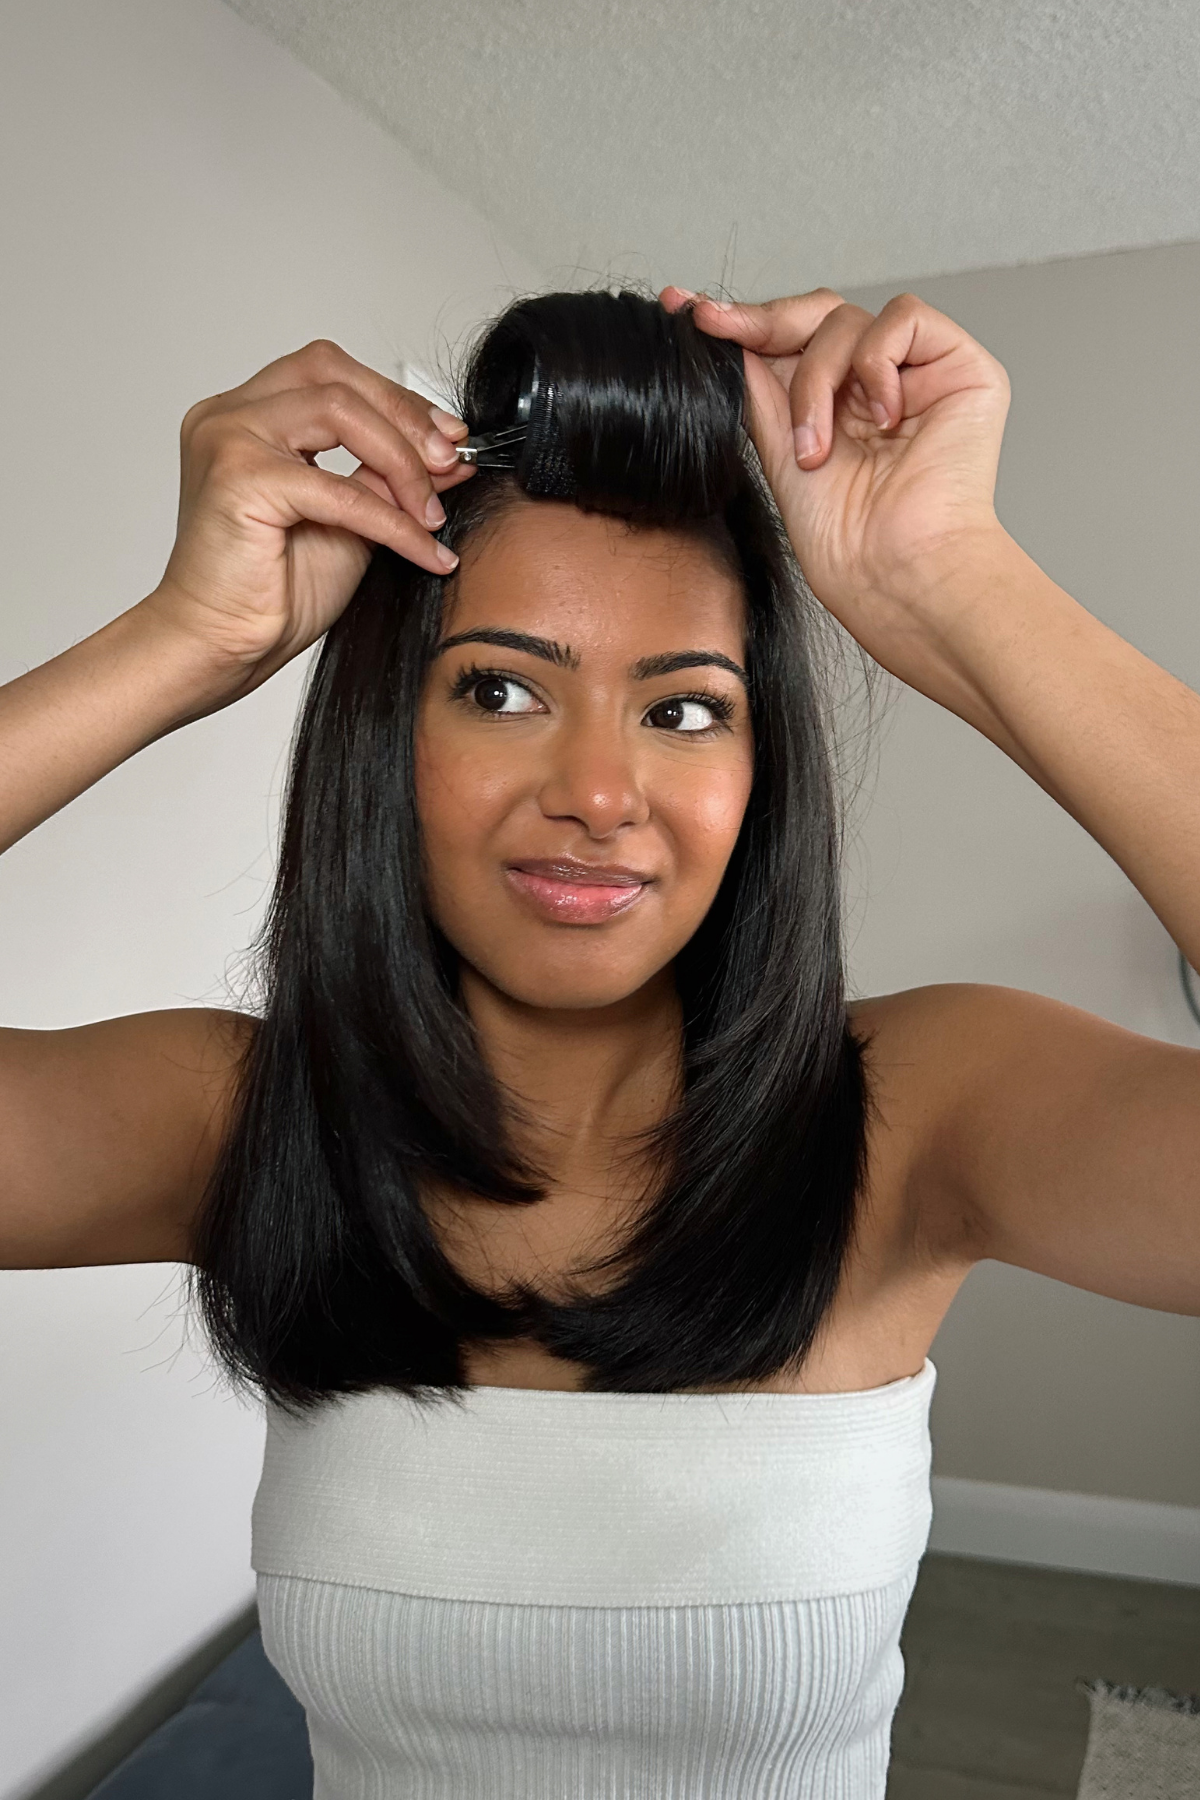
This is my favorite trick for root volume without teasing because it separates the warming and cooling stages. As your hair cools, it sets into its new shape, and the roller simply keeps the roots lifted until they're fully cool, helping the volume last much longer.
Step-by-Step
Start by sectioning off your crown, which is just the top of your head, into two or three small pieces, small enough that a round brush can grip each one easily.
With fine hair especially, keep this volume to the crown only and not spread over your whole head, or the shape ends up looking off rather than lifted.
Take the first section and blow-dry it with a round brush, pulling the hair up and toward your face as you go, so the root lifts and the whole section gets properly warm. The instant that section comes off the brush, while it's still hot, roll a Kitsch Self-Grip (Velcro) Hair Roller down to the base of the section, right against your scalp, so it sits up on top of your head instead of sagging to the side.
Don't let the section cool first and roll it in afterward. Repeat the same process on your remaining two or three crown sections.
Once every section has a roller in it, leave them alone completely for ten to fifteen minutes. Longer is even better, up to a full hour if your morning allows it, because the longer your hair sits in that shape while it's cooling, the longer the volume will last once you take the rollers out.
Go do your makeup, get dressed, or make coffee; just don't touch them. When you're ready, take each roller out gently and settle the section with your fingers instead of a brush, since a brush will pull the fresh set right back out the moment it touches the hair.
Pro Tip
Once the rollers are out, you can tap a small pinch of PUFF.ME Volumizing Powder by DESIGNME into the root and massage it in to help the lift stand up all day.
And when you're rolling the sections in, don't wind the roller so tightly that it stretches the hair. You're only parking the root upright while it cools, not trying to curl it, so a loose, snug roll is all you need.
Method 2: The Round-Brush Root Lift
Source: Personal Image
Who It’s For:
- Anyone who already owns a round brush and blow-dries most mornings
- Medium to thick hair that needs a firmer pull than air alone can provide
- Anyone wanting a smooth, full blowout shape at home
Why It Works:
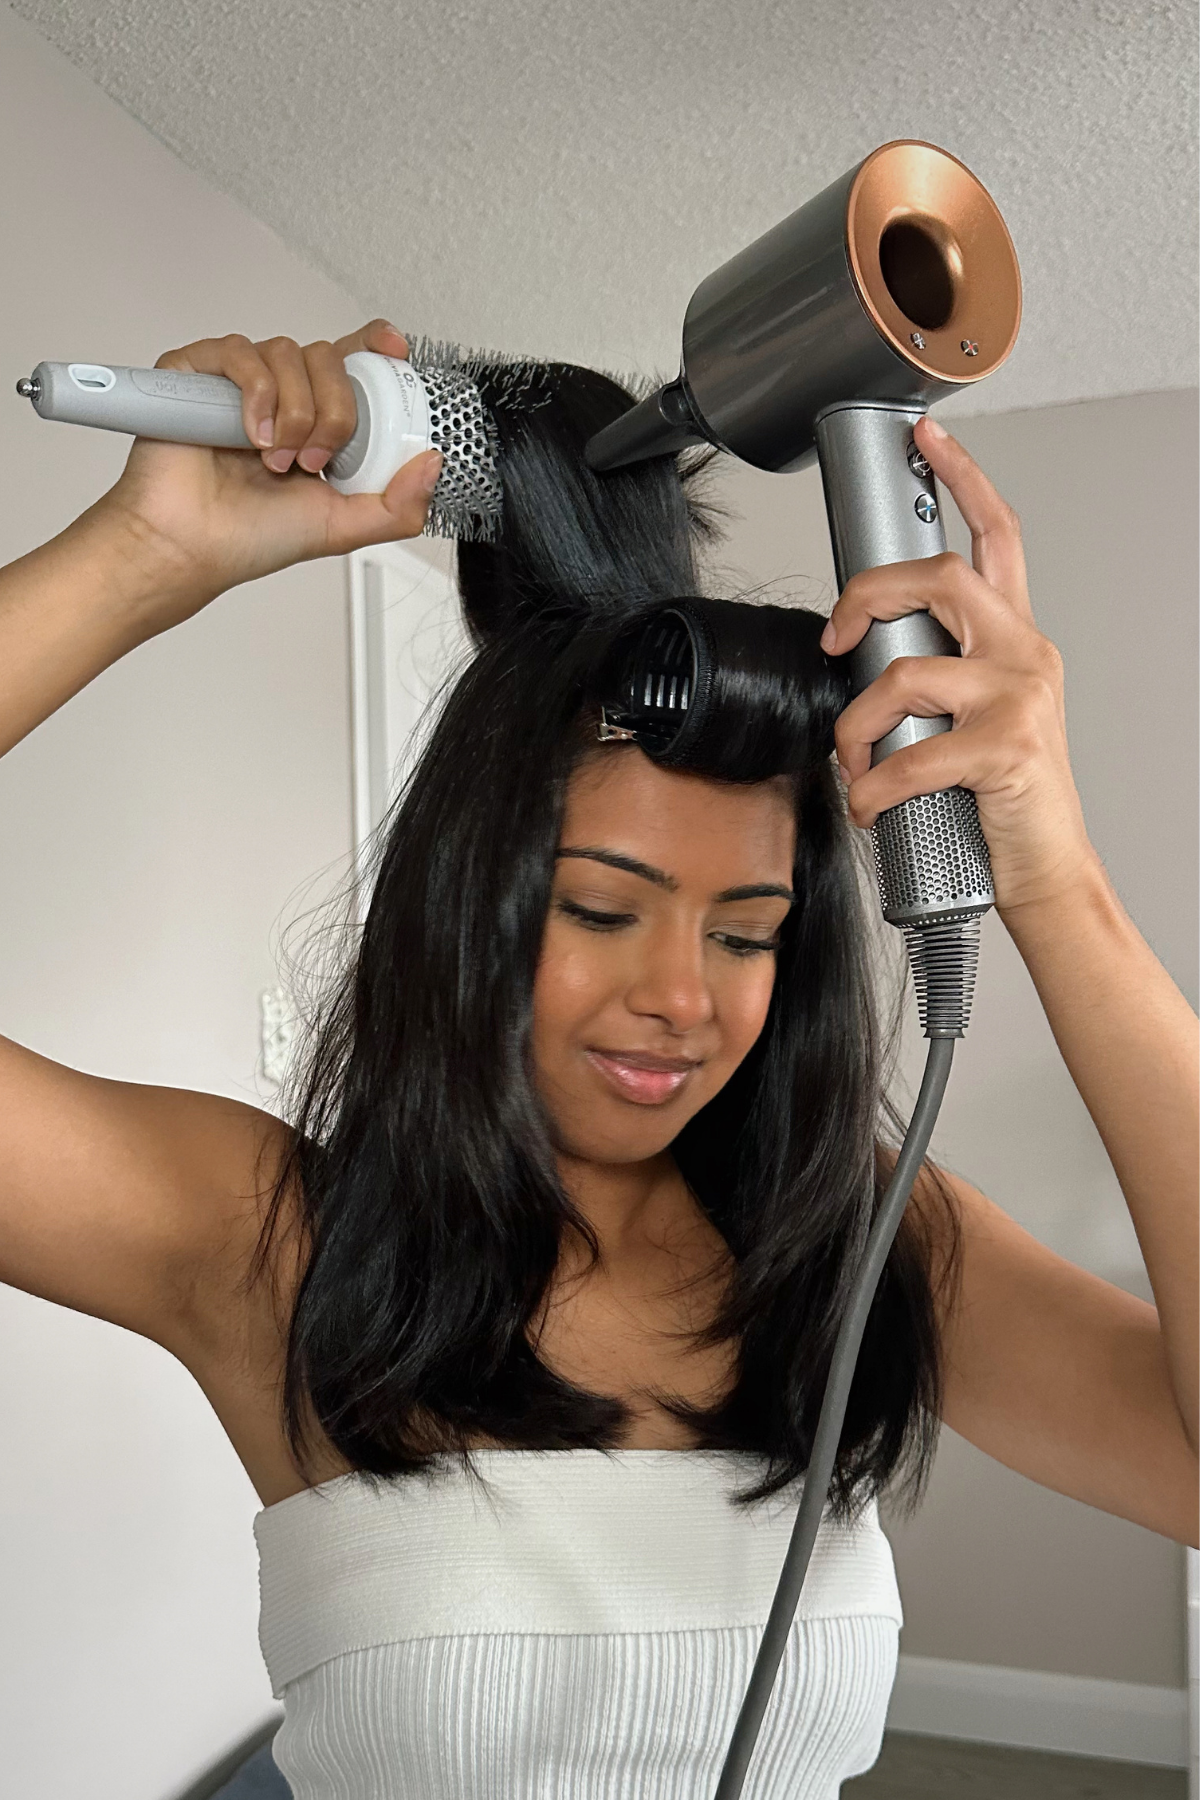
Three things work together here: the brush's pull, the dryer's heat, and the upward direction you're pulling in. The brush grips and tightens the root, the heat warms it through, and pulling up and away from your head means the root cools at that lifted angle instead of falling flat.
Step-by-Step
Start by misting your damp hair with Olaplex Volumizing Blow Dry Mist, which preps your hair to take the heat well and adds a little body before you even pick up the dryer.
Rough-dry your whole head first without any brush, just aiming the dryer at your hair until it's roughly eighty percent dry, so most of the water is already gone before a brush or roller ever touches it.
Then section off your crown, the top of your head, and work through it one section at a time rather than trying to do it all at once.
Slide the Olivia Garden Ceramic + Ion Speed XL 2⅛" Round Brush underneath the root of your first section and pull it up and toward your face as you dry, keeping the dryer's nozzle pointed down the length of the hair and following right behind the brush.
That up-and-forward direction is exactly where the extra lift comes from, so don't rush past it. Once a section is fully dry and warm, either hold it in that lifted position with your hand until it cools, or roll it straight into a velcro roller while it's still hot to get the benefits of both methods at once.
Pro Tip
The two-and-one-eighth-inch barrel on the brush I recommend is a good middle-ground size for this method: wide enough to smooth your lengths in the same pass, but still small enough to grip firmly right at the root. If you're not sure which barrel size is right for your hair, my round brush size guide breaks down what each size does.
If your arms give out partway through, it's completely fine to just do your crown section and let the rest of your head air-dry; nobody can tell from the outside whether the layers underneath got a round-brush pass.
Once your roots are handled, my full guide to blow-drying for volume that actually stays picks up from here and covers the rest of your head, fine hair included.
Method 3: The Blowout-Brush Shortcut
Who It’s For:
- Beginners who find using a brush and dryer at the same time difficult
- Anyone who needs a quicker option for rushed mornings
- Anyone who doesn't own a round brush and doesn't plan to buy one
Why It Works:
A blowout brush combines a dryer and a brush into one tool, so it pulls and dries at the same time instead of asking you to coordinate two tools in two hands. You lose a little of the polish a true round brush gives, but you keep about eighty percent of the lift with half the coordination.
Step-by-Step
Start the same way you would for the round-brush method: rough-dry your hair to about eighty percent before you introduce any brush, since running a blowout brush over soaking wet hair mostly steams it instead of styling it.
Once your hair is mostly dry, place the Lange Multi-Volume Series brush underneath a crown section, right at the base near your scalp, and pull the section up and toward your face as you dry it, the same up-and-forward direction used in the round-brush method.
Let the brush's bristles carry the hair up and away from your head rather than pulling straight down.
On your very last pass through each section, hold the brush steady at the root for a few extra seconds before you let go, then let that section cool while it's still lifted instead of pressing it back down flat with your palm out of habit.
Pro Tip
If your hair is freshly washed, it can feel too slippery for the set to grip properly, so a light spritz of K18 AstroLift Reparative Volume Spray at the roots before you start drying gives the hair something to hold onto.
And if you're still figuring out what belongs in your styling drawer, these essential hair styling tools are the ones I'd start any beginner on.
Tired of Fighting Frizz?
Learn what’s causing your frizz and how to keep your hair smoother and more manageable with my Free Frizz-Free Hair Guide.
Get the Free Frizz-Free GuideMethod 4: Product-Only Volume (No Heat, No Tools)
Source: Personal Image
Who It’s For:
- Anyone who air-dries most or all of the time
- Hair that’s damaged or taking a deliberate break from heat
- Fine hair that collapses under heavier styling products
Why It Works:
Volumizing powders and sprays do two things: they plump the strand slightly, and they add grip at the root so hair can stand away from your scalp instead of lying against it. The upside-down flip does the actual shaping, since gravity pulls your roots away from your scalp as they dry in that position.
Step-by-Step
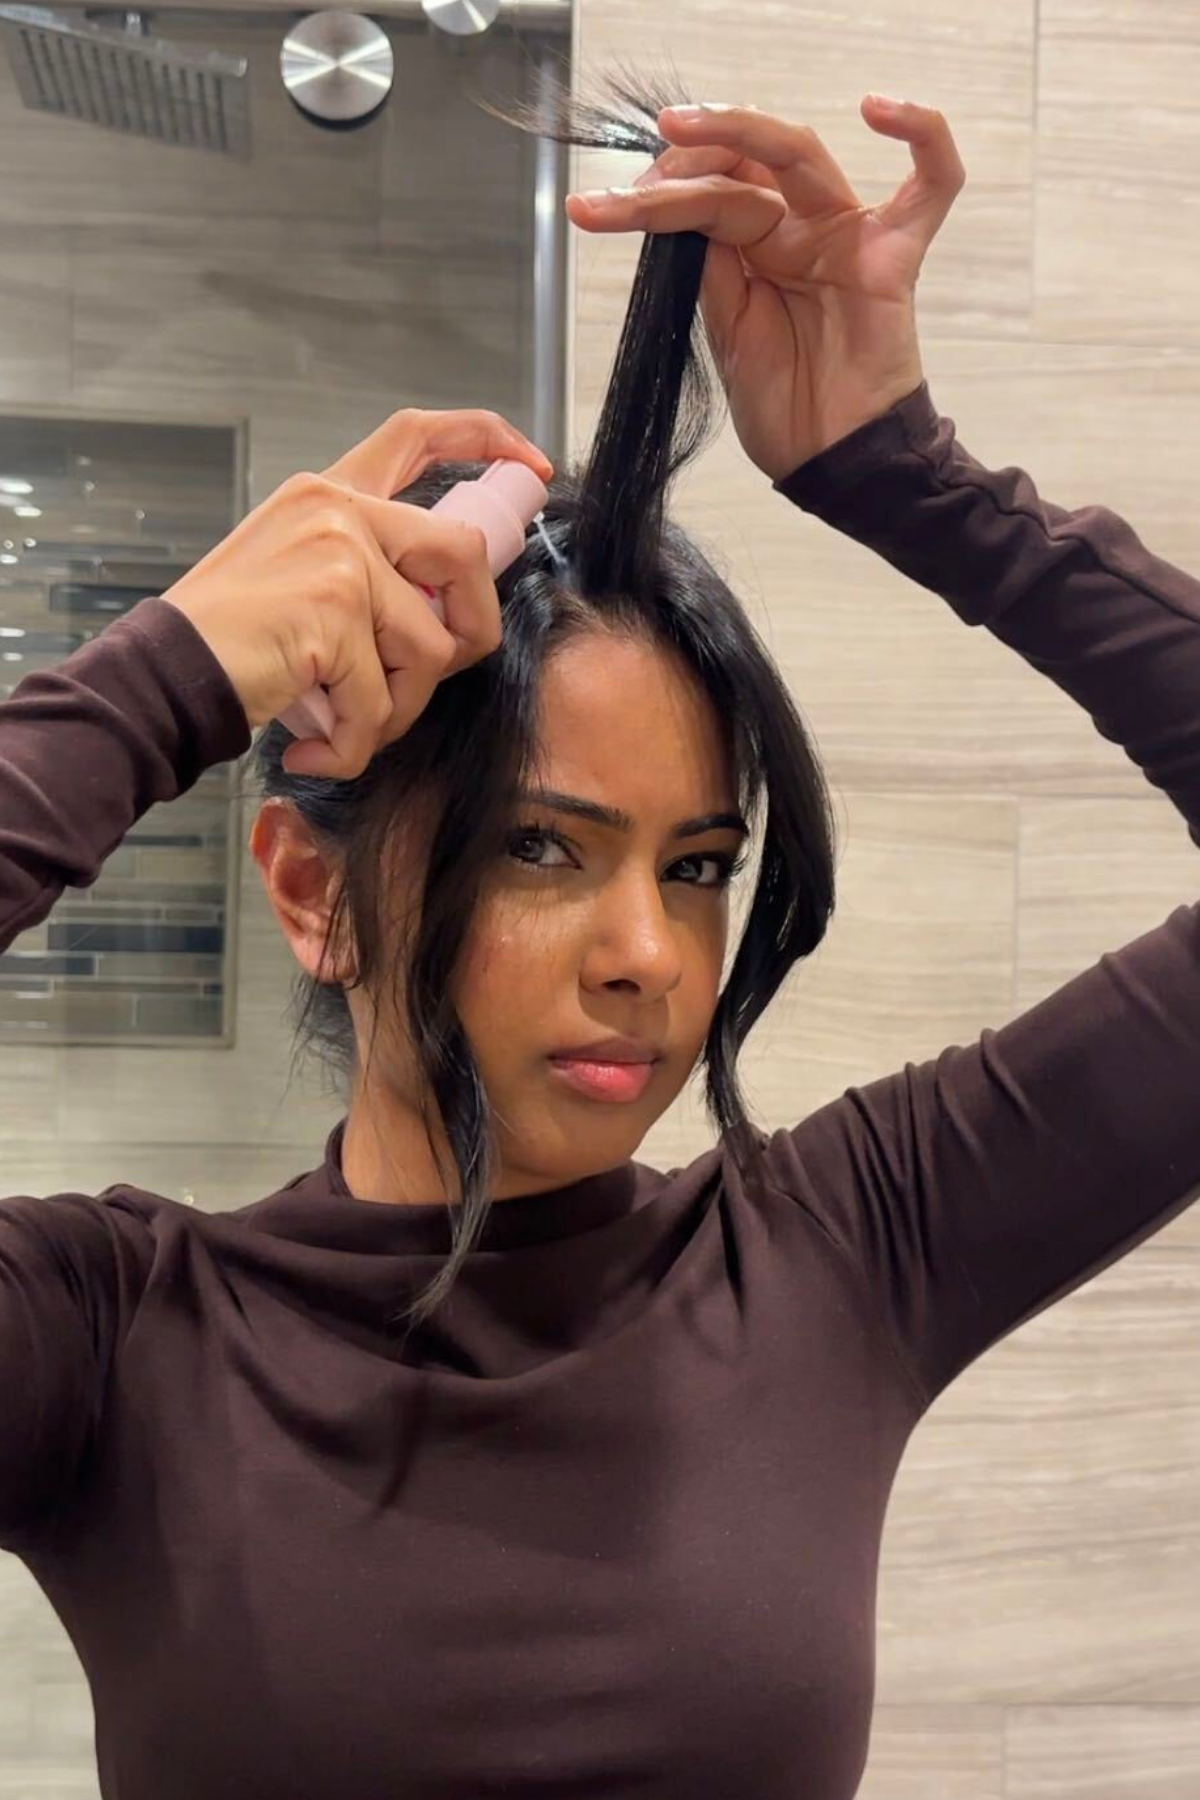
On damp hair, spray K18 AstroLift Reparative Volume Spray directly at your roots, starting with less than you think you need since the formula is buildable and you can always add more once your hair has dried.
Flip your head upside down and let your hair dry in that position, whether that's with a diffuser, in front of a fan, or simply air-drying while you get ready; your roots will dry pointing away from your scalp, and that's really the entire set right there.
Once your hair is completely dry, work PUFF.ME Volumizing Powder by DESIGNME into your crown by tapping it along your part line and massaging it in with your fingertips until it disappears.
Later in the day, if the lift starts to fade, refresh it rather than restyling from scratch: a quick massage at the roots with your fingertips is often enough to wake the powder back up and bring the volume back without starting over.
Pro Tip
Your part line is where flatness shows up first, so that's exactly where the powder earns its keep and where you should focus it.
Try not to stack the spray, the mousse, and the powder all in the same day, since fine hair genuinely does better with less product layered on top of it, not more.
And on the days you'd honestly rather work around flat roots than fight them, these volumizing hairstyles for thin hair do a good job of faking the lift you didn't have time for.
Method 5: Root Clipping (the Overnight and Air-Dry Trick)
Who It’s For:
- Curly or wavy hair that needs to stay away from brushes or hot tools
- Anyone who prefers to plan their volume the night before instead of styling in the morning
- Hair with great-looking lengths but roots that tend to fall flat
Why It Works:
A lifted, clipped section dries in the position it's held in, the same way hair cools into the shape it's in when heat is the tool instead of time. The clip does the same job a heated roller does, holding the root upright, just without any heat involved.
Step-by-Step
Start with damp hair and part it exactly where you actually wear your hair day to day, since volume that sets on the wrong part will disappear the moment you switch your part back.
Lift a section at your crown straight up and slide a flat sectioning clip against your scalp at the base of that section; a sectioning clip is just an inexpensive flat metal clip you can pick up at any drugstore, and it should hold the root standing upright without creasing or denting the hair underneath it.
Repeat this with three or four clips spaced along your part and across your crown.
Then let your hair air-dry naturally, or diffuse it if you have curls and prefer to speed things up, and only take the clips out once your hair is completely, fully dry all the way through.
If you pull the clips out even slightly early, while there's still dampness at the root, the roots will fall right back down, and you'll have to start over.
Pro Tip
If you want overnight volume specifically, set the clips into barely damp hair before you go to bed, or alternatively, pile your already-dry lengths into a loose bun high on top of your head so your roots aren't pressed flat against the pillow all night.
You don't need any specialty tool for this method at all; the plain clips from the drugstore work exactly as well as anything fancier.
Common Mistakes That Kill Root Volume
If your roots keep falling flat no matter what you try, the reason is almost always one of these four mistakes, so it's worth checking yourself against the list before you spend money on anything new.
Touching the rollers before they've cooled.
Warm hair is still soft enough to reshape, so touching or unrolling it early presses the lift right back down flat. Leave the rollers alone for ten to fifteen minutes, up to a full hour if you have the time.
Piling too much product onto fine hair.
The more product you layer on fine hair, the heavier and flatter it gets, which is the exact opposite of what you're going for. One styling product at the root is plenty; your shampoo and conditioner rinse out of the hair, so they don't count toward that limit.
Brushing out the finished set.
Bristles stretch the cooled, lifted shape straight back out the moment they touch it. Rake through with your fingers instead, and leave the set alone once it's settled.
Volumizing your whole head instead of just the crown.
Spreading lift evenly over your entire head turns it into a rounded, puffy shape rather than height exactly where you want it. Keep your effort to two or three sections at the top of your head, right where the flatness actually shows.
| More Volume, Blowout, and Fine-Hair Guides |
|---|
| Got your roots handled? These go deeper on the blowout, the tools, and keeping fine hair full: Whether you're chasing lift, picking a brush, or building a fine-hair routine, you'll find the next step here. |
How to Get Root Volume That Lasts Until Day 2
Day-2 volume is a refresh, not a restyle.
If you set your roots properly yesterday, you only need to wake them up. That takes minutes.
Start with amika Perk Up Talc-Free Dry Shampoo at your roots. Spray, wait a beat, then massage it in with your fingertips. It soaks up the oil that's been dragging your crown down.
Then re-set one or two crown sections. The fastest way is a hot roller. Conair Ceramic Hot Rollers (1¾" & 1½") plug in and heat themselves, so there's no dryer involved.
Pop one or two in at your crown while you get dressed. Let them cool, take them out, and rake through with your fingers. It's the same warm-then-cool trick as day one, squeezed into your getting-ready time.
And if the clock has already beaten you, these quick second-day hairstyles buy you a polished morning without a restyle.
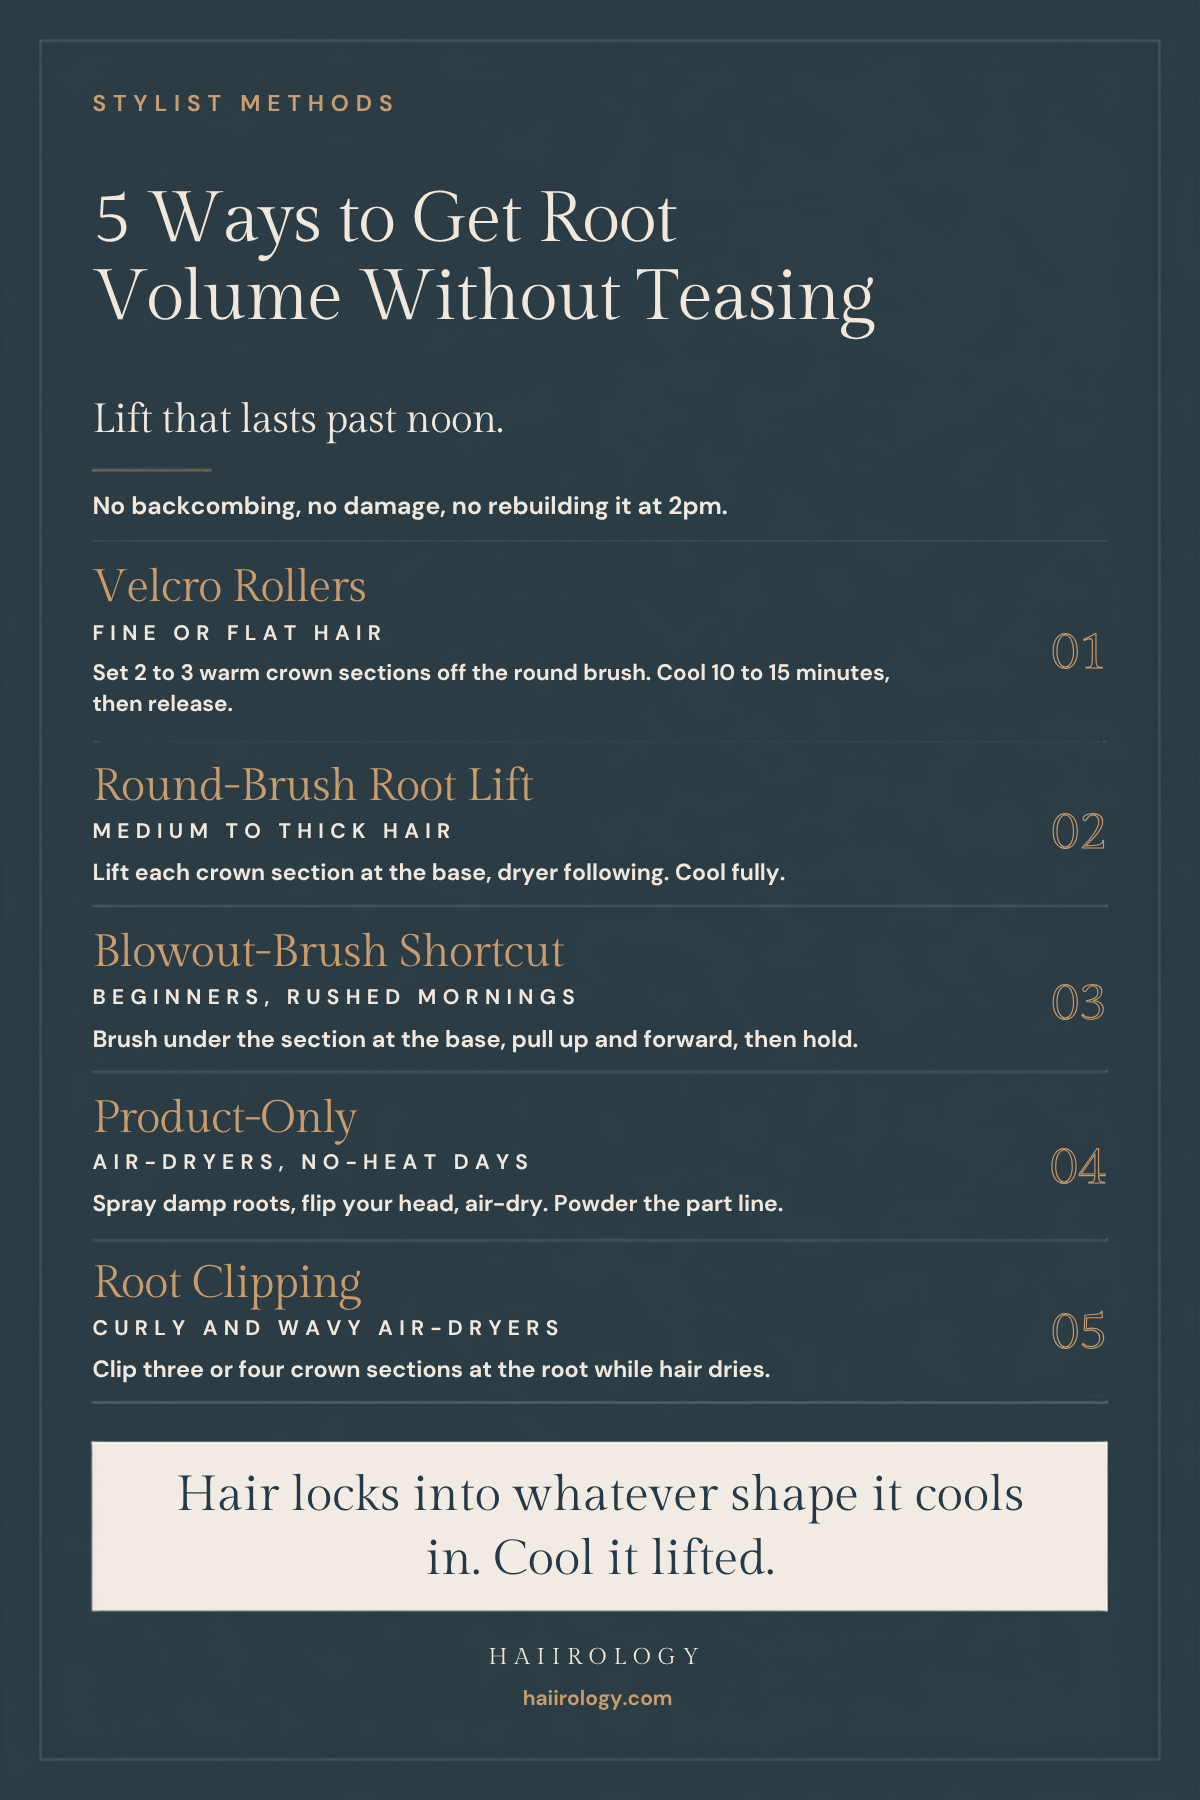
Which Root Volume Method Should You Use?
| Method | Best For | Time | Result |
|---|---|---|---|
| Velcro rollers | Fine or flat hair, blow-dry mornings | 10–15 min of hands-free cooling | My number one: the set that holds longest |
| Round-brush root lift | Medium to thick hair, blowout fans | Part of your normal blow-dry | Salon-shape lift plus smoothness |
| Blowout-brush shortcut | Beginners, rushed mornings | Part of your dry, easiest to learn | Most of the round-brush lift, half the juggling |
| Product-only | Air-dryers, no-heat days | 2 minutes of application, then air-dry | Soft, textured lift with grip |
| Root clipping | Curly and wavy air-dryers, overnight | Zero active minutes while hair dries | Lifted roots, natural texture untouched |
FAQs: Root Volume Without Teasing
How do I get volume at my roots?
Shape the roots while they're warm and let them cool lifted. That's the whole game. The most reliable version is the velcro roller set: right after a crown section comes off your round brush, while it's still hot, roll a velcro roller down to the base and let it cool 10 to 15 minutes. If you don't blow-dry, flip your head upside down while your hair dries, or clip the crown roots upright on damp hair. Whichever route you take, keep your hands off until the hair is fully cool or fully dry. Touching it early is what undoes the set.
How do I get root volume overnight?
Set the roots before bed and let the night do the work. On barely damp hair, clip 3 to 4 crown sections upright with flat sectioning clips so the roots dry standing while you sleep. If your hair is already dry, pile the lengths into a loose bun high on your head so the roots aren't pinned flat against the pillow. In the morning, shake everything out, spray dry shampoo at the root, and massage it through. If the crown still looks tired, one or two hot rollers while you get dressed will warm and re-set it in minutes.
Does root clipping work?
It does, with one non-negotiable: the clips stay in until your hair is completely dry. A clip set flat against the scalp at the base of a section props the root upright while the water leaves the hair, and hair keeps the shape it dries in. Pull the clips while there's any dampness left and the roots drop right back down. It's the best fit for curly and wavy air-dryers, because it builds lift at the root without a brush or heat touching the curl pattern. Straight-haired air-dryers can use it too, though the lift reads softer.
How do I get root volume on curly hair?
Work with the drying process instead of fighting it. On damp hair, clip your crown roots upright with flat sectioning clips, then air-dry or diffuse as usual and unclip only once everything is fully dry. Your curl pattern stays untouched while the roots set lifted. If you want more hold once it's dry, tap a volumizing powder along the part line at the crown and massage it in. On day 2, skip the restyle: dry shampoo at the roots and a scalp massage with your fingertips usually brings the lift back without disturbing the curls.
How do I get volume at the roots on fine hair?
Fine hair needs volume at the crown only, and less product than you think. Start in the shower with a thin, rinse-clean volumizing shampoo, since heavy formulas weigh fine hair down before you've even dried it. Use one styler at the roots, a buildable volume spray or a small puff of mousse, never both plus powder in the same day. Then set 2 to 3 warm crown sections in velcro rollers straight off the round brush and let them cool completely, 10 to 15 minutes. Release with your fingers and the lift holds.
Do volumizing shampoos actually work?
Yes, but not the way the bottle implies. A volumizing shampoo doesn't create lift; it removes the obstacle. Thin, rinse-clean formulas keep fine strands from being coated and dragged down, which is what makes root volume buildable in the first place. Rich, creamy formulas do the opposite, and no roller or powder fully rescues hair that's already weighed down out of the shower. So use the volumizing wash as your foundation, keep your conditioner on the thinner side and below your ears, and let the drying and setting steps do the actual lifting.
Final Word from Haiirology
The next time your roots go flat by noon, you'll know it was never your shampoo's fault, and it never needed a teasing comb to fix it. Getting real root volume without teasing comes down to one habit, repeated in five different ways: warm the root, shape it while it's lifted, then leave it completely alone until it finishes cooling or drying.
Whether that means a velcro roller after a round-brush pass, a blowout brush on a rushed morning, a spritz of volumizing spray before you flip your head upside down, or a simple clip left in overnight, the principle behind every one of these methods is exactly the same.
Pick whichever one actually fits your hair and your morning, and give it a real try tomorrow instead of falling back on the teasing comb out of habit.
Once you find the method that clicks for your hair, grab my free Frizz-Free Styling Routine, so the rest of your styling holds up just as well as your roots now do. And when your crown finally stands up on its own without a fight, tag me @HaiirologyByJen. I genuinely love seeing it.

Free Frizz-Free Hair Guide
Get Your Frizz-Free Hair Guide
Learn what actually causes frizz and build a routine that keeps your hair smoother, softer, and easier to manage.
- ✓ Understand what’s causing your frizz
- ✓ Build a routine for smoother, more manageable hair
- ✓ Learn how to protect your style from humidity and moisture
No spam, just great hair advice!








Brassy, "not blonde enough," or unsure which highlights suit you? 15 blonde highlight looks, from money piece to balayage, and exactly who each one flatters.