
17 Short Winter Haircuts by Hair Type
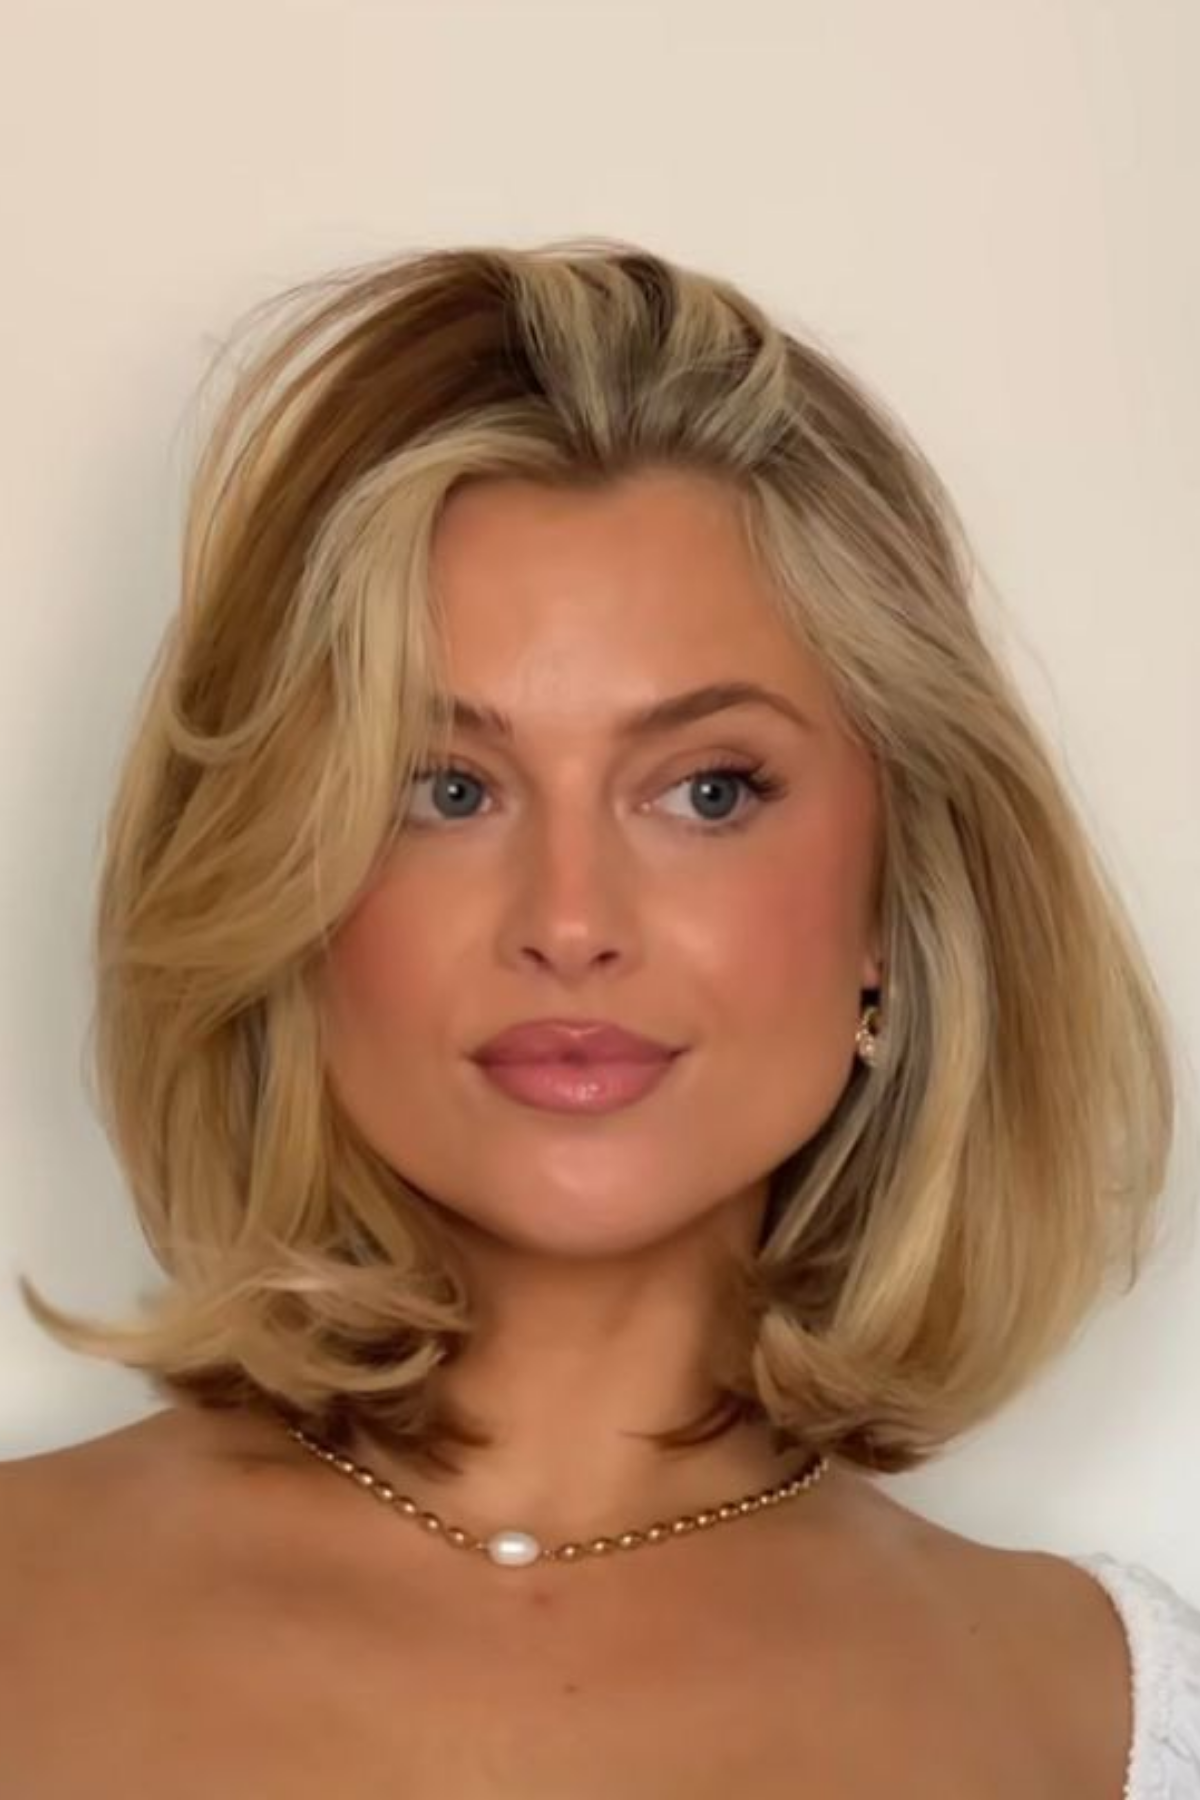
TL;DR
Short winter haircuts look fuller when they're cut to your density. On fine hair that means a blunt perimeter, which is just the bottom edge of the cut, the line you can see.
Leave that line unbroken and every strand ends in the same place, so you see more hair than you actually have.
Thick hair needs the opposite. The bulk has to come out from inside the cut while the bottom edge is left alone.
Thin the edge instead and your ends go wispy, and the whole shape shrinks in. Below are 17 short winter haircuts sorted by what your hair actually is.
If you want my face-shape breakdown before you book, the Haircut Guide walks you through it.
Every winter the same appointment comes round. Someone sits down with a folder of short winter haircuts she's been saving and wants to know which one will actually work on her hair.
Most people don't regret going short. They regret going short into a cut that doesn't fit their morning. I've watched it happen from the other side of the chair plenty of times. Someone leaves loving it, and three weeks later they're back telling me they can't get it to do what I did.
That's the part nobody checks before they book. The question everybody asks is whether the cut is pretty. Almost nobody asks whether they'll actually live with it.
So before you even get your phone out, before we look at a single picture, I go through your day with you. I want to know how often you really style your hair, whether you work out, and whether you'll realistically come back for trims. Most of the short winter haircuts for women I cut are decided in that conversation, not in the photos. That conversation is where the difference gets made, and it's why the short winter haircuts below are sorted by hair type.
Is Winter a Good Time to Go Short? A Stylist's Straight Answer

Source: Pinterest
Yes. And it's one of my favorite times of year to do it.
Most people go the other way. They hold on to a bit more length through winter, and I get why, because it feels warmer and nobody wants to sit under a coat collar wondering what they've done.
But a fresh short cut in winter looks so sleek with high-neck sweaters and turtlenecks. Your whole winter wardrobe sits right where the cut ends. Your turtleneck stops at your jaw, and your bob stops at your jaw, so the two lines land in the same place and the whole thing looks put together.
Long hair in winter mostly disappears. It goes under the collar, it gets tucked into the coat, it flattens against a scarf. A short cut is the one length that chunky knits and coats actually show off, and it pulls the whole outfit together instead of competing with it.
So no, winter isn't a bad time to go short. It's the season the cut looks best in.
Which Short Winter Haircut Fits You?
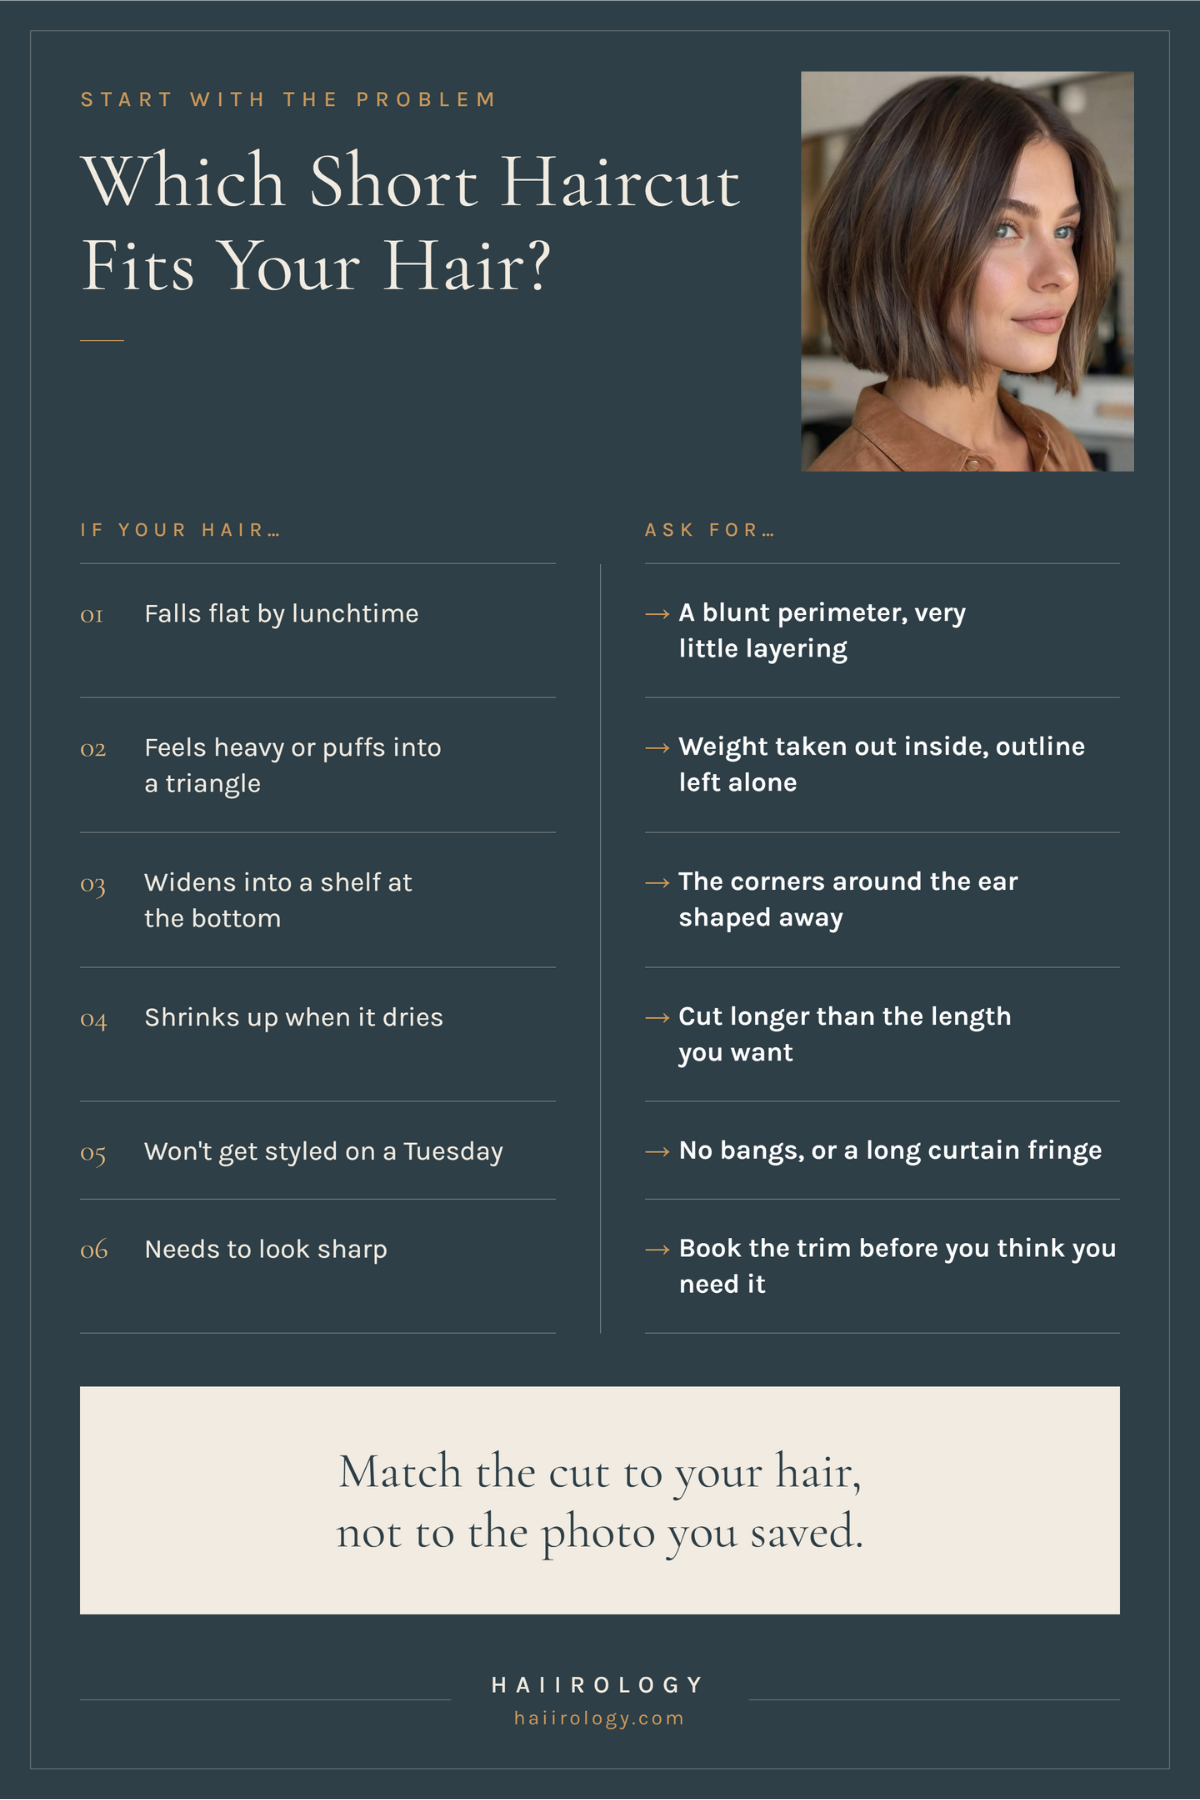
Start with the problem you actually have before you go back to the photo you saved. Every cut below solves something specific, and matching the two up front is how you avoid the version of short hair that fights you every morning.
Here's how I narrow it down in the chair:
Your hair falls flat by lunchtime.
You want a blunt perimeter and very little layering, because layers scatter fine hair and make it look thinner. The fullness has to come from the line at the bottom.
Your hair feels heavy, or it puffs out at the sides like a triangle.
Both of those are the same problem, which is bulk sitting where you can't see it. You want the weight taken out from inside the cut while the outline is left alone.
Your hair widens at the very bottom into a shelf.
This one is about the corners, not the bulk inside. Ask for the boxy bit around your ears to be shaped away so the outline curves instead of squaring off.
Your hair shrinks up more than you expect when it dries.
You need it cut longer than the length you're asking for, since wave and curl both lift once the dead weight comes off.
You know you won't style it on a Tuesday.
This is where the low-maintenance short winter haircuts live. Skip the bangs, or go for a long curtain fringe at most. A cut with lots of short layers at the front means you'll be styling it every single day, and you have to learn how first.
You want it to look sharp.
Then book the trim before you think you need one. Keeping a sharp cut sharp is part of the cut, and if that's not something you want to do, pick one of the softer shapes instead.
Not sure which haircut will flatter your face shape?
Enter your email below and I’ll send you my free haircut guide.
No spam, just great hair advice!
17 Short Winter Haircuts, Grouped by Hair Type
These are real salon cuts, grouped by your hair type so you can skip straight to your section.
For each one, you'll get what the cut looks like and where it sits, who it suits best, the exact words to ask your stylist for, and one styling move that makes it work at home, even if you've never styled your hair before.
Find your hair type, then find the shape that matches the problem you picked above. You only need one of these to be right.
Fine and Thin Hair
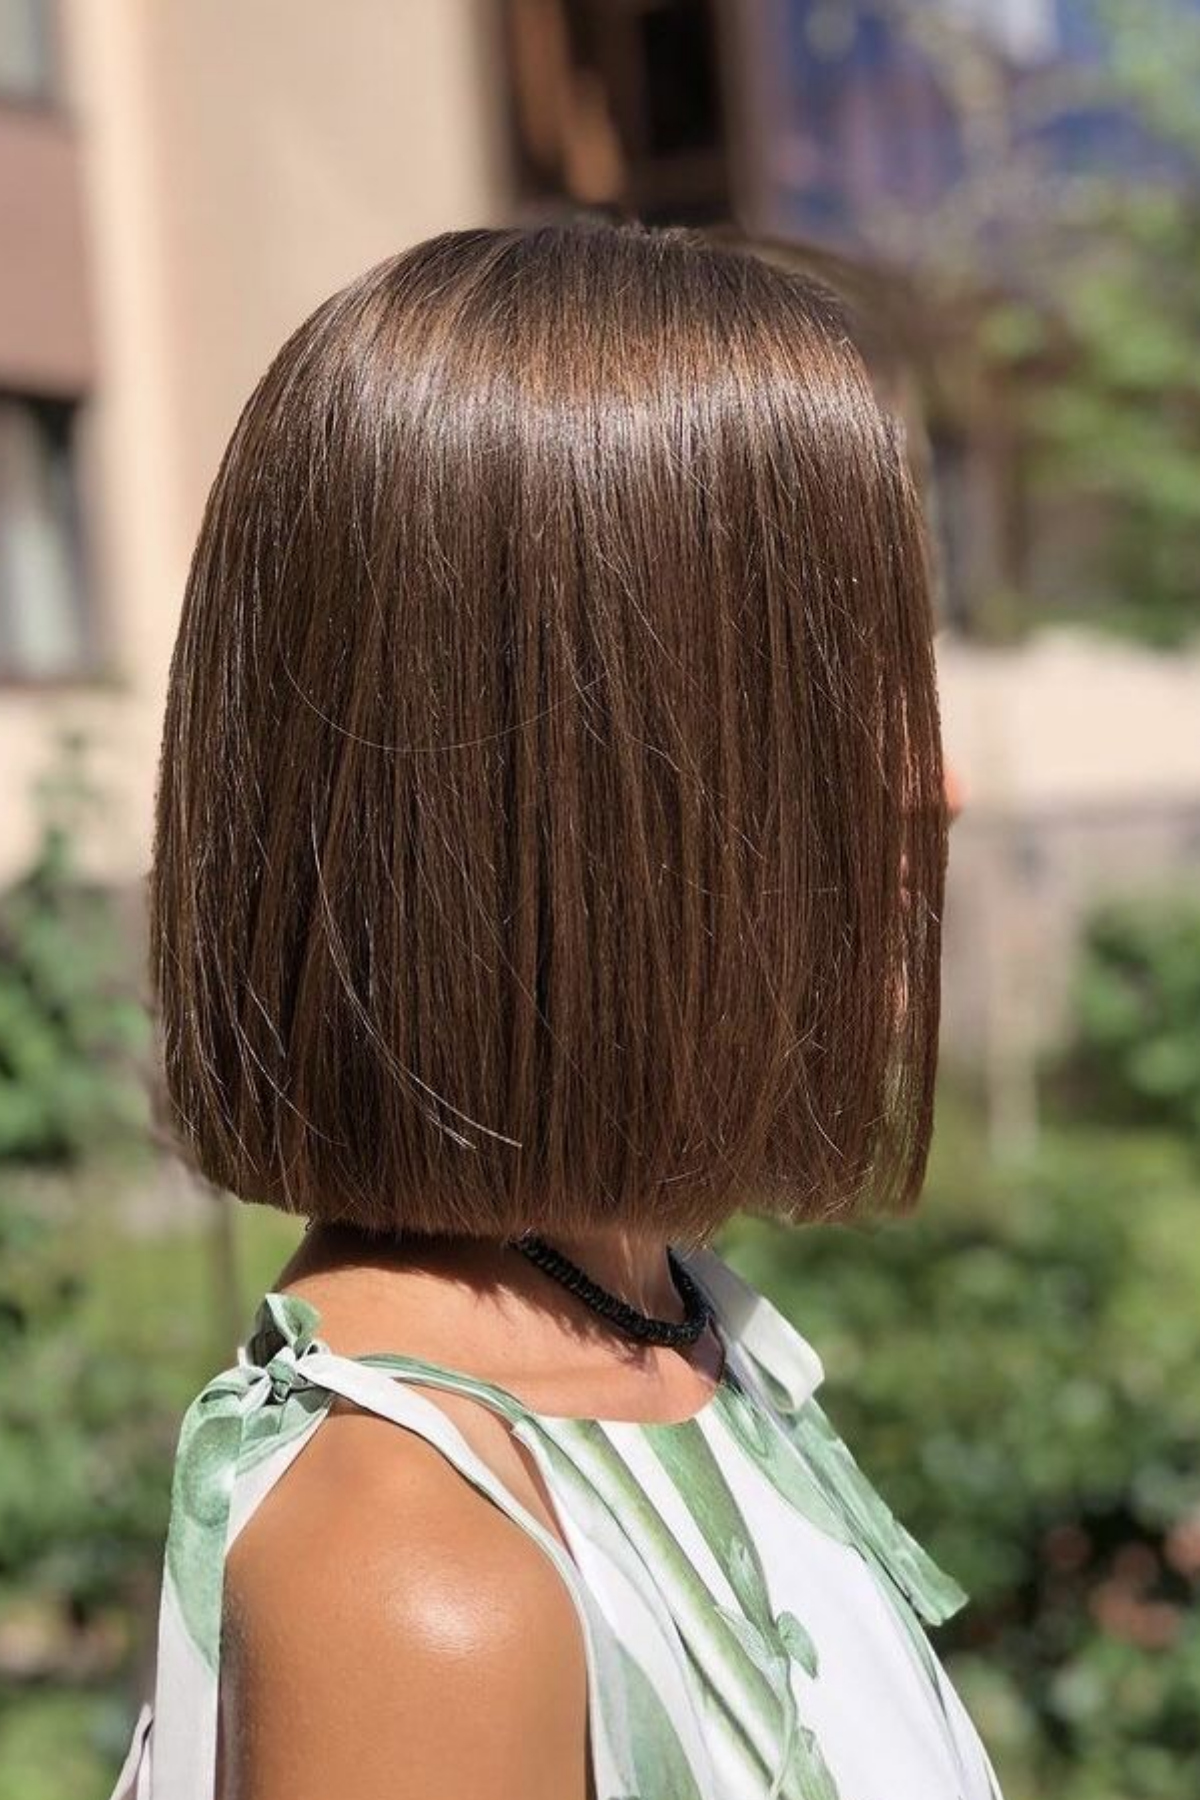
The Blunt Chin Bob
One length, cut straight across at the chin, with no layering inside it at all. Every strand ends in the same place, and because nothing breaks that line up, fine hair looks denser than it really is. All the weight stays down at the bottom, where you can see it. It holds its shape for a good while and then loses it all at once, rather than softening gradually.
Source: Pinterest
Best Suited For: Fine to medium density, straight or barely wavy hair. A blunt bob is a high-maintenance cut, and most people don't expect that going in. So the honest question is whether you'll keep it sharp with frequent trims, or whether you're happy riding out the grow-out phases. If you'll book the appointments to keep that edge sharp, this is your shape.
What to Ask Your Stylist:
Length: Chin, one length all the way around
Layers: None through the interior
Finish: Blunt, with minimal point cutting. Point cutting is when your stylist snips into the ends at an angle to soften them, and on this cut you want very little of it
Bangs (optional): Skip them for the lowest upkeep
Pro Tip
Start on damp hair and spray amika The Shield Anti-Humidity Spray all the way through, from roots to ends, to protect your hair from the heat. Then dry it with the nozzle pointing straight down the hair, keeping the section pulled taut with your free hand the whole time. Keep that tension on and the whole bottom edge dries as one flat line. Let the section go slack and every end dries pointing somewhere slightly different, which is why a fresh blunt bob starts looking fuzzy along the bottom by week two.
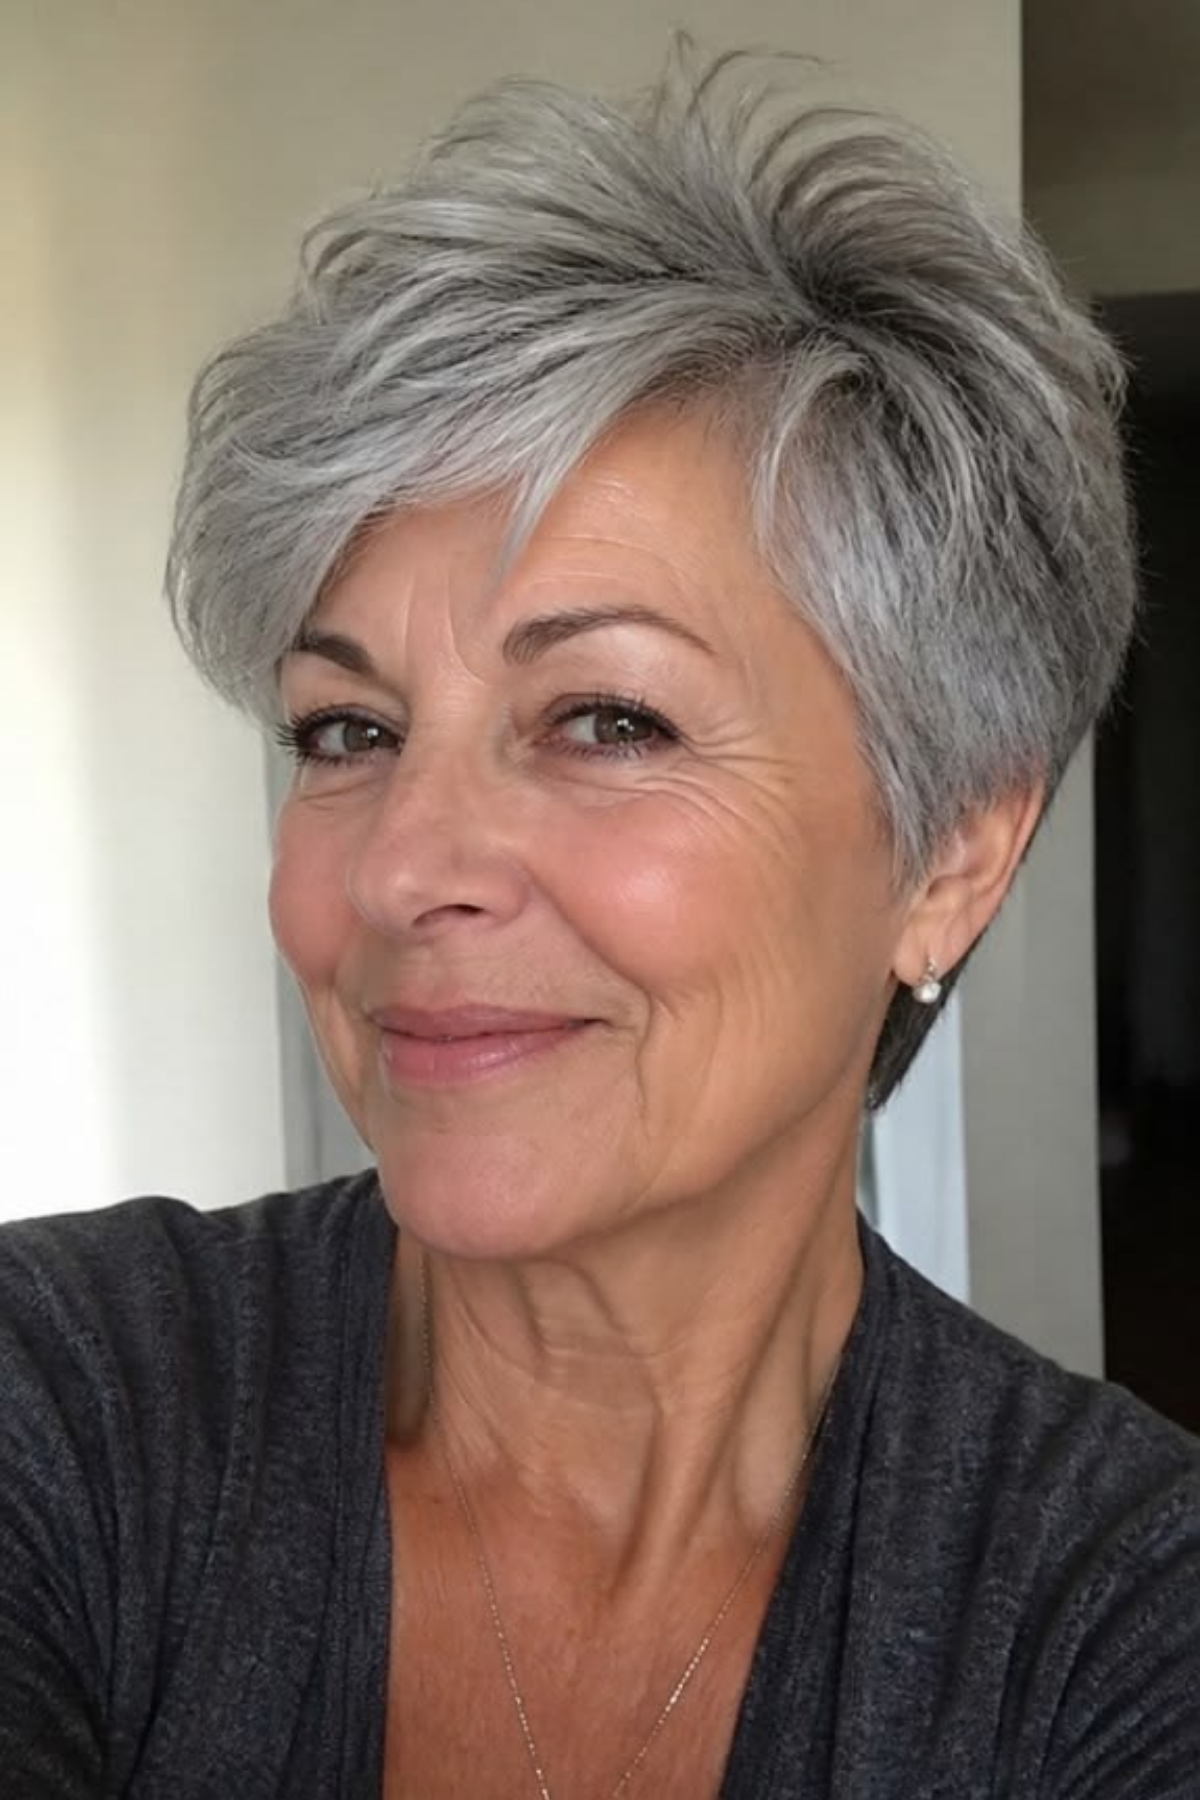
The Textured Pixie with a Longer Top
Some stylists call this a textured crop. Where a classic pixie is cut short all over, this one keeps two to three inches on top and takes the sides and nape in tight. That difference in length does all the work. The top has enough weight to lift and separate into pieces, while the short sides stop the shape spreading outward. It grows out kindly too, because the top just gets longer and starts to fall forward, which still looks like a haircut.
Source: Pinterest
Best Suited For: Fine hair, low to medium density. The question to answer honestly is whether you'll style it for a few minutes every single day, because that's the trade this cut asks for. Three minutes pushing pieces around instead of twenty with a dryer is a good deal if you'll actually do it. Leave it alone and a pixie just looks flat.
What to Ask Your Stylist:
Length: Two to three inches on top, tight at the sides
Layers: Graduated from the crown forward
Finish: Point cut through the top
Bangs (optional): A short soft fringe blended into the top
Back / nape: A tapered nape. Your nape is the back of your neck under your hair, and tapered means it gets gradually shorter as it goes down to your hairline
Pro Tip
Do this on completely dry hair. Tip your head forward and mist Hairitage Magic Spell Texturizing Spray straight at your roots, keeping it off the ends, then give it a few seconds to grip. Stand up and rake your fingertips back through the top, pushing the hair where you want it to sit. Don't reach for a comb. A comb flattens everything you just built, while your fingers keep the pieces apart.
The Stacked Bob with a Graduated Nape
The back is cut shorter than the front and built up in layers that stack on top of each other, so the shape climbs as it goes round. That stacking pushes the back of the shape up and out. Fine hair usually collapses at the crown, which is the section on the very top of your head, so this cut builds the height in with scissors instead of asking you to create it every morning.
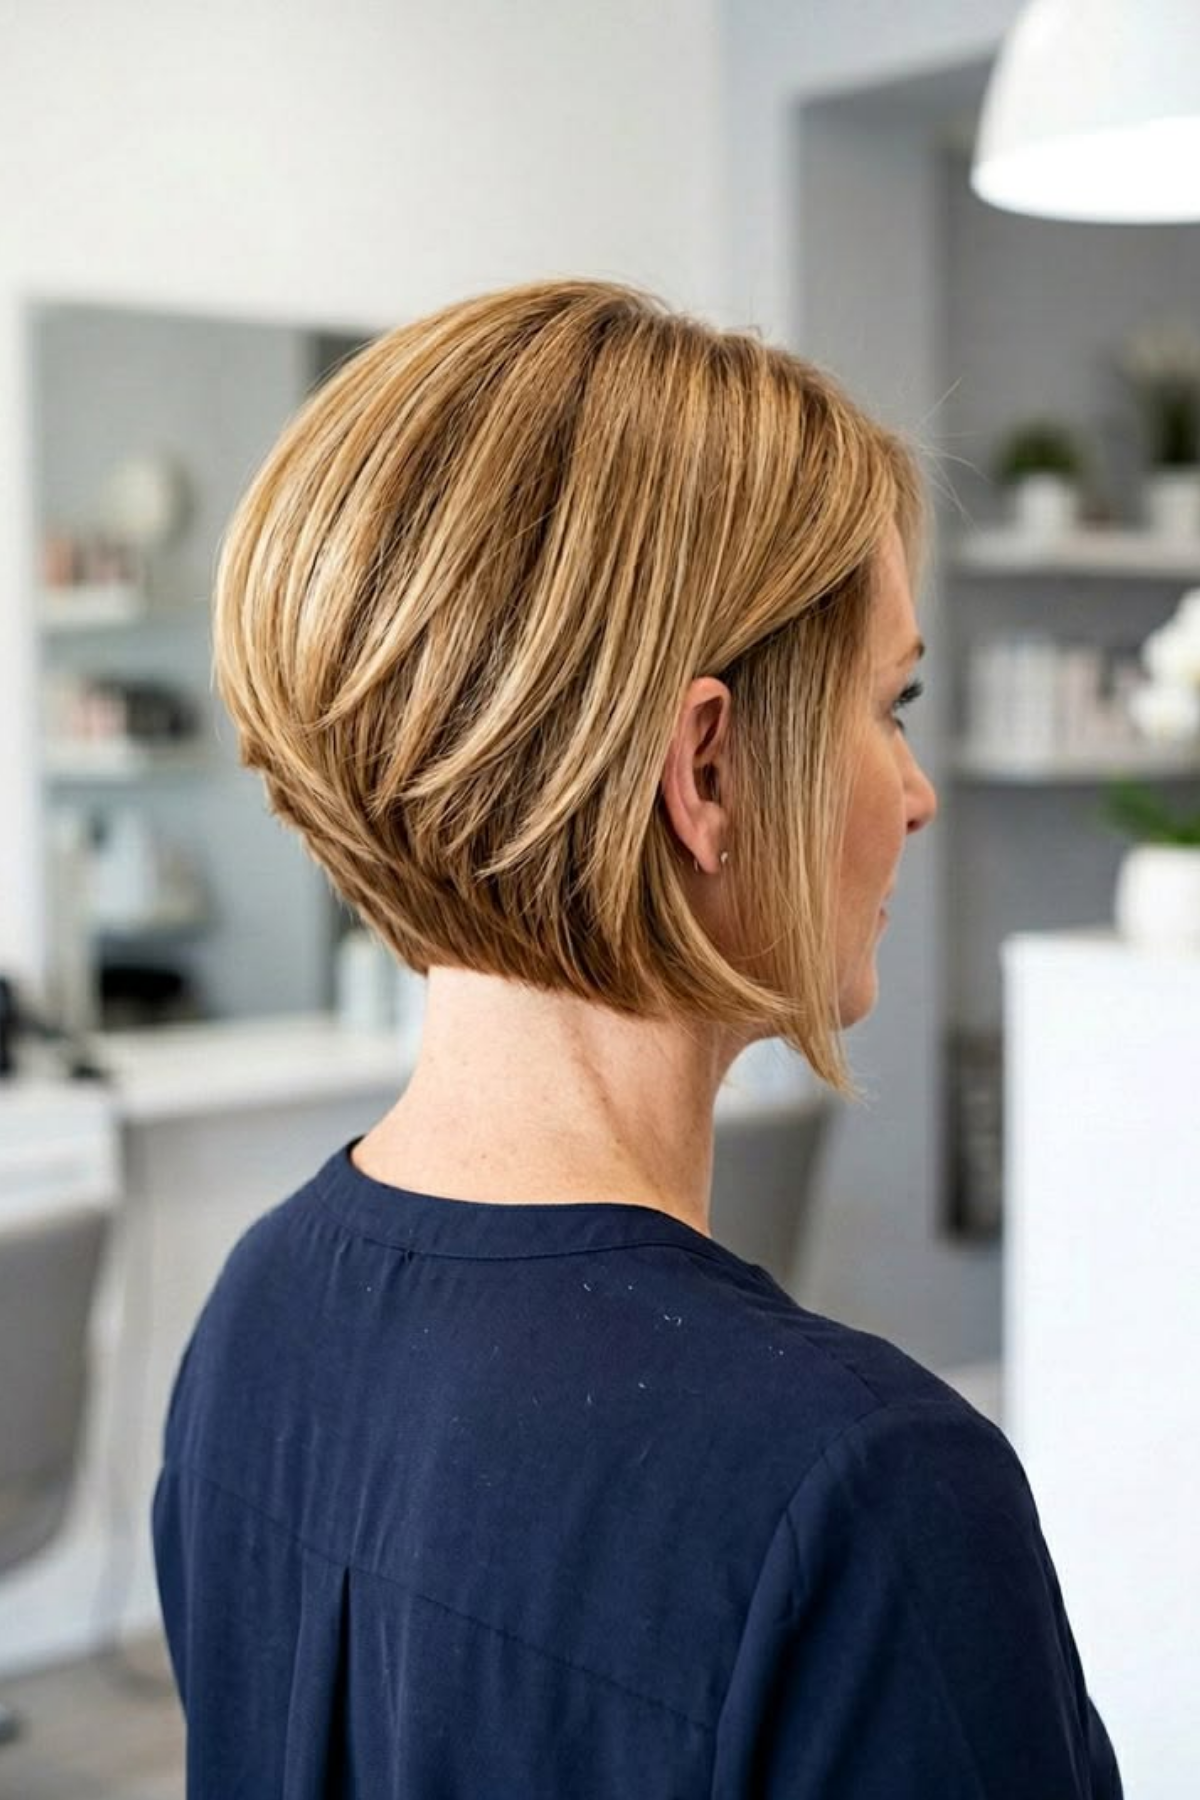
Source: Pinterest
Best Suited For: Fine hair that's sparser through the crown and the front, straight to slightly wavy. If you've tried every volume product going and your hair still sits flat on top by the afternoon, the problem probably isn't the product. When there's less density at the crown there's simply less hair up there to build volume on, so the cut has to do that work instead.
What to Ask Your Stylist:
Length: Jaw length at the front, shorter at the back
Layers: Stacked graduation through the back only
Finish: Blunt at the front perimeter, softer through the stack
Bangs (optional): No
Back / nape: Graduation starting at the nape and building up toward the crown
Pro Tip
Blow-dry your crown section over a round brush first. While that hair is still hot, wind a Kitsch Self-Grip Velcro Roller into it and set it right at the base of your scalp so it sits up on its own. Warm hair is easy to shape, and once it cools it locks into whatever shape it's in, so the heat is doing the real work here. Do two sections on top, no more, then leave them alone for ten to fifteen minutes until they're completely cool. Take them out and mist TRESemmé Keratin Smooth Weightless Finishing Hairspray over the top.
The Flippy Bob with a C-Curl Finish
Same length as the blunt bob above, cut the complete opposite way. This one sits between the chin and the jaw with soft layers through the inside so the ends can move, and it's finished so the bottom curves under in a soft C. Those interior layers are what make the curve possible, and if your hair hasn't got much body of its own, that curve gives it some.
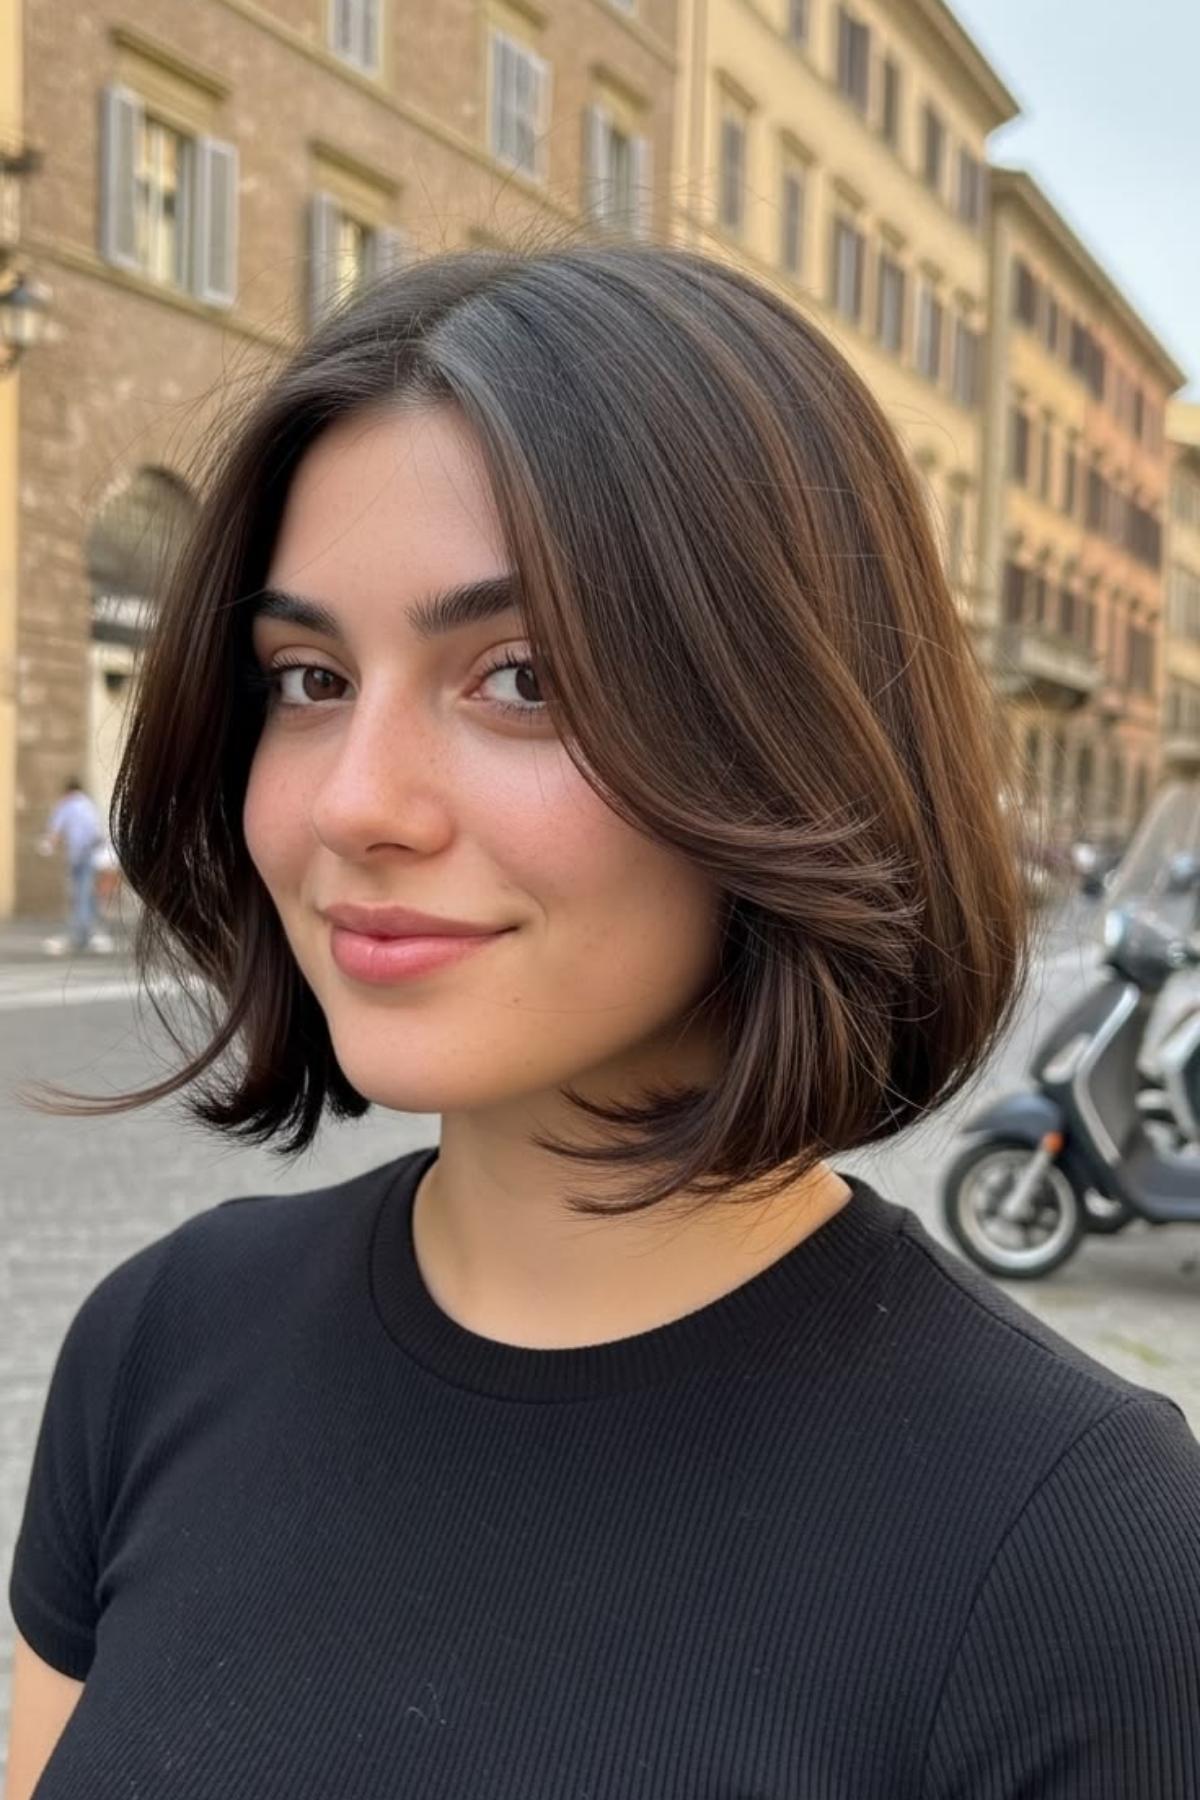
Source: Pinterest
Best Suited For: Fine to medium density, straight or gently wavy hair, on someone who blow-dries a couple of times a week and wants the result to look like body she was born with. Worth knowing before you book: a C-curl finish needs layers. On a completely blunt cut you can still do it, but you won't get the same effect, so I'd send you back up to the blunt bob instead.
What to Ask Your Stylist:
Length: Chin to jaw
Layers: Soft interior layers, or face-framing at minimum. Say out loud that you want it to hold a C-curl
Finish: A soft perimeter so the ends can turn under
Bangs (optional): None, or long face-framing pieces that connect into the layers
Pro Tip
On damp hair, spray K18 AstroLift Reparative Volume Spray from root to tip, without overdoing it, and blow it dry. The lift sits underneath, at the root, and it's what stops the top going flat once you smooth it. Then run the Olivia Garden Ceramic 1" Round Brush through the top surface to smooth it down, and when you reach the last two inches, roll the brush under and hold it there a moment before you let go. You end up with a smooth top, lift at the root underneath it, and ends that turn.
Thick and Dense Hair
The Jaw-Length Bob with Internal Layers
From the front, this looks like a plain one-length bob sitting at the jaw. The outline stays heavy and solid while the middle of the cut gets hollowed out, so all the work that makes it lie flat is invisible. Taking bulk out from the inside is what stops thick hair from spreading into a triangle as it dries.
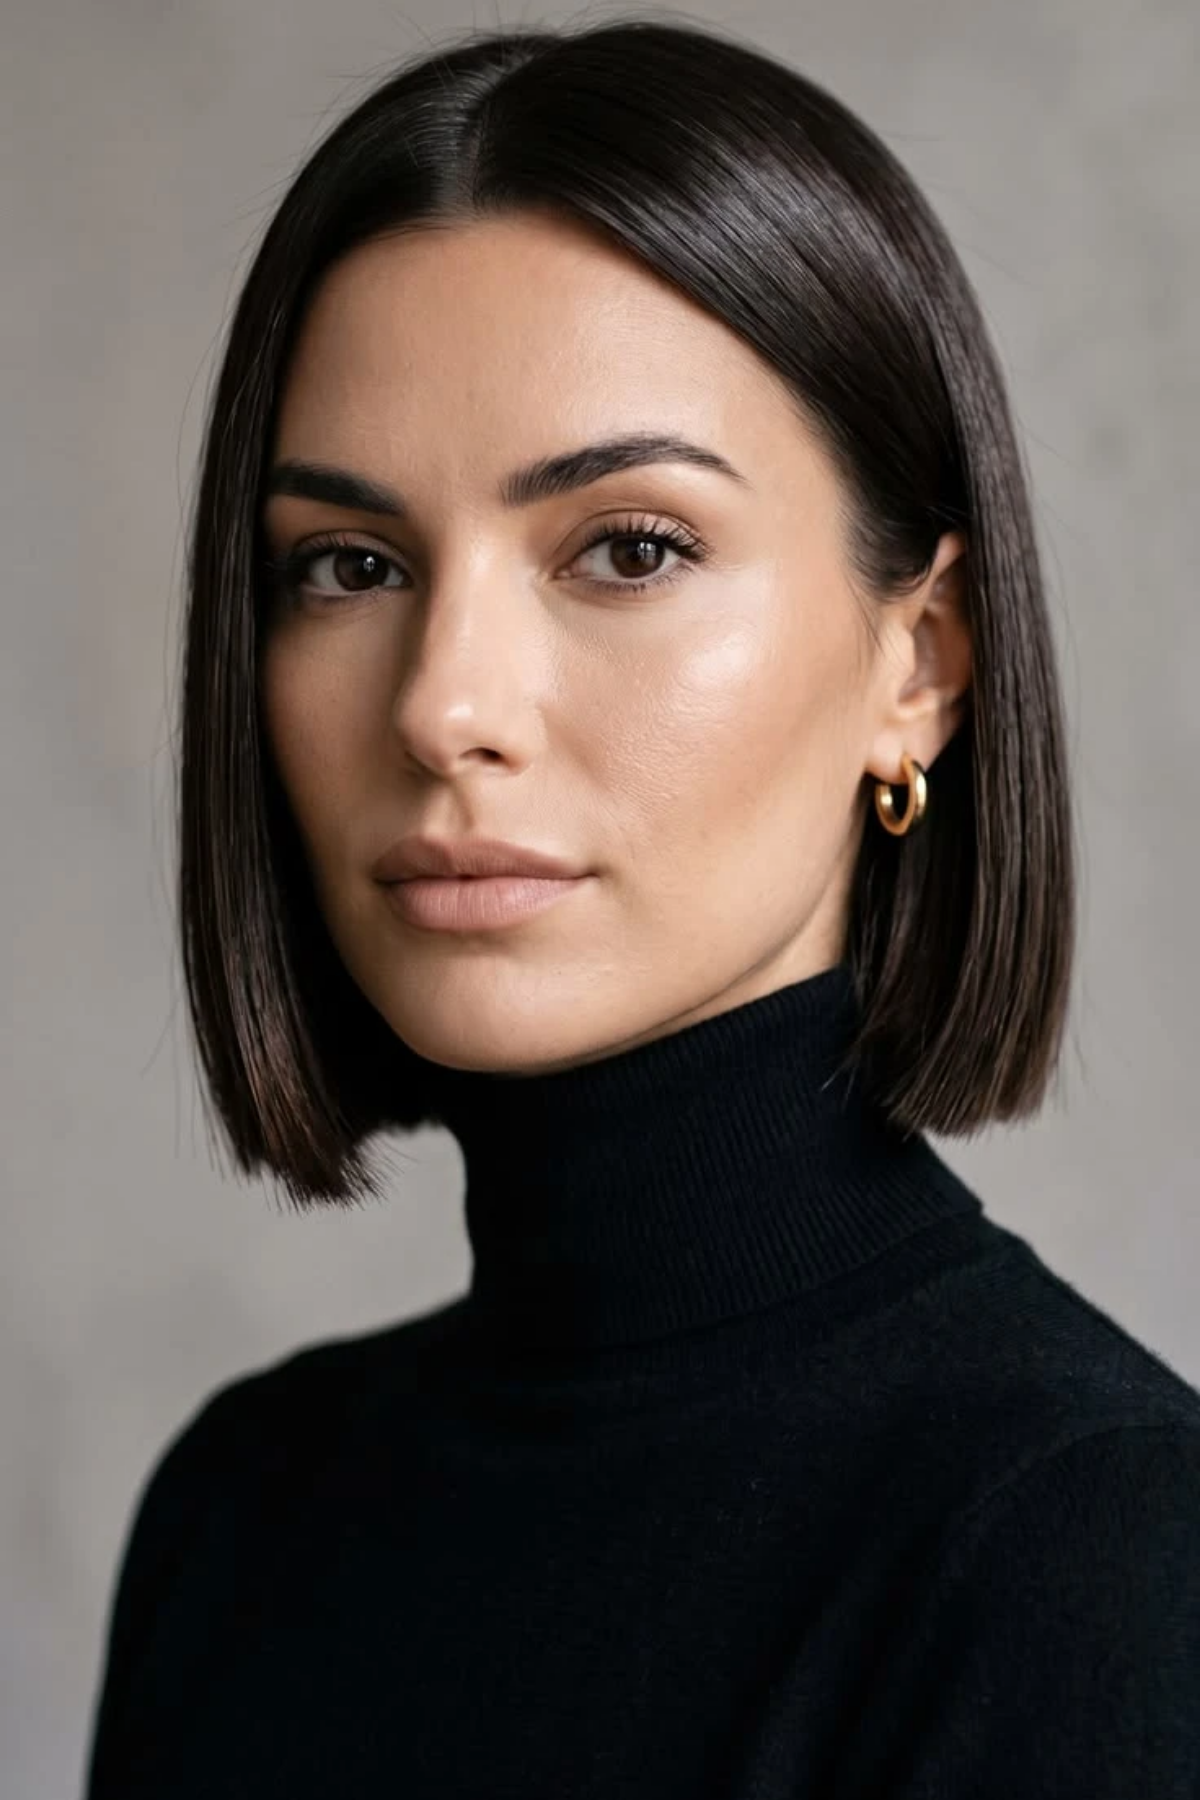
Source: Pinterest
Best Suited For: Thick, dense, straight to wavy hair that's widened at the bottom by three in the afternoon. If all that weight feels like it's dragging you down, this is the shape that fixes it. What makes short thick hair look like a triangle is the bulk, so the answer is taking the bulk out, not going shorter and hoping.
What to Ask Your Stylist:
Length: Jaw, one length at the perimeter
Layers: Internal only, with nothing visible on the surface
Finish: Point cut inside to release weight, blunt around the perimeter
Bangs (optional): No
Pro Tip
Spray Color Wow Dream Coat Supernatural Spray generously over clean, damp hair and really saturate it, then comb it through so it's even. Now blow-dry until your hair is one hundred percent dry, because it only activates once it's properly hot, and damp patches mean it hasn't worked. As you dry, point the nozzle down the length of the hair, from your roots toward your ends, following the way the hair already lies. Aim it out at the sides instead and you'll push all that thickness wider.
The Bixie
A pixie through the back and a bob at the front, joined by a graduated corner around the ear. The back takes the density out where thick hair piles up, and the front keeps enough length to tuck behind your ear or push forward. It grows into a short bob, which is a large part of why it's worth asking for.
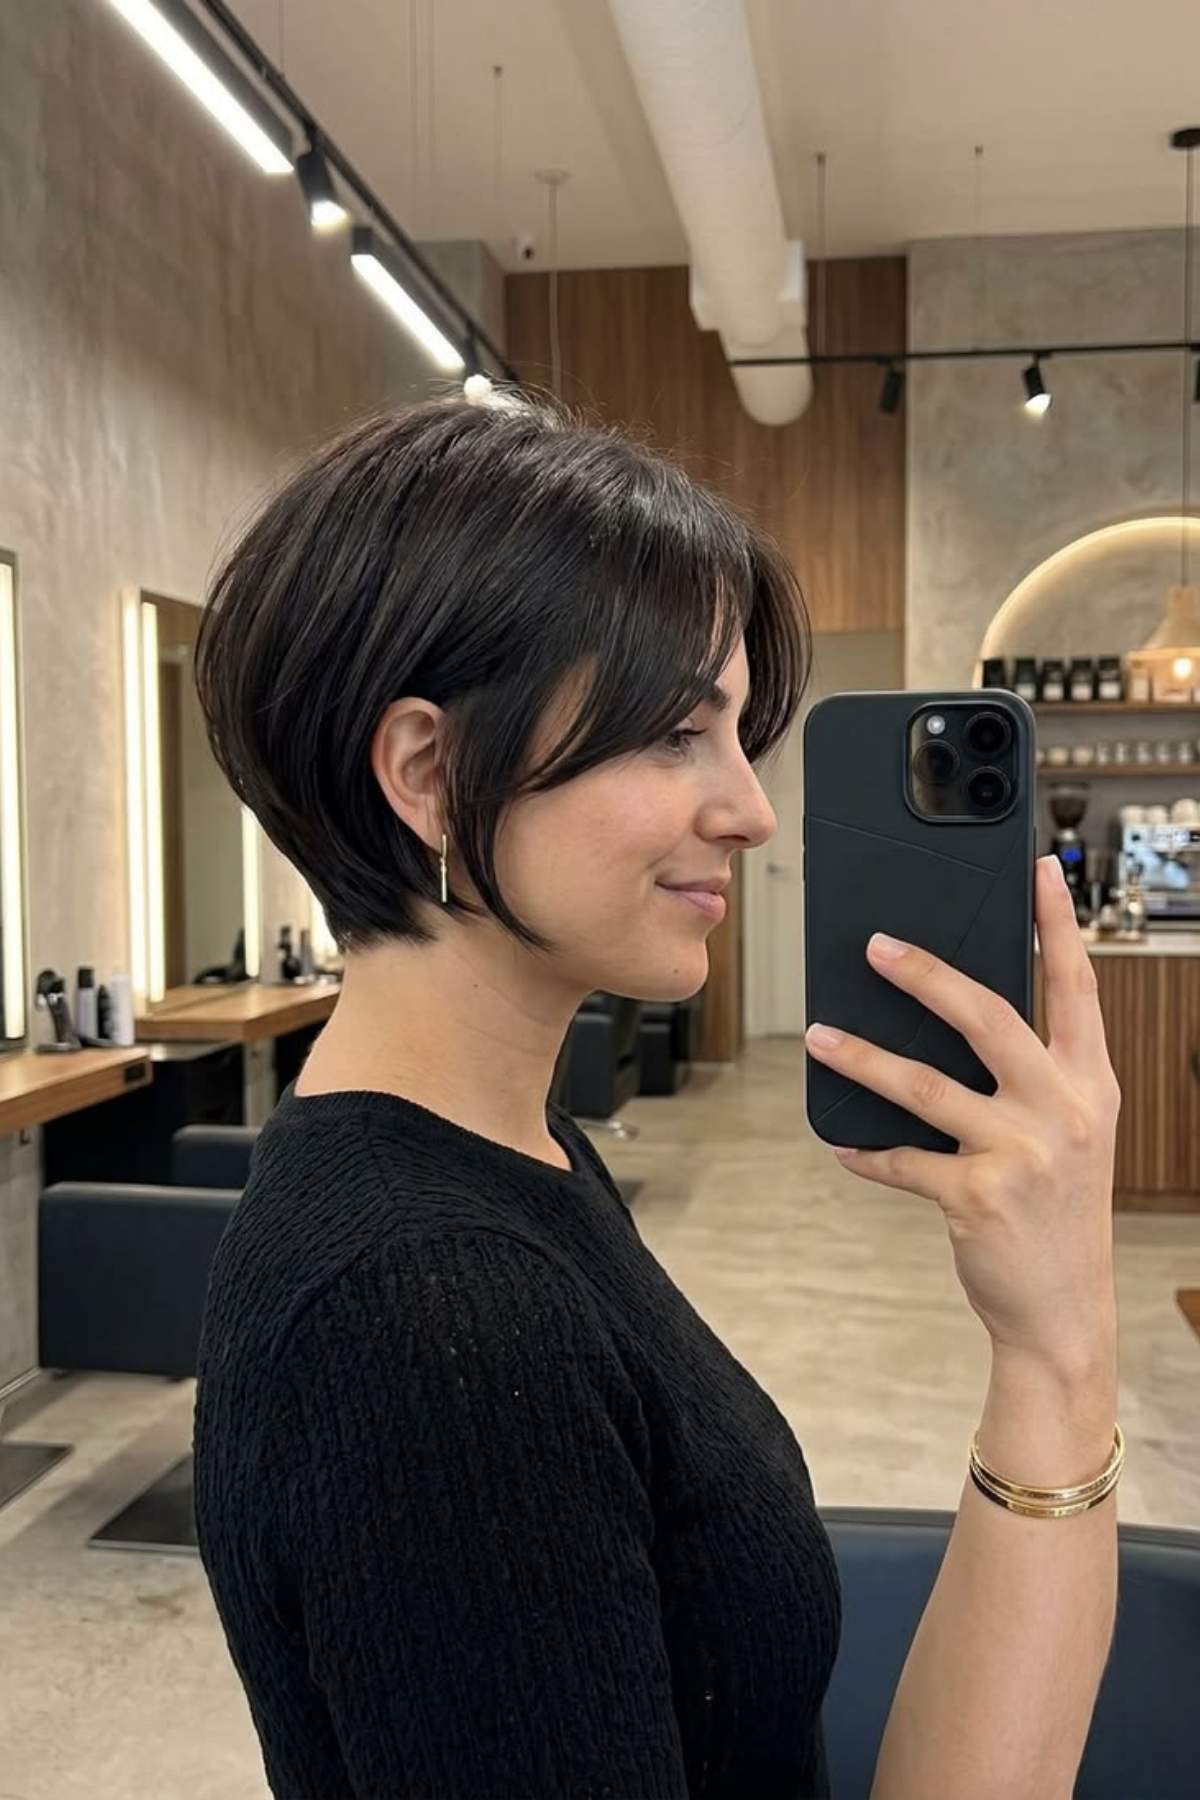
Source: Pinterest
Best Suited For: Thick, dense hair. You want short, but you're not ready to go all the way, and this is the shape that lets you do both. You still look like you've got hair when you're facing forward, so it's a good first step if you've never gone properly short before, and the front length gives you something to hold on to while you decide.
What to Ask Your Stylist:
Length: Pixie through the back, chin-skimming at the front
Layers: Graduated through the corner at the ear so the two lengths connect
Finish: Ask for manual texturizing rather than thinning shears
Bangs (optional): A long side-swept piece works
Back / nape: Ask for a tapered nape that connects into the graduation
Pro Tip
Work on dry hair. Mist Hairitage Magic Spell Texturizing Spray through the back only and scrunch it once to build grit where the hair is shortest. Now leave the front completely alone and comb it smooth with your fingers. That contrast is the cut: rough and short at the back, smooth and long at the front. Treat both ends the same way and you lose the thing the bixie was built around.
The Short Shag with a Heavy Fringe
Short layers run right through the interior, and the ends are cut piecey, so your hair falls into separated sections you can see through. All the weight comes off the bottom, which is the opposite instinct to most thick-hair cuts. On dense hair that's what turns your thickness into the look. A solid fringe at the front finishes it.
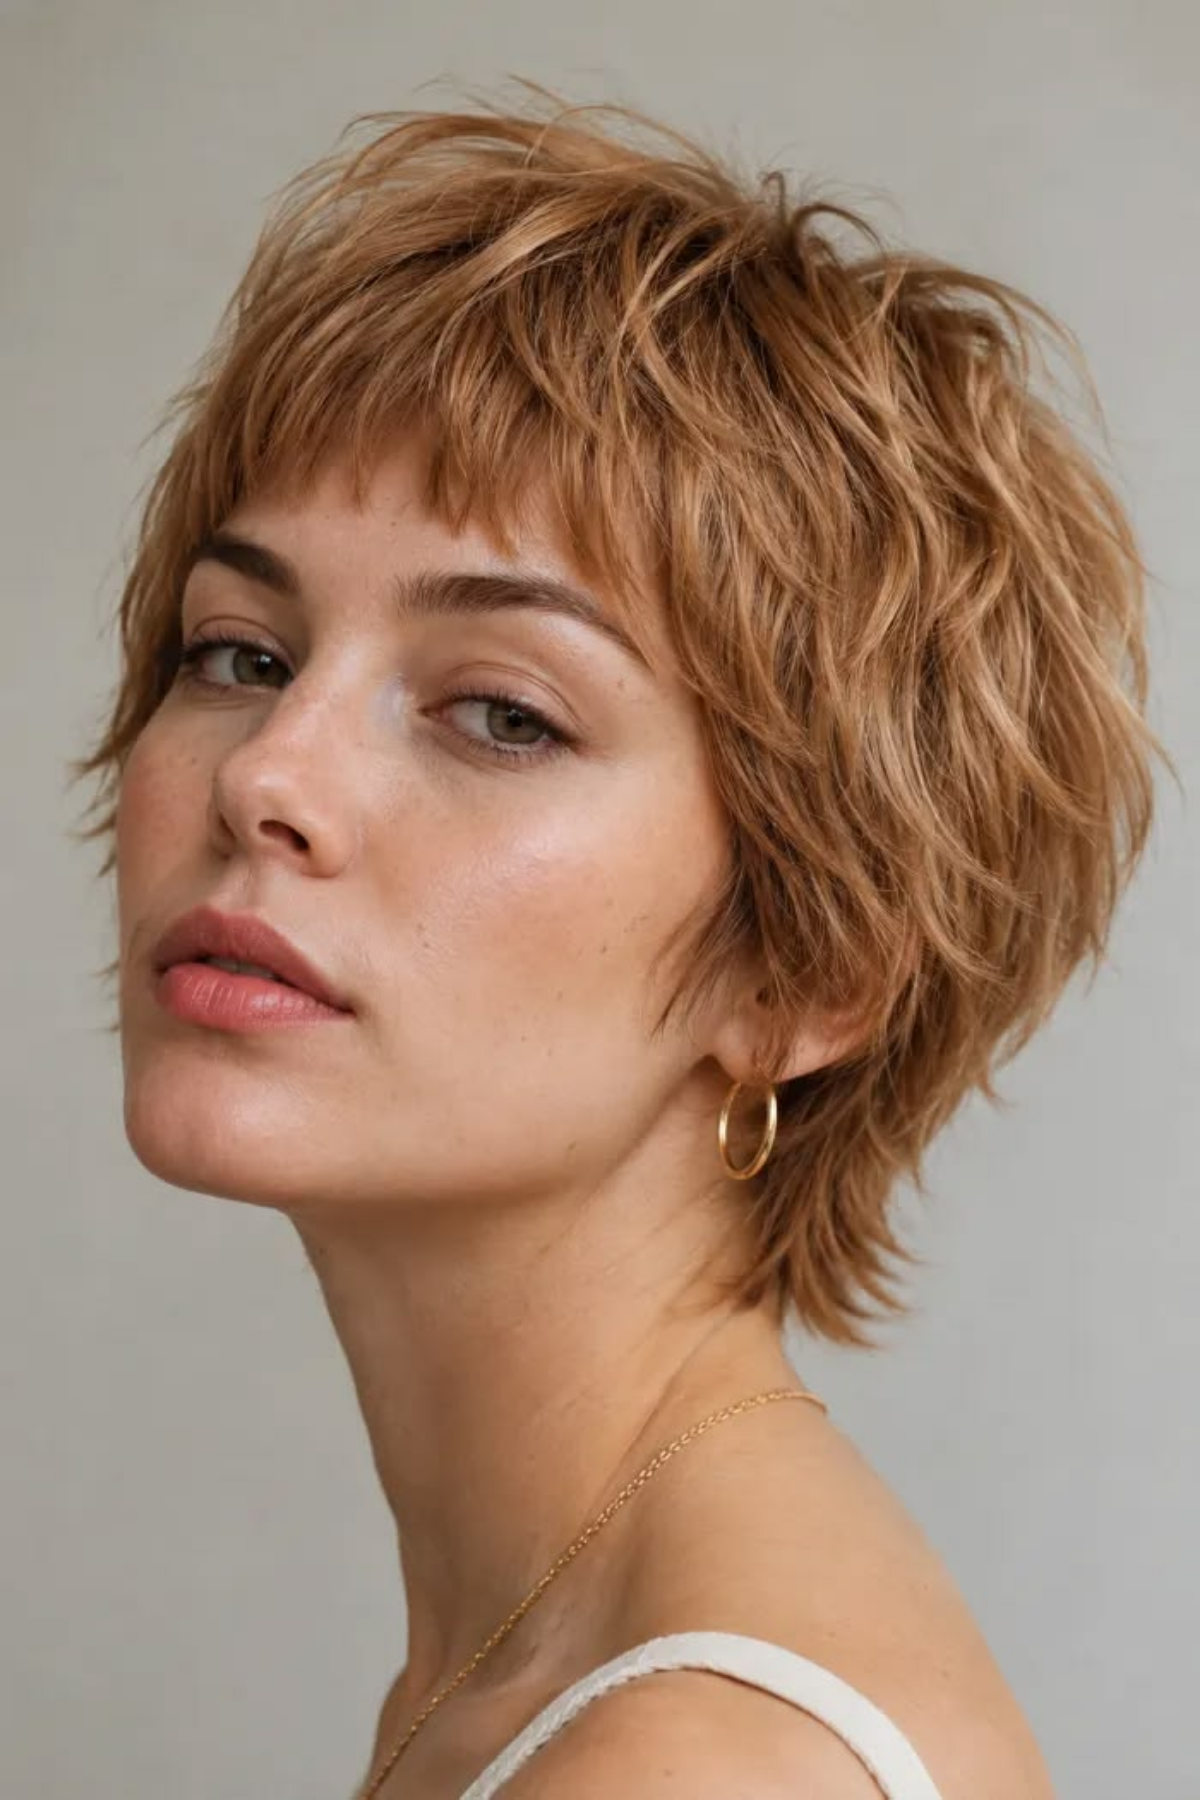
Source: Pinterest
Best Suited For: Thick, coarse, naturally textured hair. It works best when you already wear your texture most days, because a shag brings that out. I'd talk you out of it if your hair is baby fine and very thin, because that hair type doesn't hold the shape and you won't get the lived-in effect a shag is known for.
What to Ask Your Stylist:
Length: Ear to jaw through the layers
Layers: Short and blended throughout, never choppy
Finish: Thin the bulk at the bottom and texturize the ends
Bangs (optional): Heavy and full, cut to the brow
Pro Tip
Rough-dry it first with your fingers, no brush, until it's mostly dry with a little damp left in it. Then mist Hairitage Magic Spell Texturizing Spray over the mid-lengths and ends and twist small sections between your finger and thumb, a few around your face and a few through the back. Twist them and the ends fall into the separated pieces the cut was built for. A brush would blend them back together.
The U-Cut Short Layered Bob
The reason to ask for this one only shows up three months later. It's a short bob with a rounded bottom edge rather than a pointed one, so the perimeter curves into a U instead of dipping into a V, and the inside is layered to release weight while that rounded outline stays untouched. A V-cut makes the ends look thinner as it grows out. A U-cut grows out beautifully and doesn't thin the perimeter the same way.
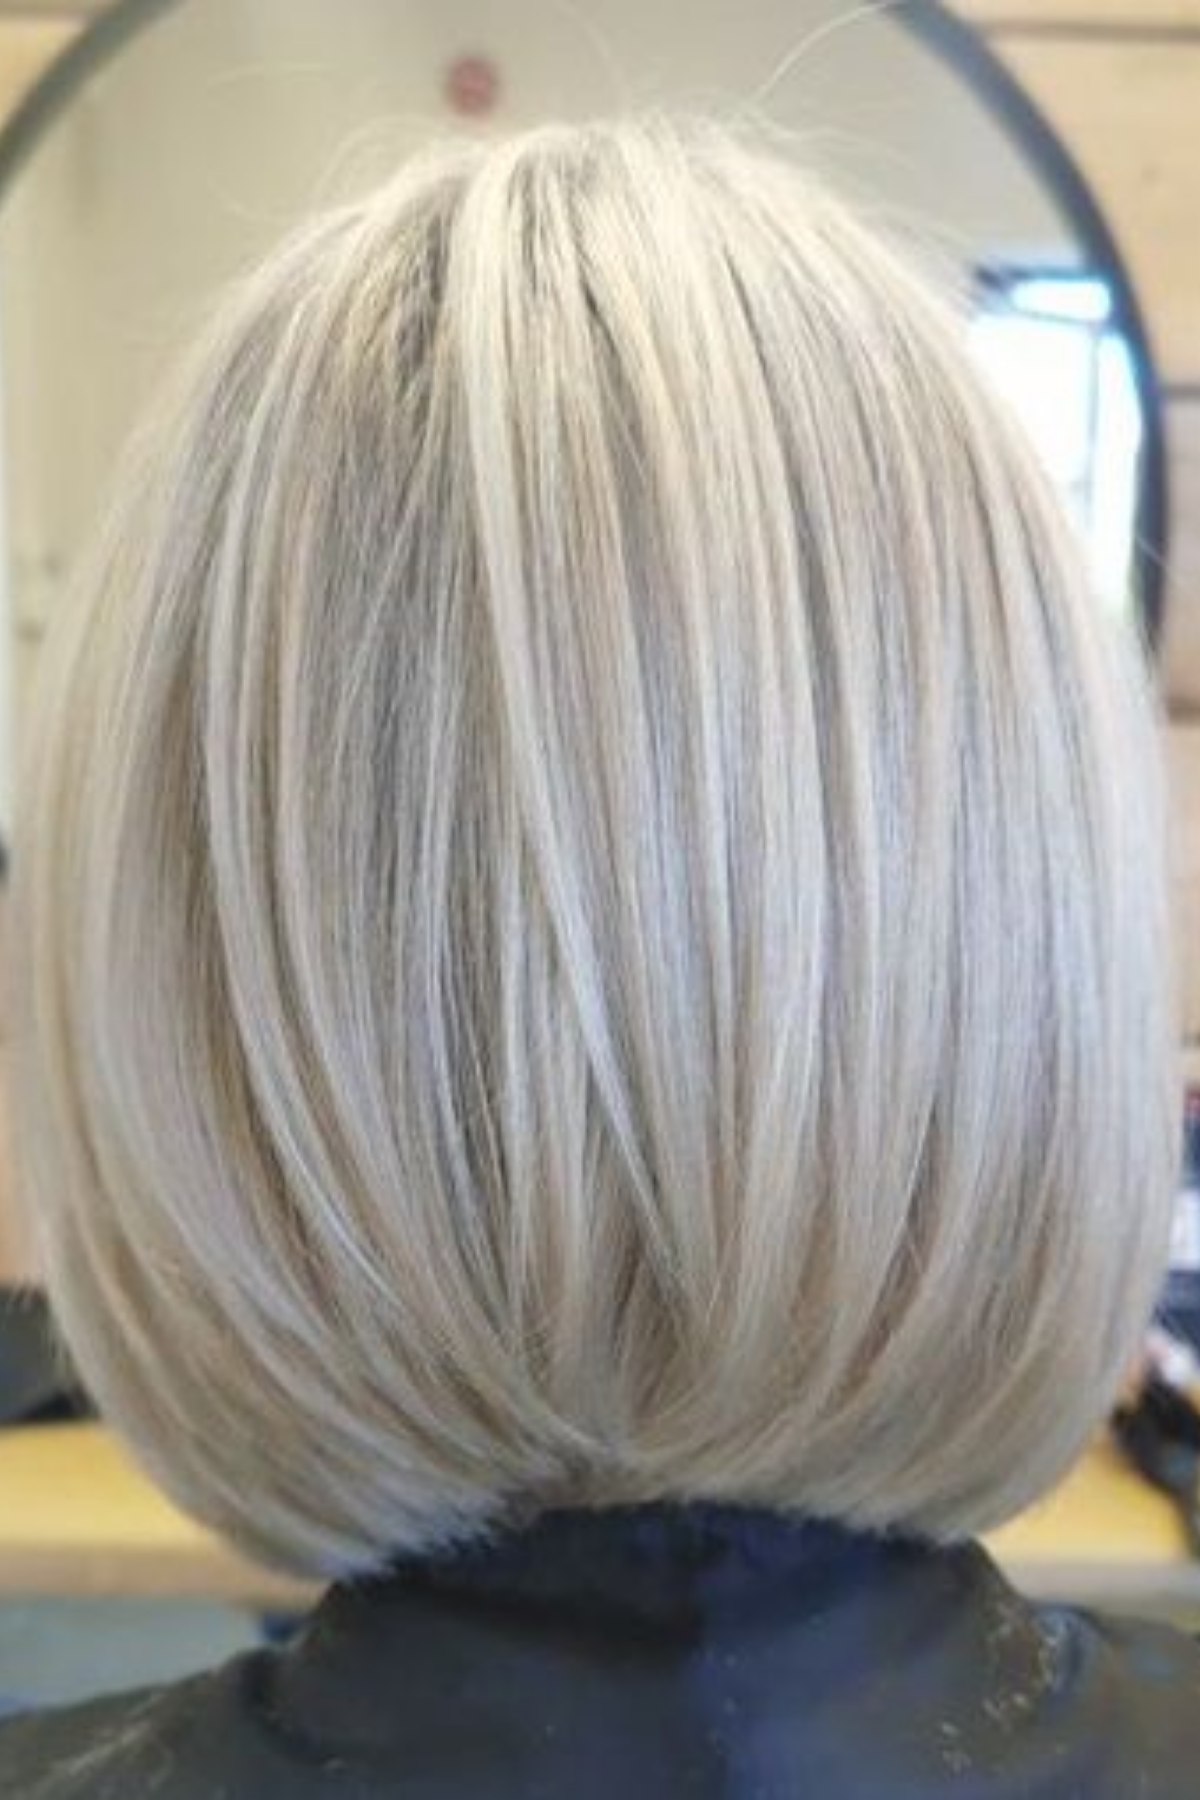
Source: Pinterest
Best Suited For: Thick, dense hair, and specifically the person who's grown a short cut out before and watched the ends go stringy and see-through at the bottom. Your complaint isn't how the cut looks the day you leave, it's how it ages between appointments. You still get the weight removed here, just not at the cost of the outline.
What to Ask Your Stylist:
Length: Jaw to chin
Layers: Interior layers to release weight, perimeter left alone
Finish: A U-shaped perimeter, not a V. Ask for point cutting inside to reduce weight without thinning the outline
Bangs (optional): Long face-framing pieces
Back / nape: Ask for the U to be cut at the back, because that curve is the whole reason for this cut
Pro Tip
Dry the inside of your hair first with your head tipped forward, so the roots lift. Then flip back up and finish on the bottom two inches with your dryer's cool shot button, pinching the ends between your fingers until they feel cool. Same principle as the velcro rollers further up: warm hair is easy to shape and it locks in as it cools, so if you cool the ends while you're holding that curve, the U stays put instead of dropping into a straight line. Finish with TRESemmé Keratin Smooth Weightless Finishing Hairspray misted at the perimeter only, keeping it off your roots.
Wavy Hair
The Wob
A wob is a wavy chin bob, and it gets cut longer than you asked for. Cut one at the chin and it finishes above it, because where a wave lands wet and where it lands dry are two different places. The dry one counts, so that's the one the cut is built around. The bottom edge stays soft, so your waves sit in their own shape instead of being squashed into a line.
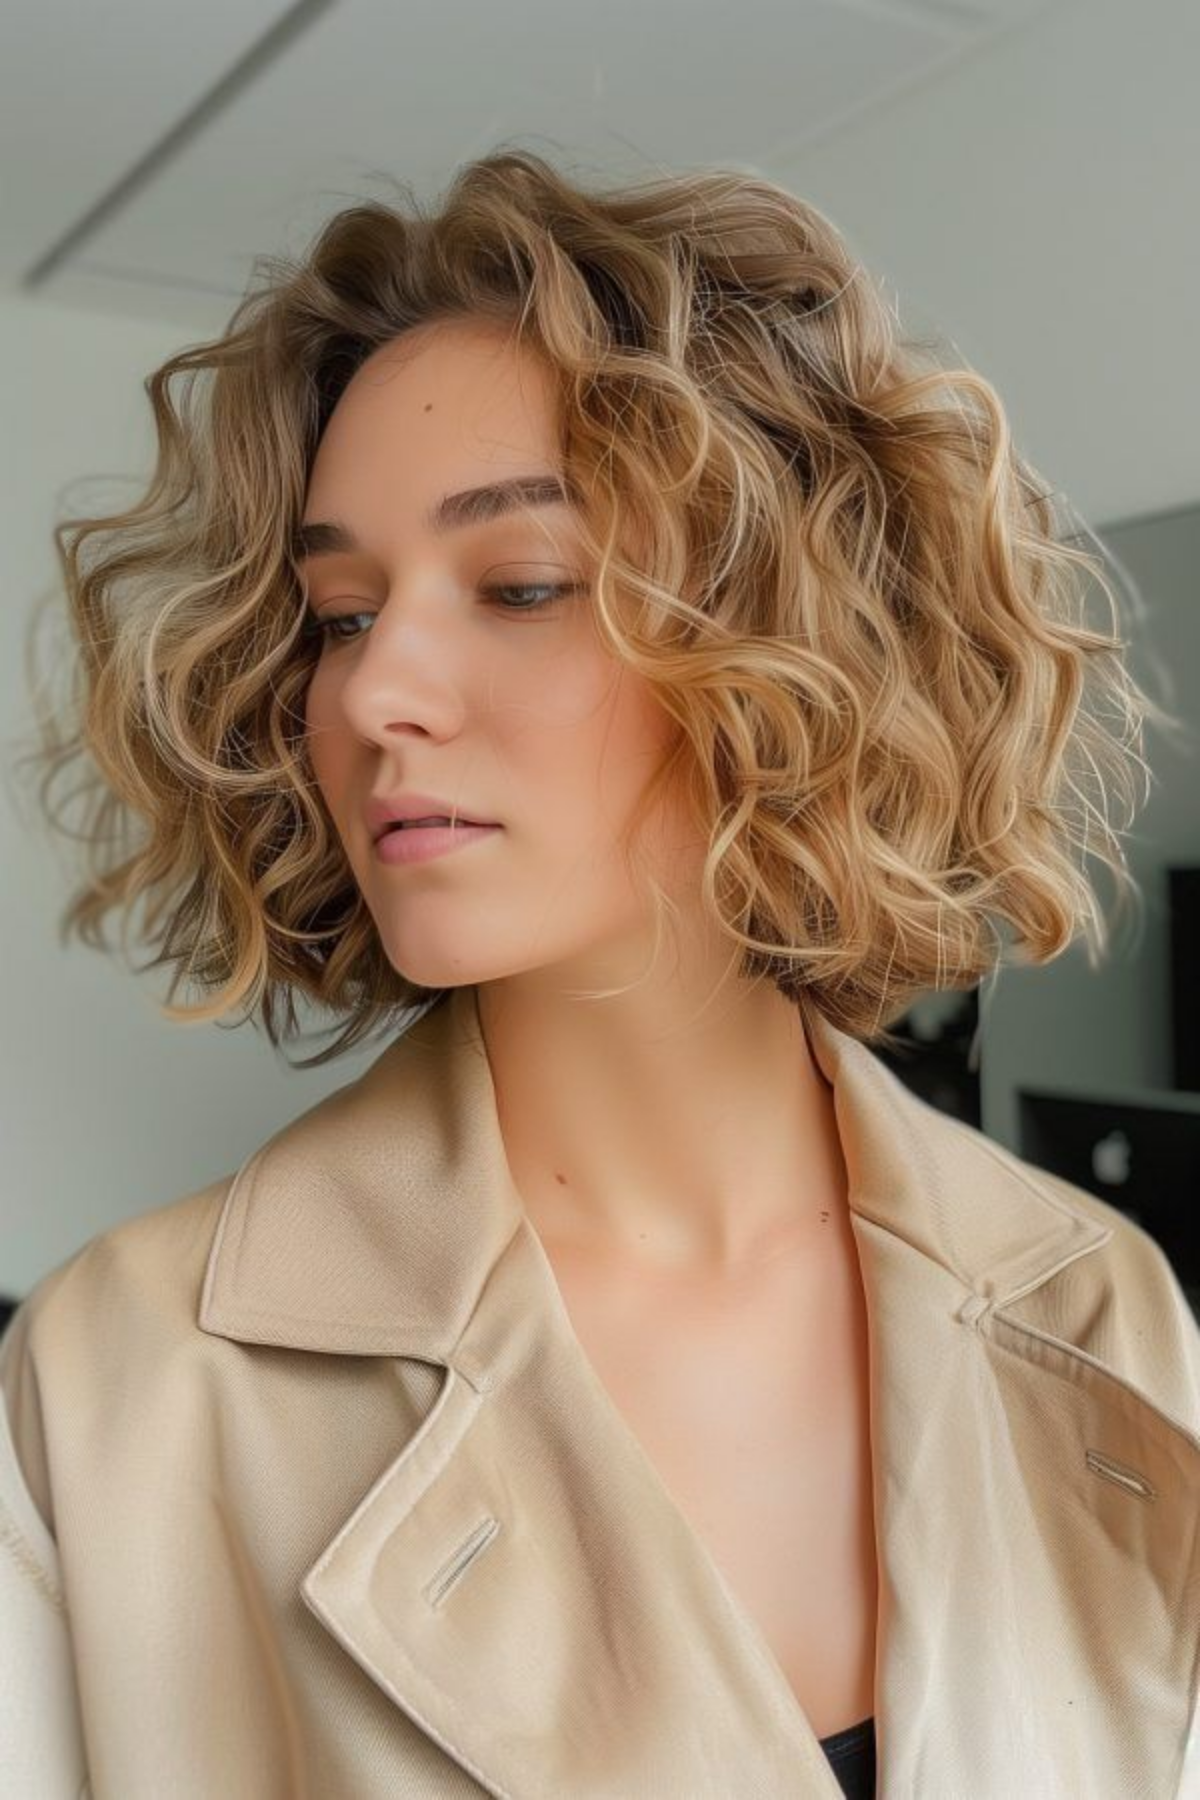
Source: Pinterest
Best Suited For: Medium density wavy hair, on someone who wants to keep wearing it wavy. Plenty of short cuts only look right blown out straight, and if you've got a wave you actually like, you don't want a shape that fights it six days a week. This one is cut so the wave is the point rather than something you deal with.
What to Ask Your Stylist:
Length: Cut below the chin so it lands at the chin when it dries
Layers: Long and internal
Finish: A soft perimeter, no blunt line
Bangs (optional): No
Pro Tip
Heat protectant first, every time. Then take a one-inch section, clamp the CONAIR INFINITIPRO Rose Gold Titanium 1-Inch Curling Iron around the middle of it and rotate away from your face, holding it there for eight to ten seconds. Let go before you reach the ends so the tips stay straight, and let each piece cool before you touch it. Straight tips give you a wave; curled tips give you a curl. Alternate the direction on each section, one away and the next toward, so it doesn't set into a uniform pattern. Use the one-inch barrel rather than anything bigger. On hair that doesn't hold a curl well, a bigger barrel drops out before you've left the house.
The Ear-Length Crop with a Soft Perimeter
This is the lowest-effort cut in the post. It sits around the ear with the bottom edge softened, and just enough internal layering to stop the wave stacking into a shelf. There's no hard line to lose, so it grows out without a bad stretch. Bulky wavy hair doesn't need tons of layers to fix it, and they don't have to be short ones either.
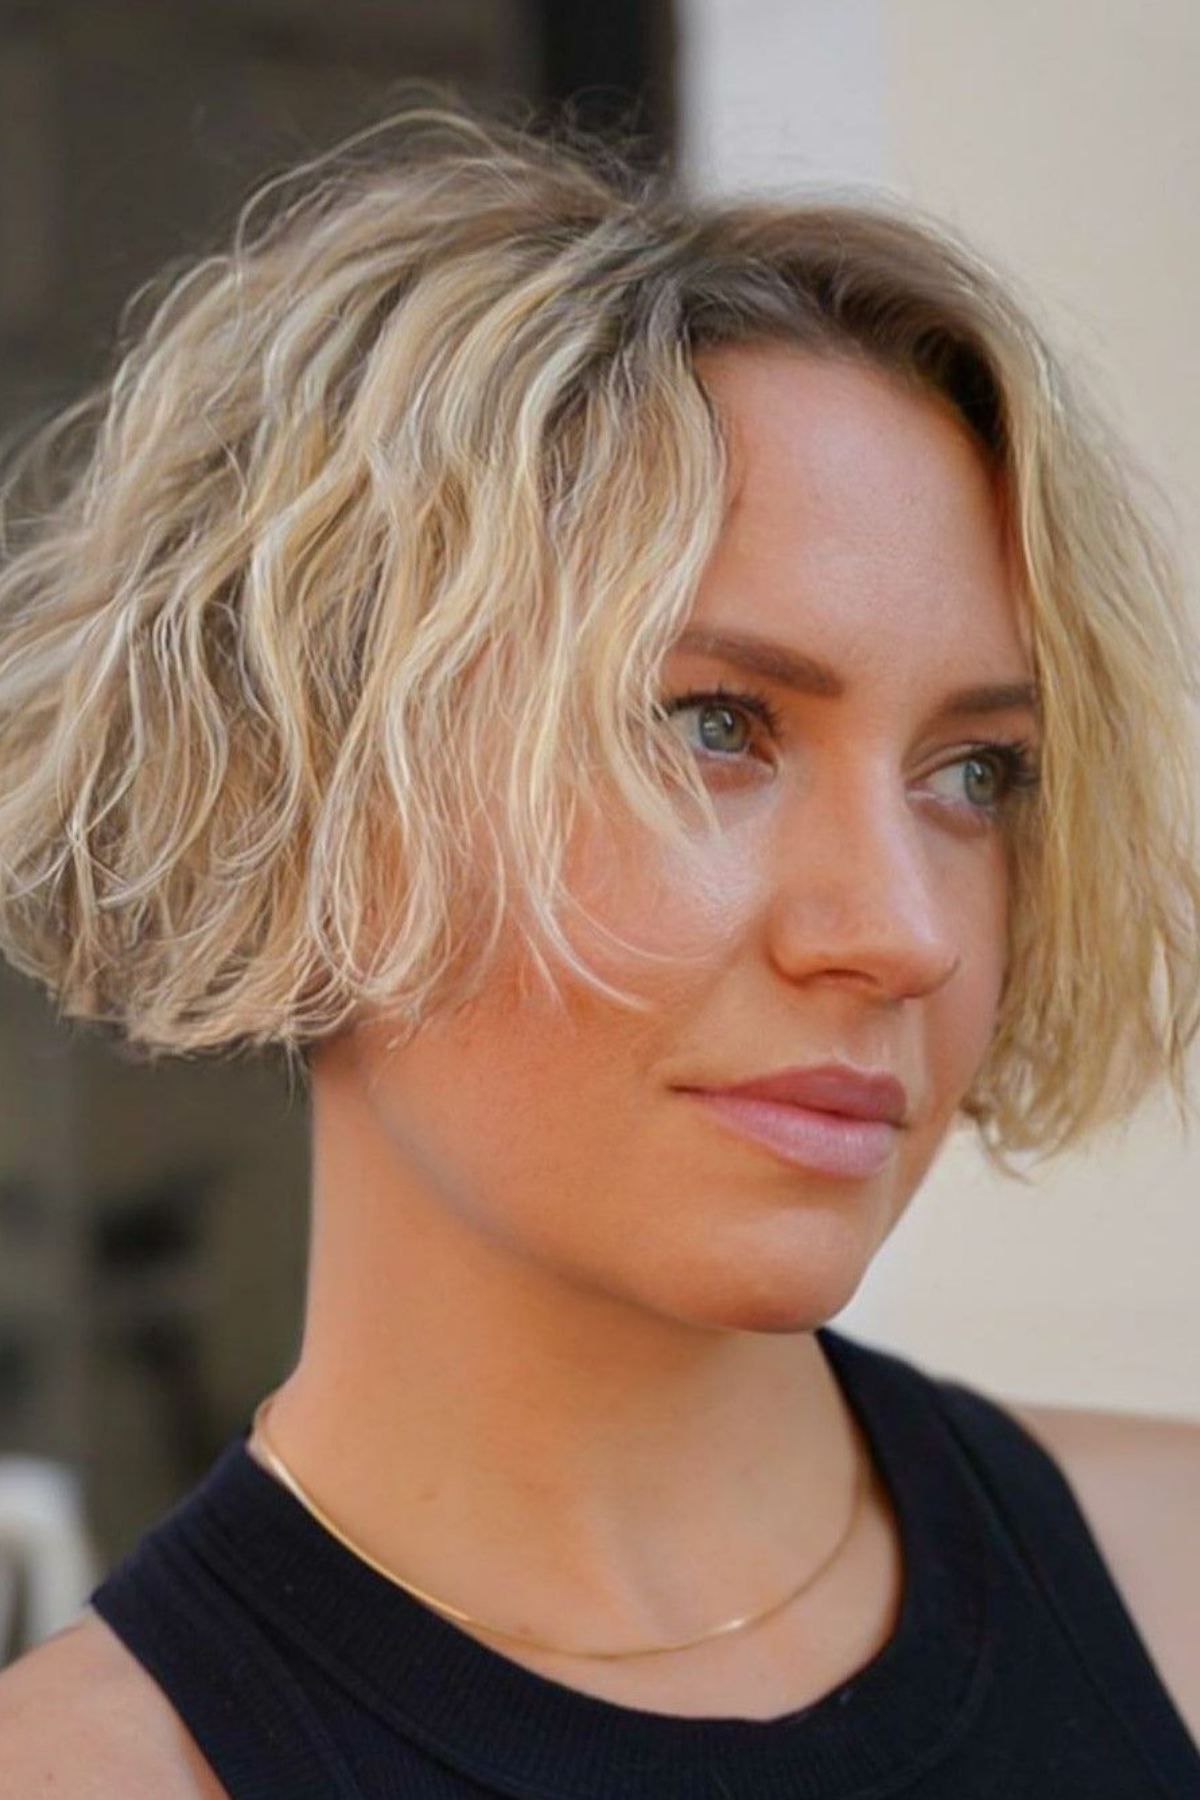
Source: Pinterest
Best Suited For: Fine to medium density wavy hair. You don't own a blow-dryer and you're not planning to buy one. Your routine is washing it and leaving the house, and you want the cut to do the work. Out of everything here, this is the one that does.
What to Ask Your Stylist:
Length: At or just below the ear
Layers: Internal, long, and minimal
Finish: A soft, point-cut perimeter
Bangs (optional): No
Pro Tip
Work a fingertip of Olaplex No. 6 Bond Smoother Leave-In Styling Cream through damp mid-lengths and ends. Then lay a flat microfiber towel or an old cotton t-shirt on the counter, tip your head forward so your hair lands on it in a pile, and wrap the towel up and clip it at the back of your head. Leave it fifteen to thirty minutes, and longer if your hair is thick. This is called plopping, and it lets the wave dry in the shape it naturally wants, with none of its own weight pulling it straight.
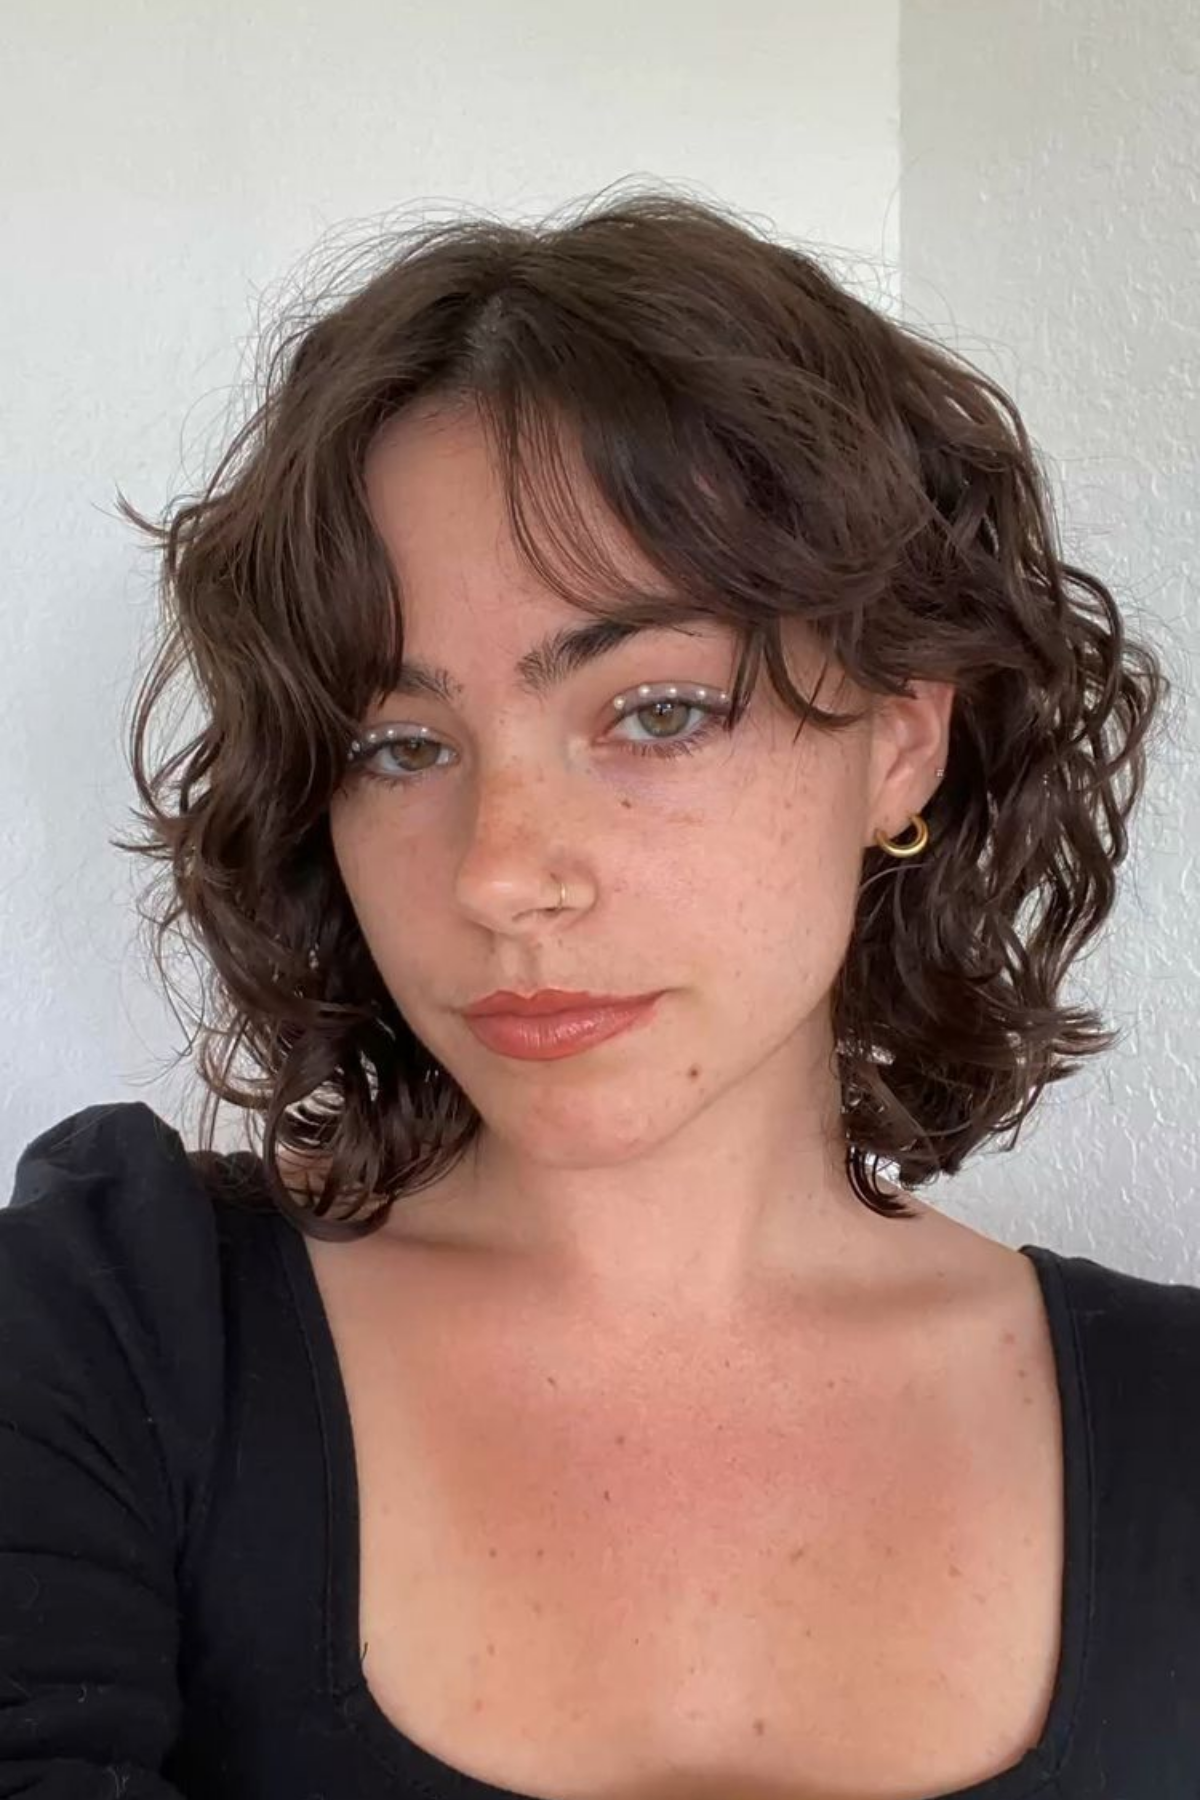
The Short Wavy Shag with a Curtain Fringe
The perimeter lands at the jaw, with short feathered layers running through the interior so the shape stays soft. The fringe starts at your cheekbone and feathers back into that length. Because it blends into the rest as it gets longer, you skip the bad month most fringes put you through.
Source: Pinterest
Best Suited For: Wavy, medium density hair on someone who wants a fringe but has been talked out of one before. If your lifestyle can't handle daily styling, a curtain fringe is the one I'd steer you toward, because it keeps blending in as it grows. This is the softer of the two shags here. If you want something edgier, look at the heavy-fringe version above.
What to Ask Your Stylist:
Length: Jaw through the perimeter
Layers: Short through the interior, feathered
Finish: Texturized ends
Bangs (optional): A curtain fringe starting at the cheekbone and feathering out gradually going back
Pro Tip
The fringe is the first thing you dry, straight out of the shower, before it's had any chance to start drying on its own. Pull it forward over your forehead, split it down the middle with your fingers, and dry it in that split position. Leave a curtain fringe to dry by itself and it sets wherever it happened to fall, and you won't get it back until you wet it again. Once the fringe is set, mist heat protectant over the ends and finish them with one bend away from your face on each side using the CONAIR INFINITIPRO Rose Gold Titanium 1-Inch Curling Iron, holding for eight to ten seconds.
Curly and Coily Hair
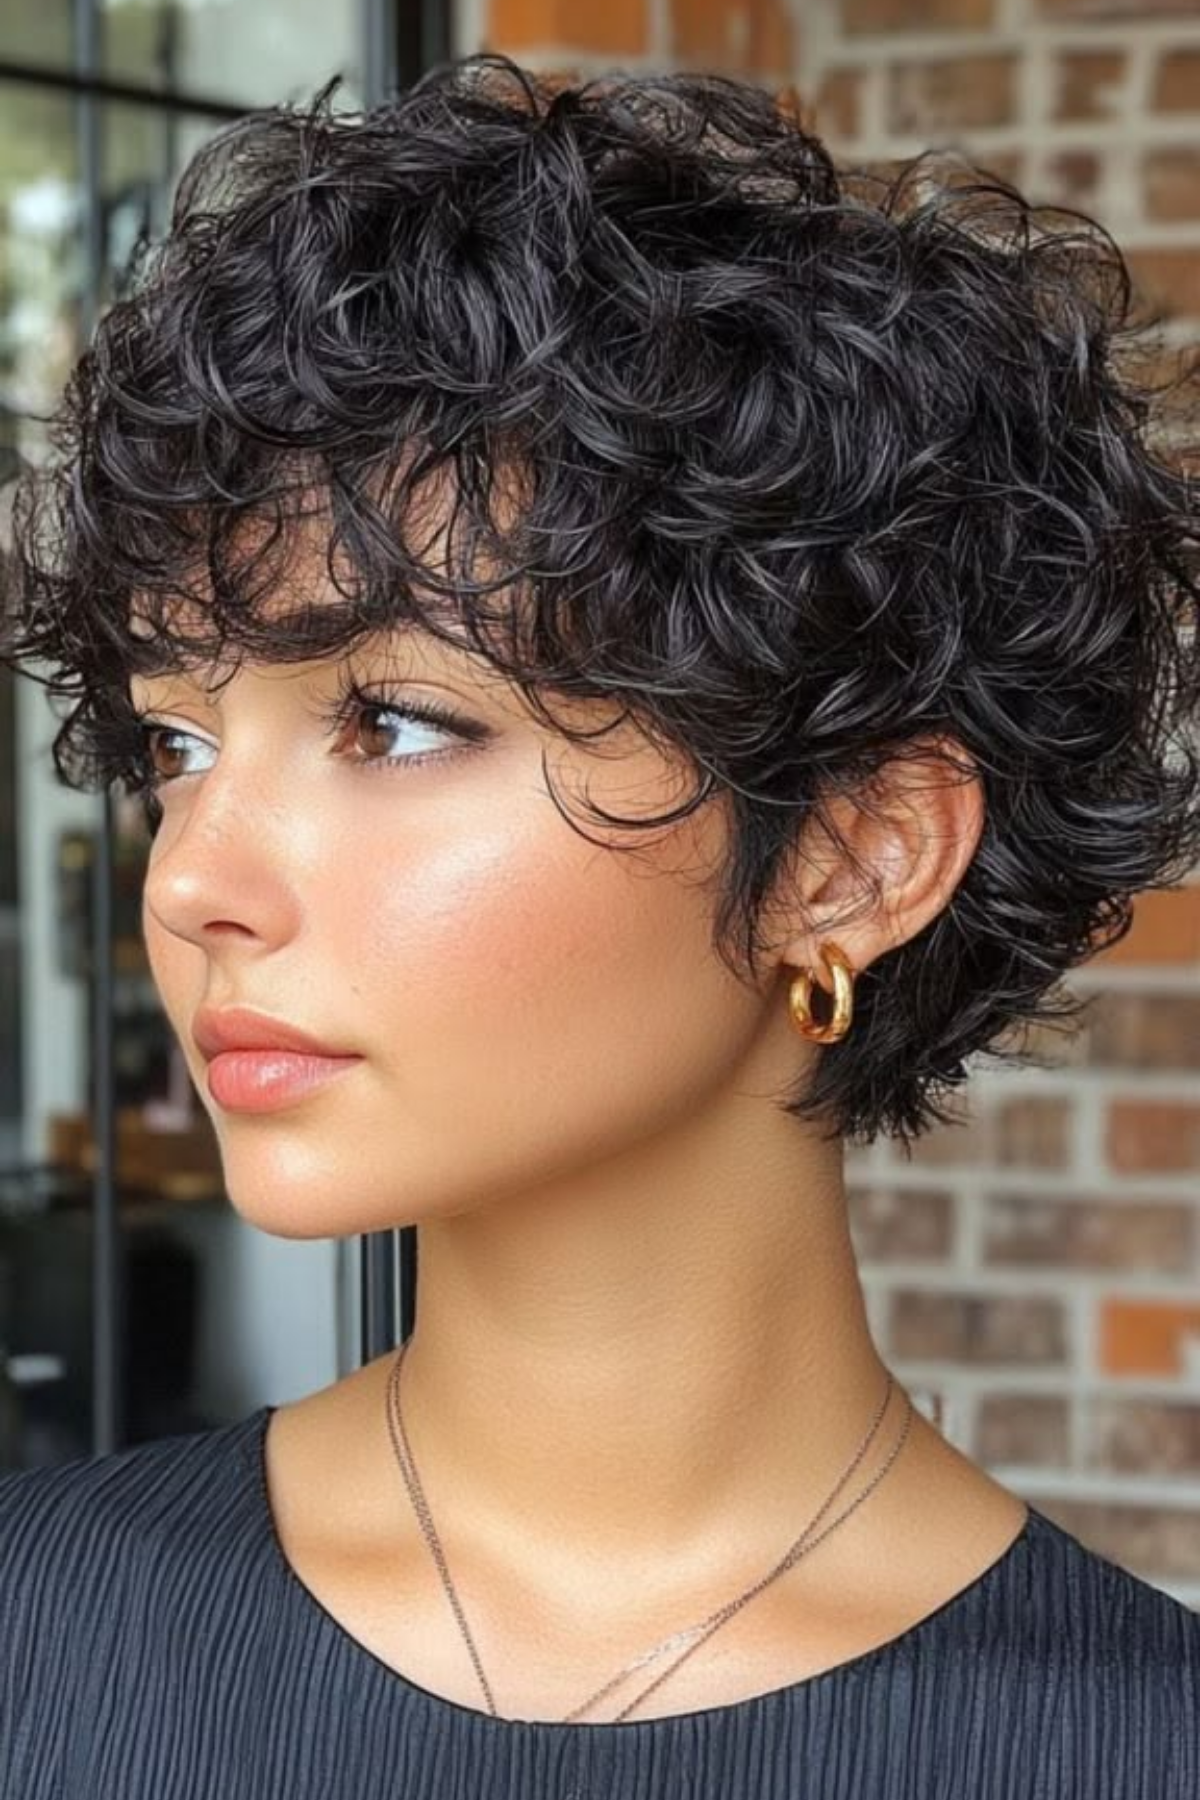
The Curly Crop with Shaped Corners
Source: Pinterest
Best Suited For: Thick curly or coily hair that collapses into a shelf at the bottom. If it looks wide at the base and flat on top no matter what product you use, that's a cutting problem, and this is the cut that answers it. The issue is the shape of the outline, and no amount of cream fixes a shape.
What to Ask Your Stylist:
Length: At or just above the ear, cut shorter through the back than the sides
Layers: Cut into the interior to release the bulk
Finish: Slide cutting and point cutting, worked curl by curl
Bangs (optional): No
Back / nape: The back cut shorter than the sides
Pro Tip
Work on damp hair, fresh out of the shower. Rake Olaplex No. 6 Bond Smoother Leave-In Styling Cream through the mid-lengths and ends in sections so every curl gets some, then cup each section in your palm and squeeze upward toward your scalp a few times. That upward squeeze settles each curl into its own coil. Then leave it until it's bone dry and don't touch it in between. Every time you touch drying hair you break the curl apart, and that broken-up curl is frizz.
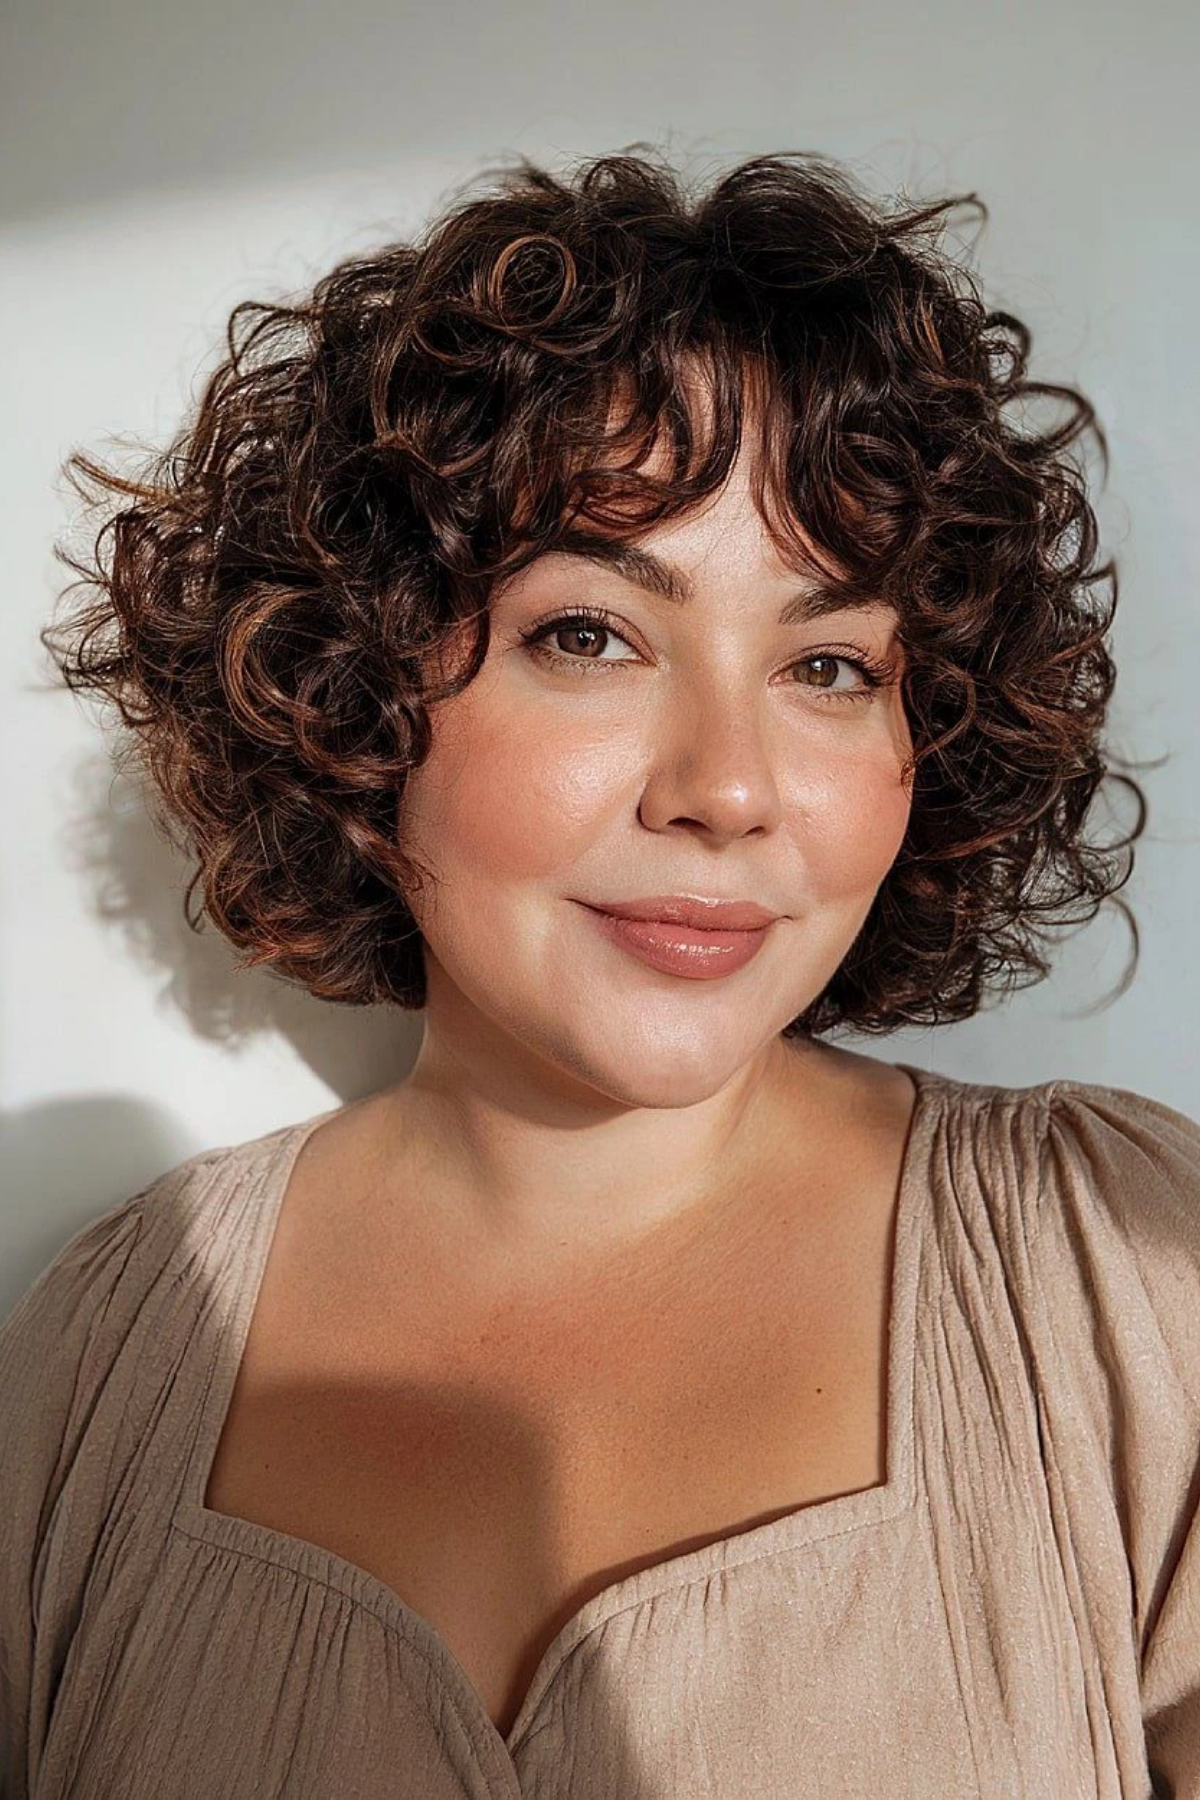
The Dry-Cut Curly Bob
Most bobs are measured wet and cut wet. This one isn't. It's cut dry, curl by curl, at a length that accounts for how far the pattern draws up once it's released, because curly hair shrinks a lot, and a curly bob measured wet is not the bob that shows up the next morning. Cutting it dry means your stylist can see exactly where each curl sits as they go.
Source: Pinterest
Best Suited For: Curly hair of any density, and particularly anyone who's come out of a salon two or three inches shorter than they asked for. You're not scared of short hair. You just don't trust anyone to judge how far your curl is going to draw up. It also suits you if you've never had a dry cut and keep ending up with a shape that looks right in the chair and wrong by the time you get home.
What to Ask Your Stylist:
Length: At the chin when dry, which means cutting two to three inches longer than that
Layers: Shaped to your curl pattern rather than to one uniform guide
Finish: Cut dry, curl by curl
Bangs (optional): No
Pro Tip
Day two is a repair job. You don't start over. Work out which side you slept on, because that's the side that's gone flat, and mist plain water through that side only until it's damp enough to move. Then smooth a pea of Olaplex No. 6 Bond Smoother Leave-In Styling Cream over just those curls and leave them to dry. You'll know it worked when both sides sit at the same height. Rewashing the whole head to fix one side is how you spend an hour on a ten-minute problem.
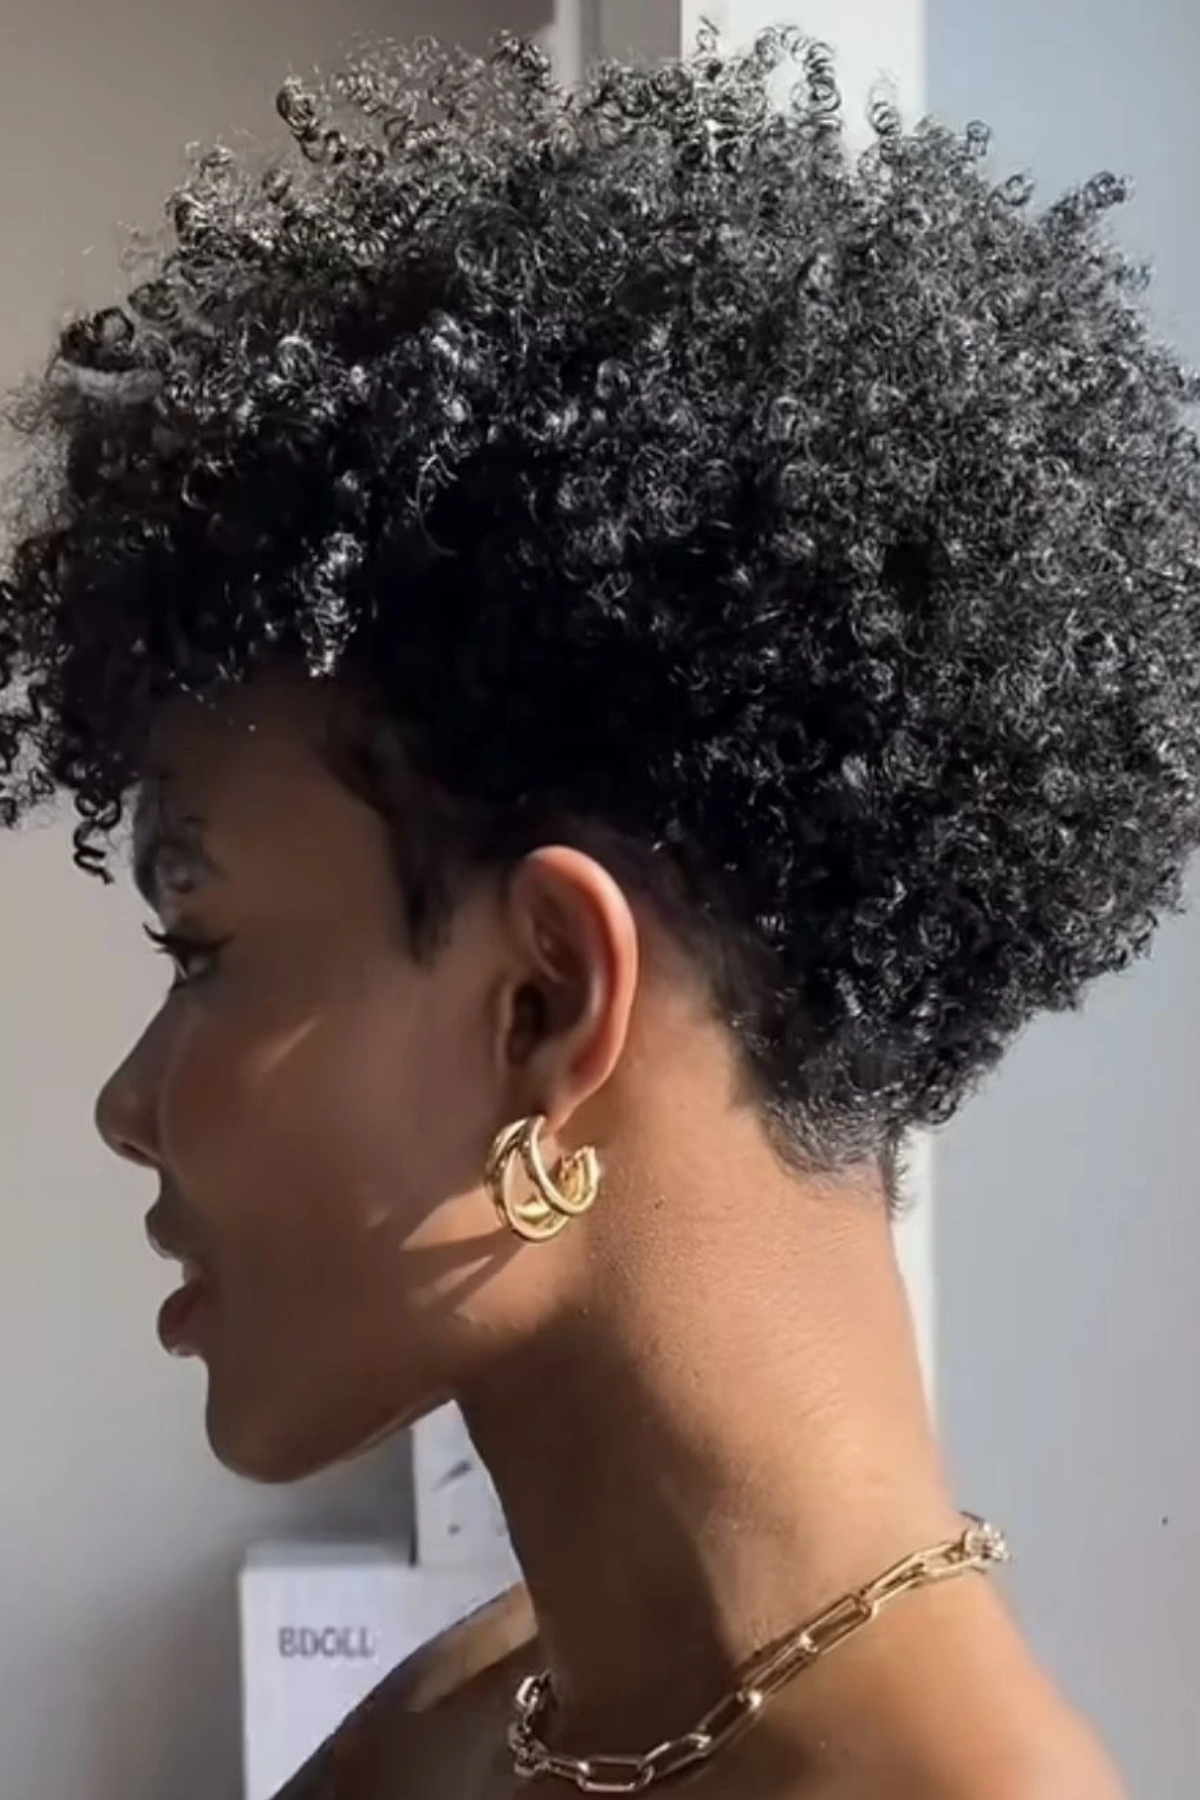
The Tapered Coily Cut
The sides and the nape are cut in tight while the crown keeps its length. Pulling the width in at the bottom sends all the volume you've got upward, so your height sits where you can see it. The taper is cut as a gradient, which means it fades so gradually you can't see where one length stops and the next starts, rather than dropping to a visible line or shelf.
Source: Pinterest
Best Suited For: Coily and tightly curly hair. You wear it natural most days and blow it out for occasions, and you need one cut that holds up both ways. A lot of curly cuts look uneven once you blow them out and wear them straight, so if you go back and forth, that versatility has to be built in at the cut.
What to Ask Your Stylist:
Length: Height kept at the crown, sides and nape tapered
Layers: A gradient through the taper, fading with no visible line where the lengths change
Finish: Shaped dry
Bangs (optional): No
Back / nape: Ask for the nape to be taken in tight and faded up, because half this cut is the back
Pro Tip
On damp hair, work Vegamour UPLIFT Volumizing Styling Foam from your roots through the crown only, then comb it through so it's spread evenly. Leave the sides alone, since the volume belongs on top where you've kept the length. Then diffuse on a low speed with your head tipped forward until the crown is dry. Keep the speed low. High airflow pushes coils apart and you lose the definition you just built in.
Straight Hair
The Italian Bob
It sits right at the chin, built on clean, structured lines with minimal to no layering. Get that structure right, and it's a great bob. Get it wrong, and it's a flat, boring one. Sitting at the chin rather than dropping to the shoulder is what keeps the lines defined and the whole thing looking sleek.

Source: Pinterest
Best Suited For: Medium to fine density straight hair, and a preference for polished over lived-in. Those densities hold this cut much more easily. The Italian bob is the wrong call for someone with really thick, dense hair. I'd avoid it there unless we're doing heavy thinning and texturizing throughout to break up the weight. Even then you're back in the chair on the same schedule as any other thick short cut, just to keep the shape.
What to Ask Your Stylist:
Length: Right at the chin
Layers: Minimal to none
Finish: Sharp, clean lines
Bangs (optional): No
Pro Tip
Spray amika The Shield Anti-Humidity Spray over damp hair and dry it completely. Then take one-inch sections and run the BaBylissPRO Nano Titanium Ultra-Thin Hair Straightener down each one, gliding from roots to ends in a single smooth motion without stopping. One pass per section, and resist going back over a piece that didn't come out perfectly. Second passes are where shine turns into damage, and on a cut this sharp you see it at the ends first.
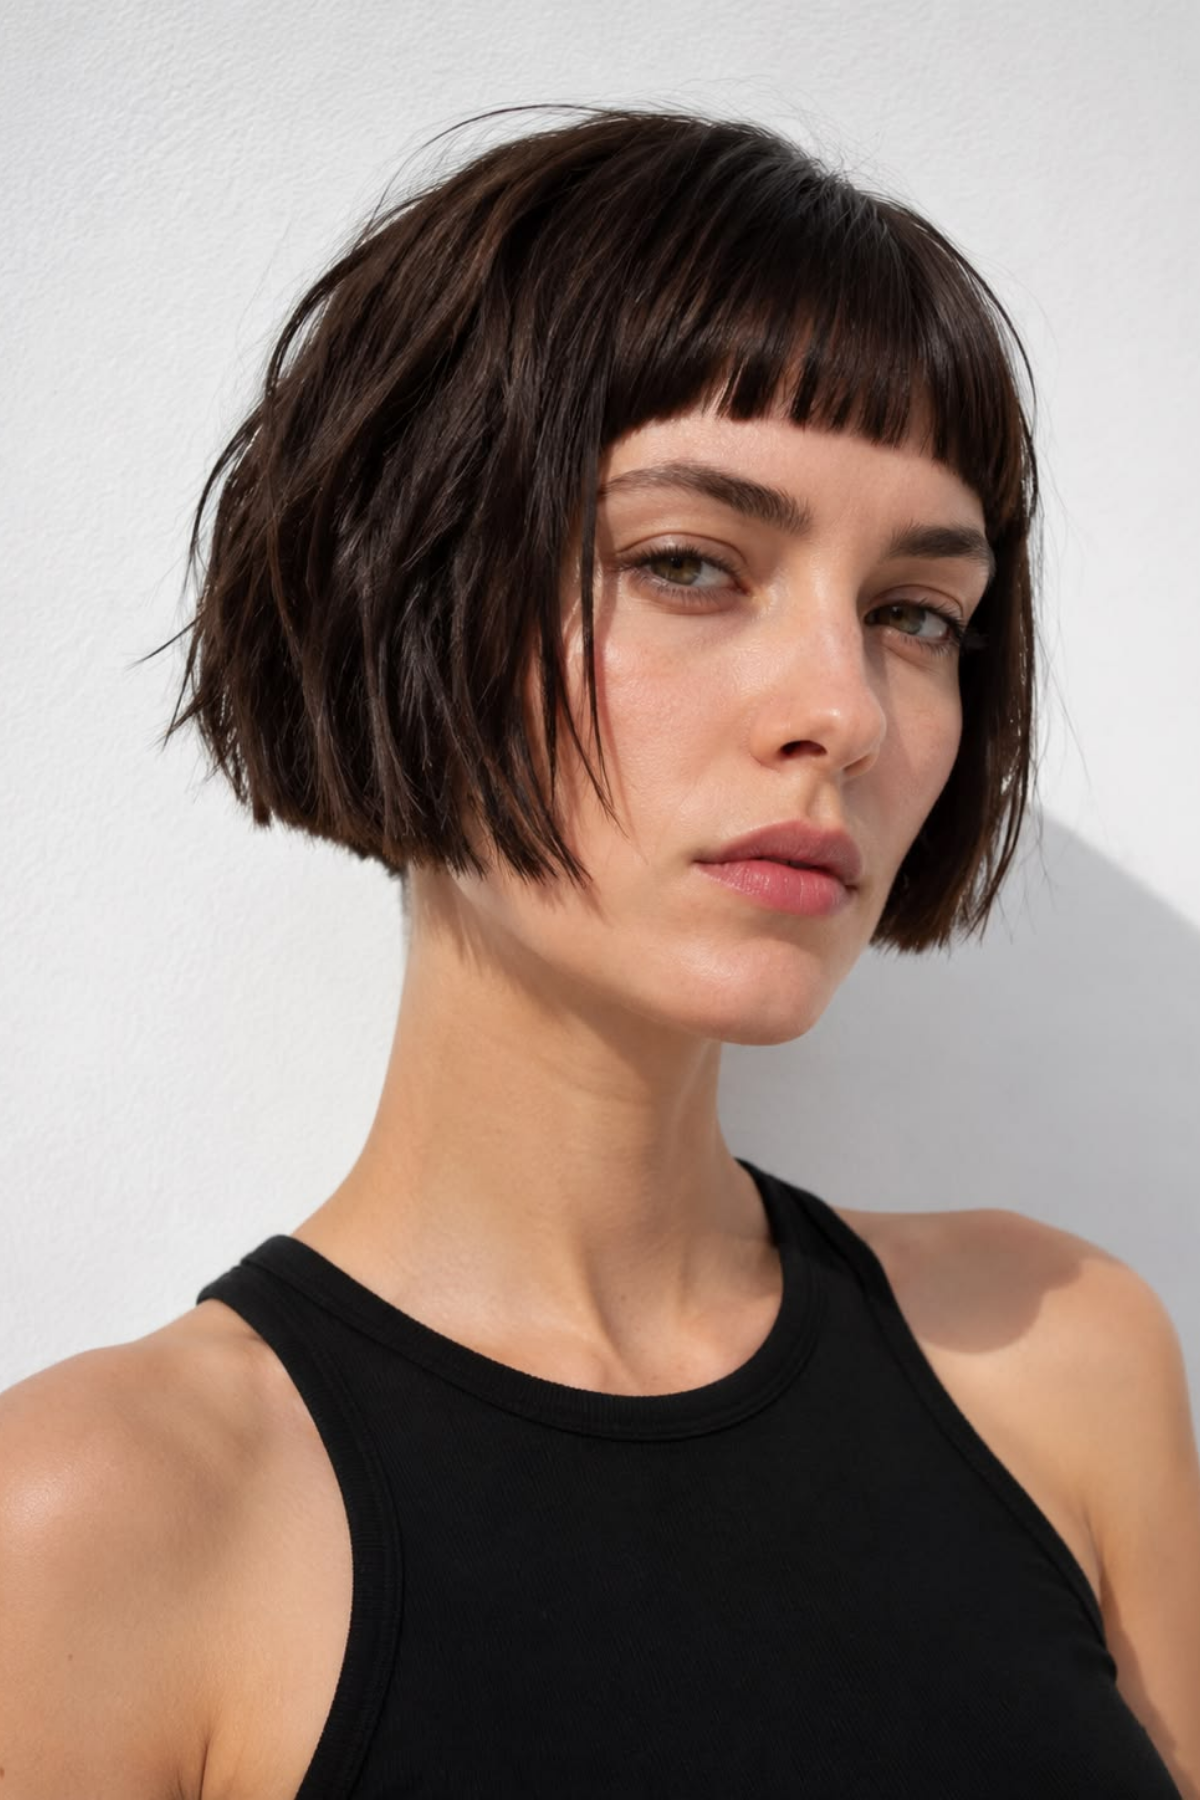
The Micro Bob with Baby Bangs
Two blunt lines, one above the jaw and one well above the brow, each framing the other. That's the whole cut. Both edges are cut sharp, and that sharpness is the whole look. The fringe grows out faster than the length does, so the front needs attention long before the rest of it.
Source: Pinterest
Best Suited For: Straight, medium density hair. This is the highest-commitment shape here, and you have to want that going in. A full bang, or a very short one, means styling it every single day, plus trims as often as your hair needs them. You also have to accept there'll be days where you style it and it still doesn't sit right.
What to Ask Your Stylist:
Length: Above the jaw
Layers: None
Finish: Blunt
Bangs (optional): Baby bangs, sometimes called micro bangs, well above the brow, cut to work with any cowlick rather than against it
Back / nape: Ask for the back line to be as clean as the fringe, because a blunt bob shows a soft back immediately
Pro Tip
Dampen only the fringe, and skip product entirely. Point the dryer at it and move it side to side with your fingers as it dries, rather than pulling it straight down. Dry it straight down and a blunt fringe tends to split and separate in the middle, and then you're fighting that all day. Moving it side to side is what gets it lying flat across. That's your whole daily commitment and it takes about two minutes.
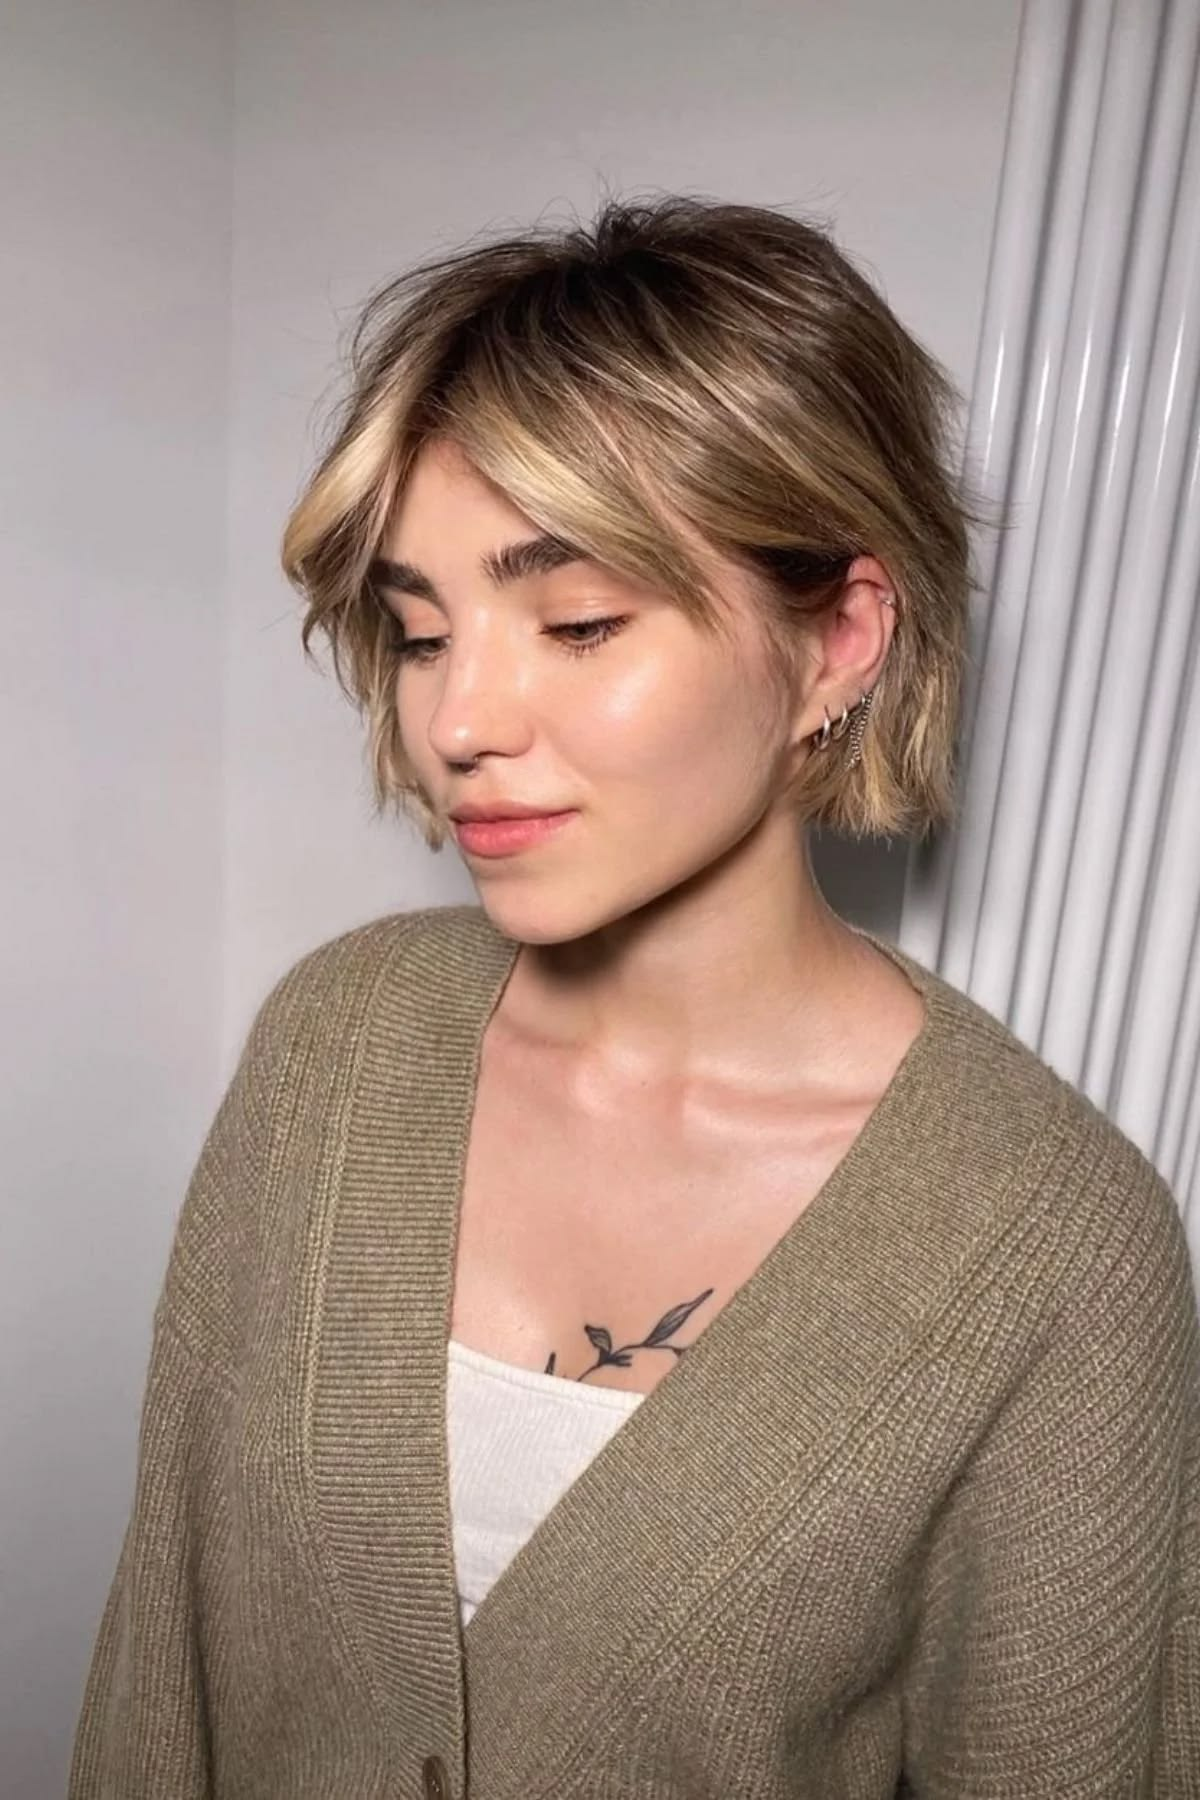
The Grown-Out Pixie with Face-Framing Pieces
This is the stage a pixie passes through on its way back, and most people end up here without asking for it. Cut it on purpose, and it stops looking like a stage you're stuck in and starts looking like a haircut. Face-framing pieces get cut into the front so the length that would otherwise sit flat against your cheek has a shape, the corners around the ear get softened so they stop flicking out, and the nape gets cleaned up.
Source: Pinterest
Best Suited For: Any texture and any density, because this one is decided by where you are in the grow-out. Specifically it's for the person about four months into growing out a pixie, at the stage where it's too long to be a pixie and too short to be a bob and she's close to panic-cutting back. If your hair is fine you'll feel the awkward stage most, since there's less weight to pull the length down into a shape.
What to Ask Your Stylist:
Length: Leave it, shape it
Layers: Face-framing at the front only
Finish: Soften the corners around the ear so they stop winging out
Bangs (optional): Blend the front into a long curtain
Back / nape: Ask for the nape to be cleaned up
Pro Tip
Warm a fingertip of Design.Me Hold.Me Styling Stick between your fingers, then draw it down your front sections from the cheekbone to the ends. Tuck one side behind your ear while the product is still tacky. That holds the awkward length flat against your head, and without it the front wings out by the middle of the afternoon, which is the specific thing that makes a grow-out feel unwearable.
Hat Hair: Why a Stylist Says Wear Earmuffs, Not a Beanie

Source: Pinterest
When someone sits in my chair worried a beanie is going to wreck a fresh short haircut, I tell her to swap it for earmuffs. They keep the shape of the cut, and they don't flatten it. Your ears stay warm, and your hair still looks good.
A beanie sits directly on your crown, and on a short cut that's exactly where the shape lives. Wear one out for a walk and the height you built that morning is gone. It's the same thing that happens overnight, when a bob flips out at the back from how you've been lying on it. Steady pressure in one spot for long enough, and the hair takes that shape.
Earmuffs sit on the sides of your head and barely touch the top at all. You get the warmth without the flattening.
The other winter annoyance is static, and that one you fix with product. Warm two or three drops of Olaplex No.7 Bonding Oil between your palms and smooth it over your mid-lengths and ends before you head out. It weighs the flyaways down just enough to stop them lifting in dry indoor air.
The Awkward Stage When a Short Cut Grows Out
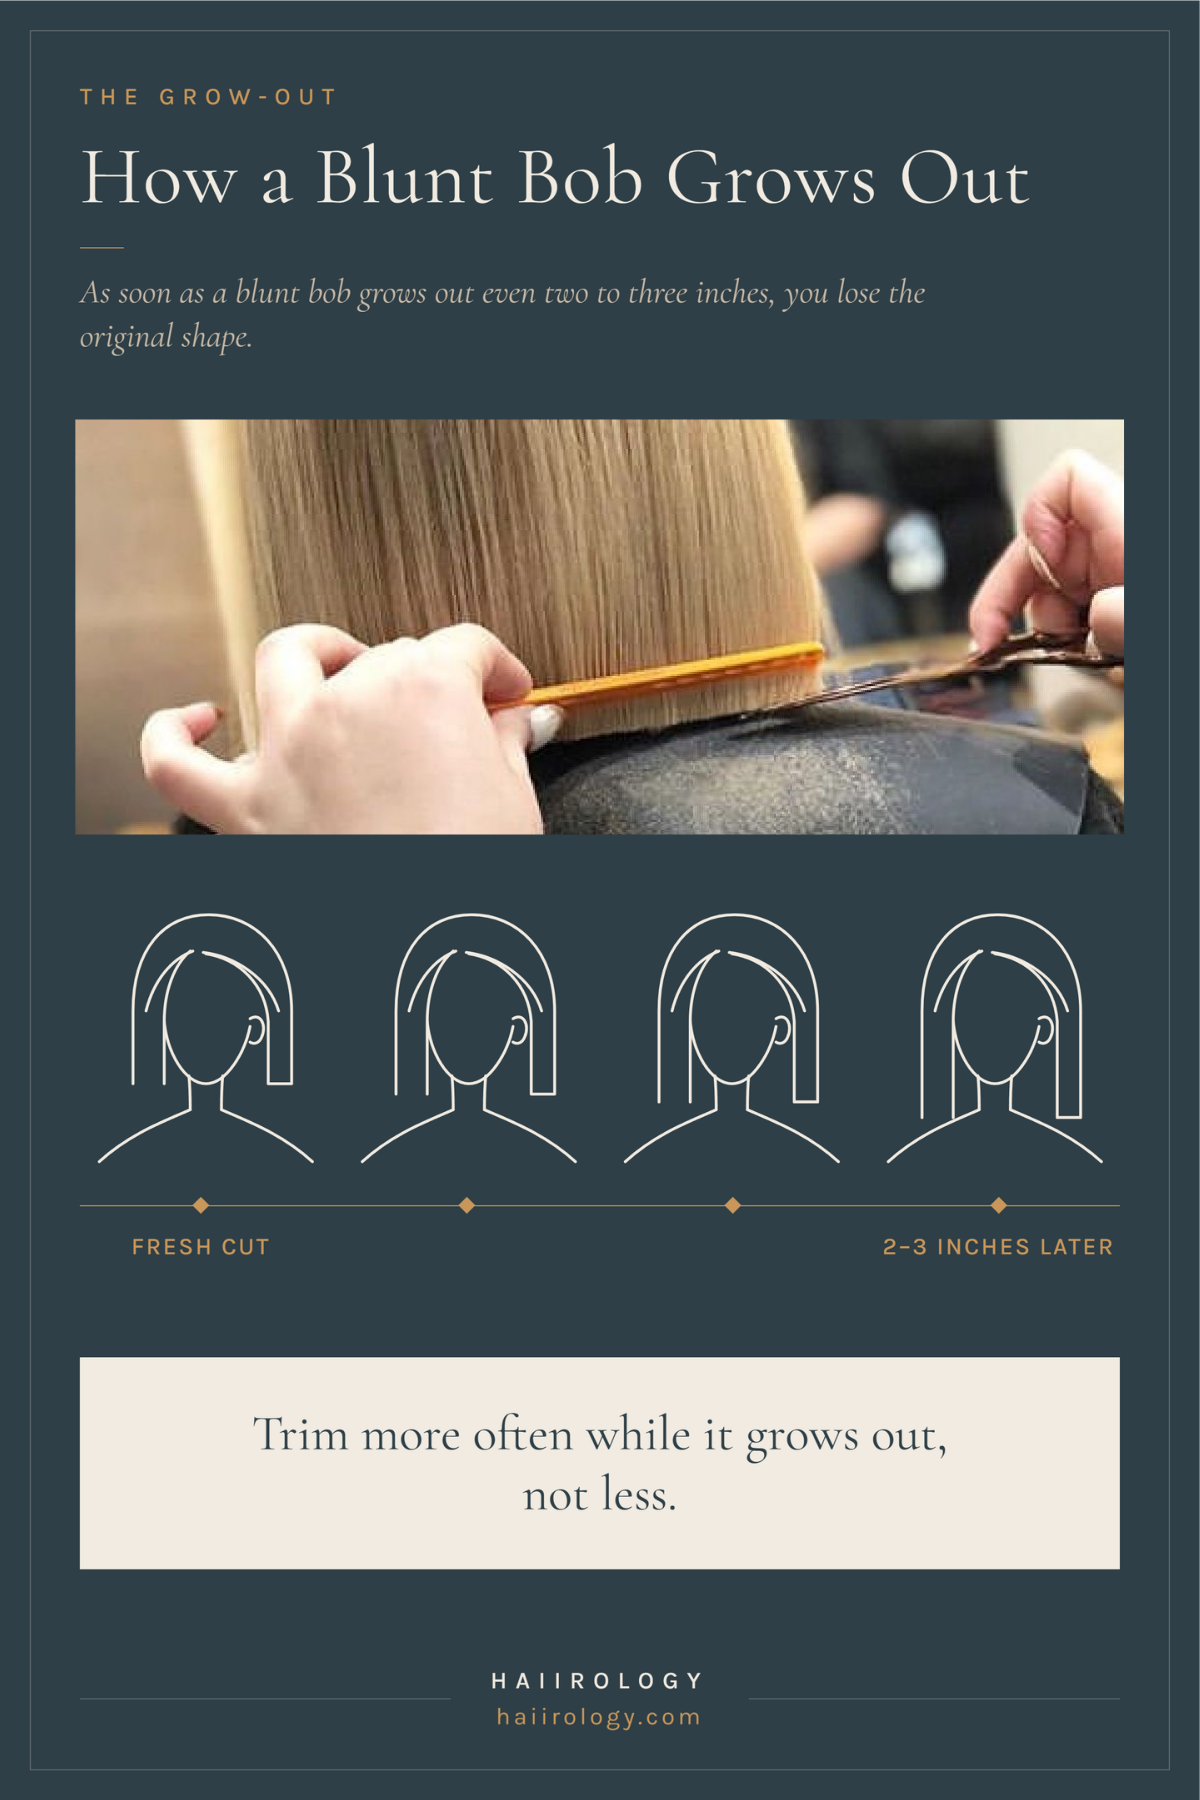
Every short cut goes through a stretch where the back flicks out, and the length sits between two shapes. Before I greenlight short hair on anyone, I make sure she's okay with that grow-out phase. Knowing it's coming is the difference between riding it out and panic-cutting.
Watch the bottom edge. As soon as a blunt bob grows out even two to three inches, the original shape is gone. That isn't damage, and it isn't a bad haircut; it's the line dropping past the point the shape was built for. What gets you through it is trimming more often, which feels backwards when you're trying to grow it out. A clean-up every couple of months keeps the shape readable while the length catches up.
Keeping Your Short Winter Haircut Sharp
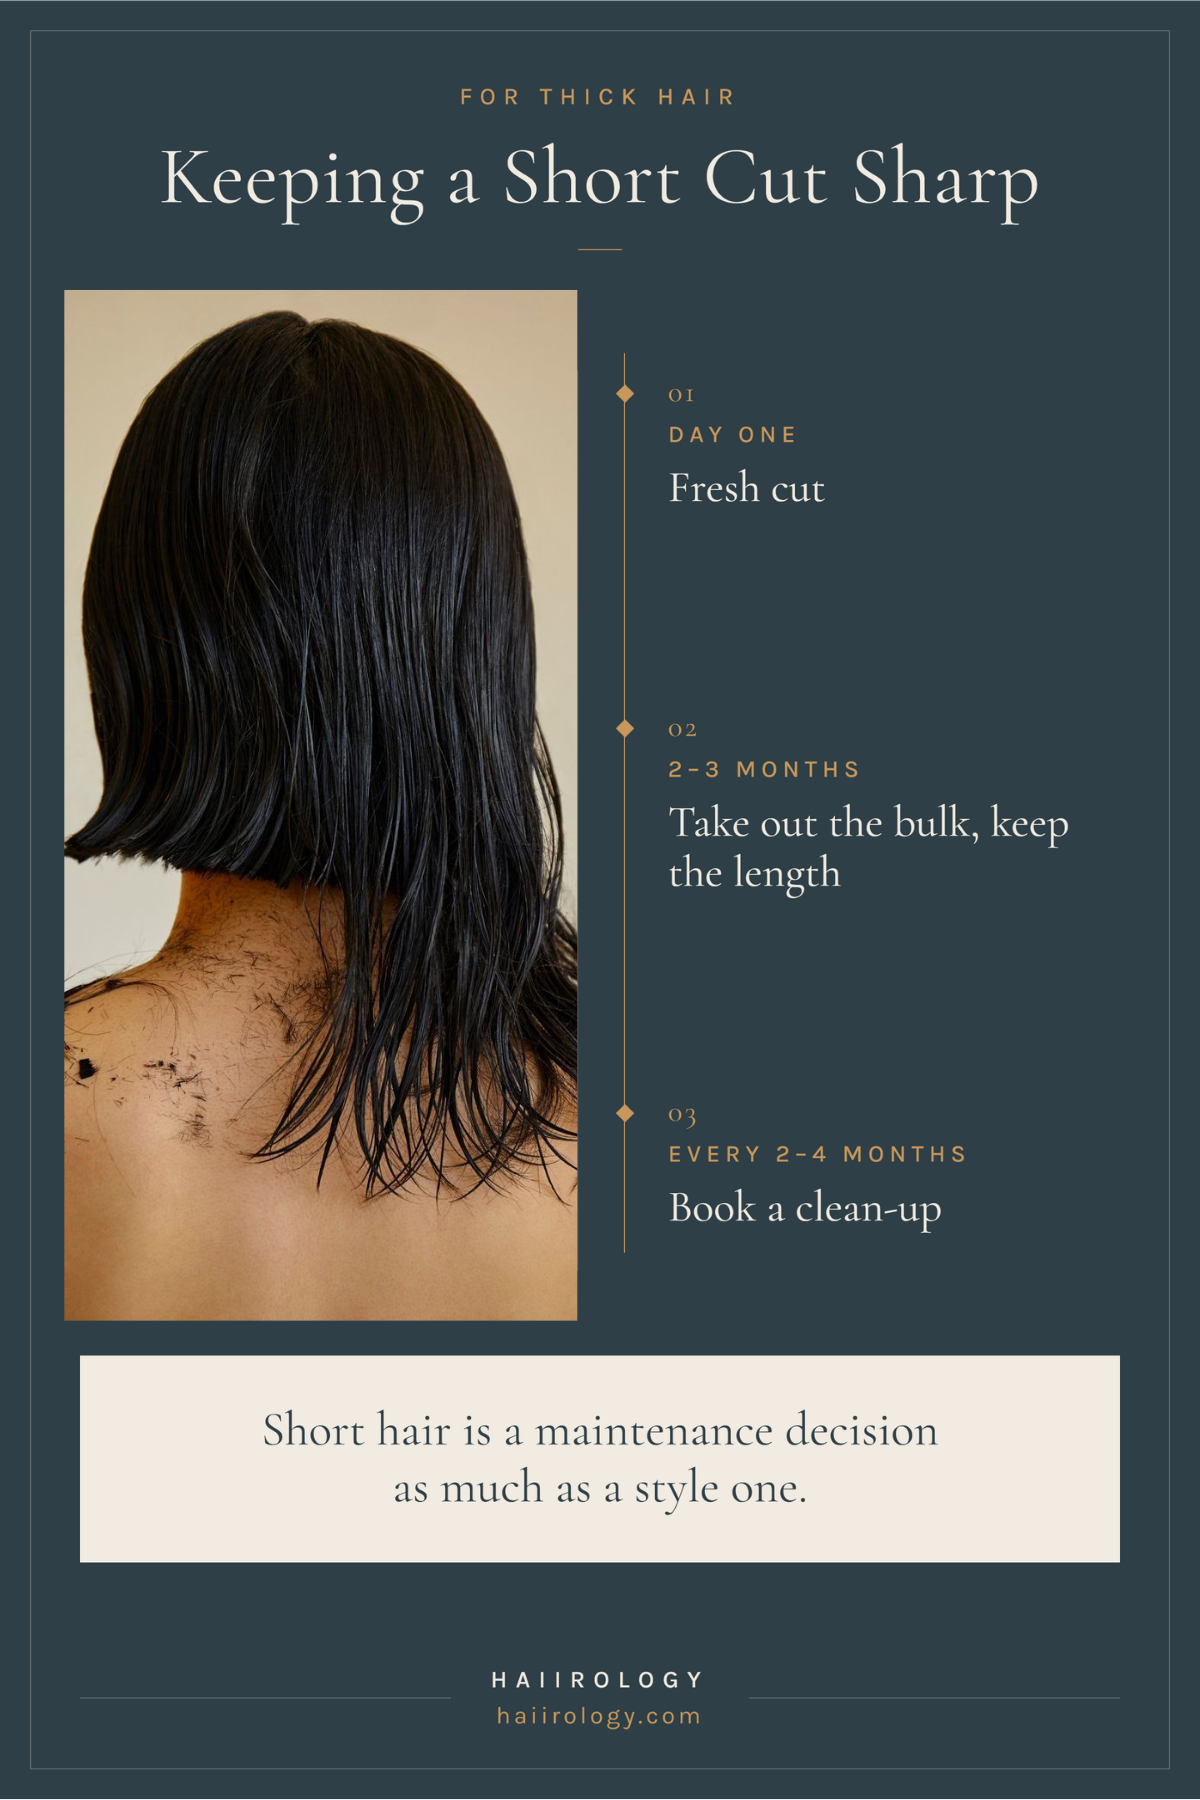
A short cut is a maintenance decision as much as a style one. Your shape is doing all the work, so when the shape goes, there's no length to hide behind. That's the trade you're making, and it's worth knowing the real upkeep before you sit down rather than three months in.
Trims. For thick hair, come in every two to four months and just ask for a clean-up. At the two or three month mark, that might mean only removing bulk without touching the length at all, just re-layering a little to take out the excess weight.
How often you'll be styling. More than you expect. A short style doesn't last as long between washes, and it's not easy to throw it up in a clip or a bun when it's greasy, because the pieces fall straight back out. Most of the time you end up washing and restyling instead.
The day between washes. Shake K18 AirWash Dry Shampoo for five seconds, hold it four to six inches from your scalp, and give each section one spray.
Resetting your part. Flip your part to the opposite side while your hair is still slightly damp and leave it there while it dries, then flip it back. Hair dries lying in whichever direction you set it. So if it dries pointing the wrong way, the roots have to stand up to get back to where you want them, and standing up is the lift you were after.
Winter dryness. Indoor heating pulls moisture out of your hair the same way it does your skin, so your ends look duller in January than they did in June. Same oil, same move as the static fix above, just aimed at the bottom two inches.
Which Short Winter Haircut Should You Start With?
| Your hair | Start with | Why it works for you |
|---|---|---|
| Fine or thin | The Blunt Chin Bob · The Textured Pixie with a Longer Top · The Stacked Bob with a Graduated Nape · The Flippy Bob with a C-Curl Finish | The fullness comes from the shape itself, though how much styling each one needs still varies, so read the block before you pick |
| Thick or dense | The Jaw-Length Bob with Internal Layers · The Bixie · The Short Shag with a Heavy Fringe · The U-Cut Short Layered Bob | The weight comes out from inside, so your hair stops spreading at the sides without the bottom edge going thin |
| Wavy | The Wob · The Ear-Length Crop with a Soft Perimeter · The Short Wavy Shag with a Curtain Fringe | Shaped so your wave has somewhere to go, and in the Wob's case cut long on purpose so it springs up to the length you asked for |
| Curly or coily | The Curly Crop with Shaped Corners · The Dry-Cut Curly Bob · The Tapered Coily Cut | Cut to your own curl pattern, and shaped at the sides so your hair doesn't widen into a shelf at the bottom |
| Straight | The Italian Bob · The Micro Bob with Baby Bangs · The Grown-Out Pixie with Face-Framing Pieces | Every line shows on straight hair, so these get their shape from clean edges rather than from texture |
Everything I Used in This Post
| Product | Best For | Where to Buy |
|---|---|---|
| Product Hairitage Magic Spell Texturizing Spray | Best For Grit and separation on any hair type, fine through coarse | Where to Buy Shop |
| Product Vegamour UPLIFT Volumizing Styling Foam | Best For Root lift and body on fine, flat hair | Where to Buy Shop |
| Product K18 AstroLift Reparative Volume Spray | Best For Volume on fine hair that's also been through color or heat | Where to Buy Shop |
| Product amika The Shield Anti-Humidity Spray | Best For Heat protection plus frizz control, fine through thick | Where to Buy Shop |
| Product Color Wow Dream Coat Supernatural Spray | Best For Smooth, glassy results on any texture, straight through curly | Where to Buy Shop |
| Product Olaplex No.7 Bonding Oil | Best For Frizz, flyaways and dull ends on any hair type | Where to Buy Shop |
| Product Olaplex No. 6 Bond Smoother Leave-In Styling Cream | Best For Smoothing and definition on frizz-prone, curly or coarse hair | Where to Buy Shop |
| Product Design.Me Hold.Me Styling Stick | Best For Separating front pieces and flattening flyaways without stiffness | Where to Buy Shop |
| Product TRESemmé Keratin Smooth Weightless Finishing Hairspray | Best For Flexible hold that stays brushable all day | Where to Buy Shop |
| Product K18 AirWash Dry Shampoo | Best For The day between washes | Where to Buy Shop |
| Product BaBylissPRO Nano Titanium Ultra-Thin Hair Straightener | Best For Getting a blunt cut properly smooth, with plates thin enough to work close to the root | Where to Buy Shop |
| Product CONAIR INFINITIPRO Rose Gold Titanium 1-Inch Curling Iron | Best For Bends and waves on short lengths | Where to Buy Shop |
| Product Olivia Garden Ceramic 1" Round Brush | Best For Blow-drying short hair with a turn at the ends | Where to Buy Shop |
| Product Kitsch Self-Grip (Velcro) Hair Rollers | Best For Setting crown volume without another hot tool | Where to Buy Shop |
FAQs: Short Winter Haircuts
What are the trendiest short winter haircuts?
Bobs, and not just one kind. Blunt chin bobs, stacked bobs, U-cut shapes and Italian bobs, with the pixie and bixie family alongside them and the short shag holding steady. But the shape that's trending matters far less than whether it's been cut for your density. The same bob behaves completely differently on fine hair than on thick, because on fine hair the blunt bottom edge is doing the work, and on thick hair the weight has to come out of the inside first. Pick the construction that solves your problem and the trend takes care of itself.
How are short haircuts being cut differently now?
A few things have shifted. Bottom edges are sharper, and the line at the bottom of a cut is now treated as the feature. Weight comes out from inside the cut, which keeps the outline full while the bulk comes down. A fringe is its own decision now, so you can commit to one without committing to the other. And on curly hair I cut dry, curl by curl, because measuring wet is how people end up two or three inches shorter than they asked for.
What haircut makes an older woman look younger?
Structure and face-framing do this, not one particular cut. It's the question I get most from women over 60, and the answer isn't a named cut. When I'm working on your face-framing, I ask what you actually want to enhance. Whether you want your face to look a little narrower, or more open, or slightly longer. Then I tailor the pieces at the front to that instead of reaching for one standard shape. A short cut with a clean bottom edge looks polished, because you can see the shape was cut to a line. Face shape plays into it too, and where you want the eye to land is the part worth thinking about before you book.
What is the most low maintenance short haircut?
The cuts that are genuinely low maintenance have no layers, or long ones, and either no bangs at all or a long curtain fringe at most. The real test is whether it still looks fine on a day you don't style it. If the answer is no, it isn't a low-maintenance cut regardless of how short it is. A cut with lots of shorter layers through the front or a short bang is high maintenance, because you'll be styling it constantly and you have to learn how to style it first. If you want a specific shape to ask for, an ear-length crop with a softened bottom edge is the one that survives a day you ignore it.
Will a short haircut survive a winter hat?
Not well, and the fix isn't a better beanie. I tell clients to swap the beanie for earmuffs, because earmuffs warm your ears without pressing down on the one part of your head a short cut depends on. Your ears stay warm and the shape holds.
Final Word from Haiirology
You already know how your mornings go better than any photo does, so pick the cut that fits them. What the seventeen short winter haircuts above give you is the words for it.
Go back to your hair type, read the What to Ask list, and take those exact lines into your appointment with you. Showing a photo gets you someone's interpretation of a photo. Asking for a jaw-length perimeter with internal layers gets you the haircut. And winter really is the season to do it. Your coat collar and every turtleneck you own are about to do half the work for you.
If you want to settle the face-shape question first, the Haircut Guide takes you through it. Then come find me on Instagram and show me what you went with.
Free Haircut Guide
Find Your Perfect Haircut for Your Face Shape
Take the guesswork out of your next haircut and find the styles that flatter your face shape before you sit in the salon chair.
- ✓ Identify your face shape
- ✓ Get personalized haircut ideas
- ✓ Learn what to ask your stylist for
No spam, just great hair advice!
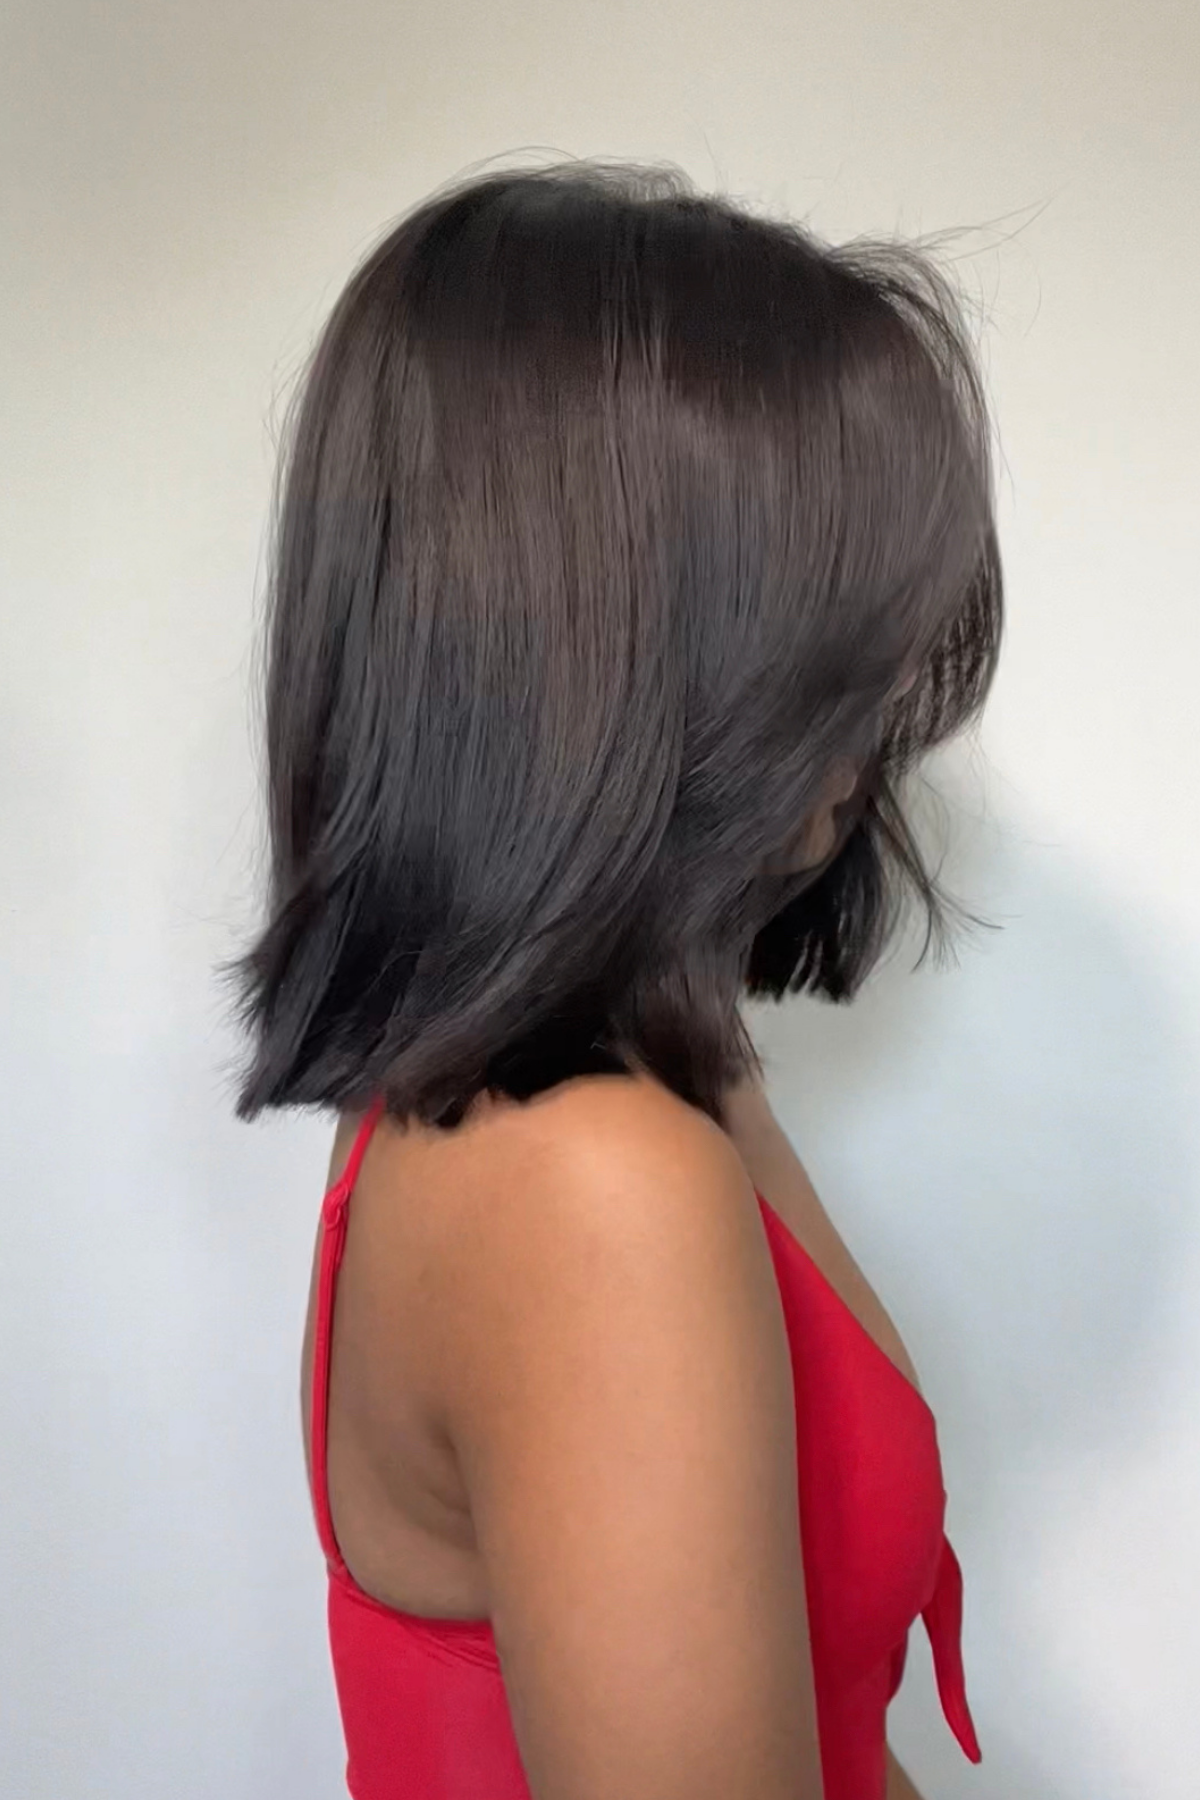
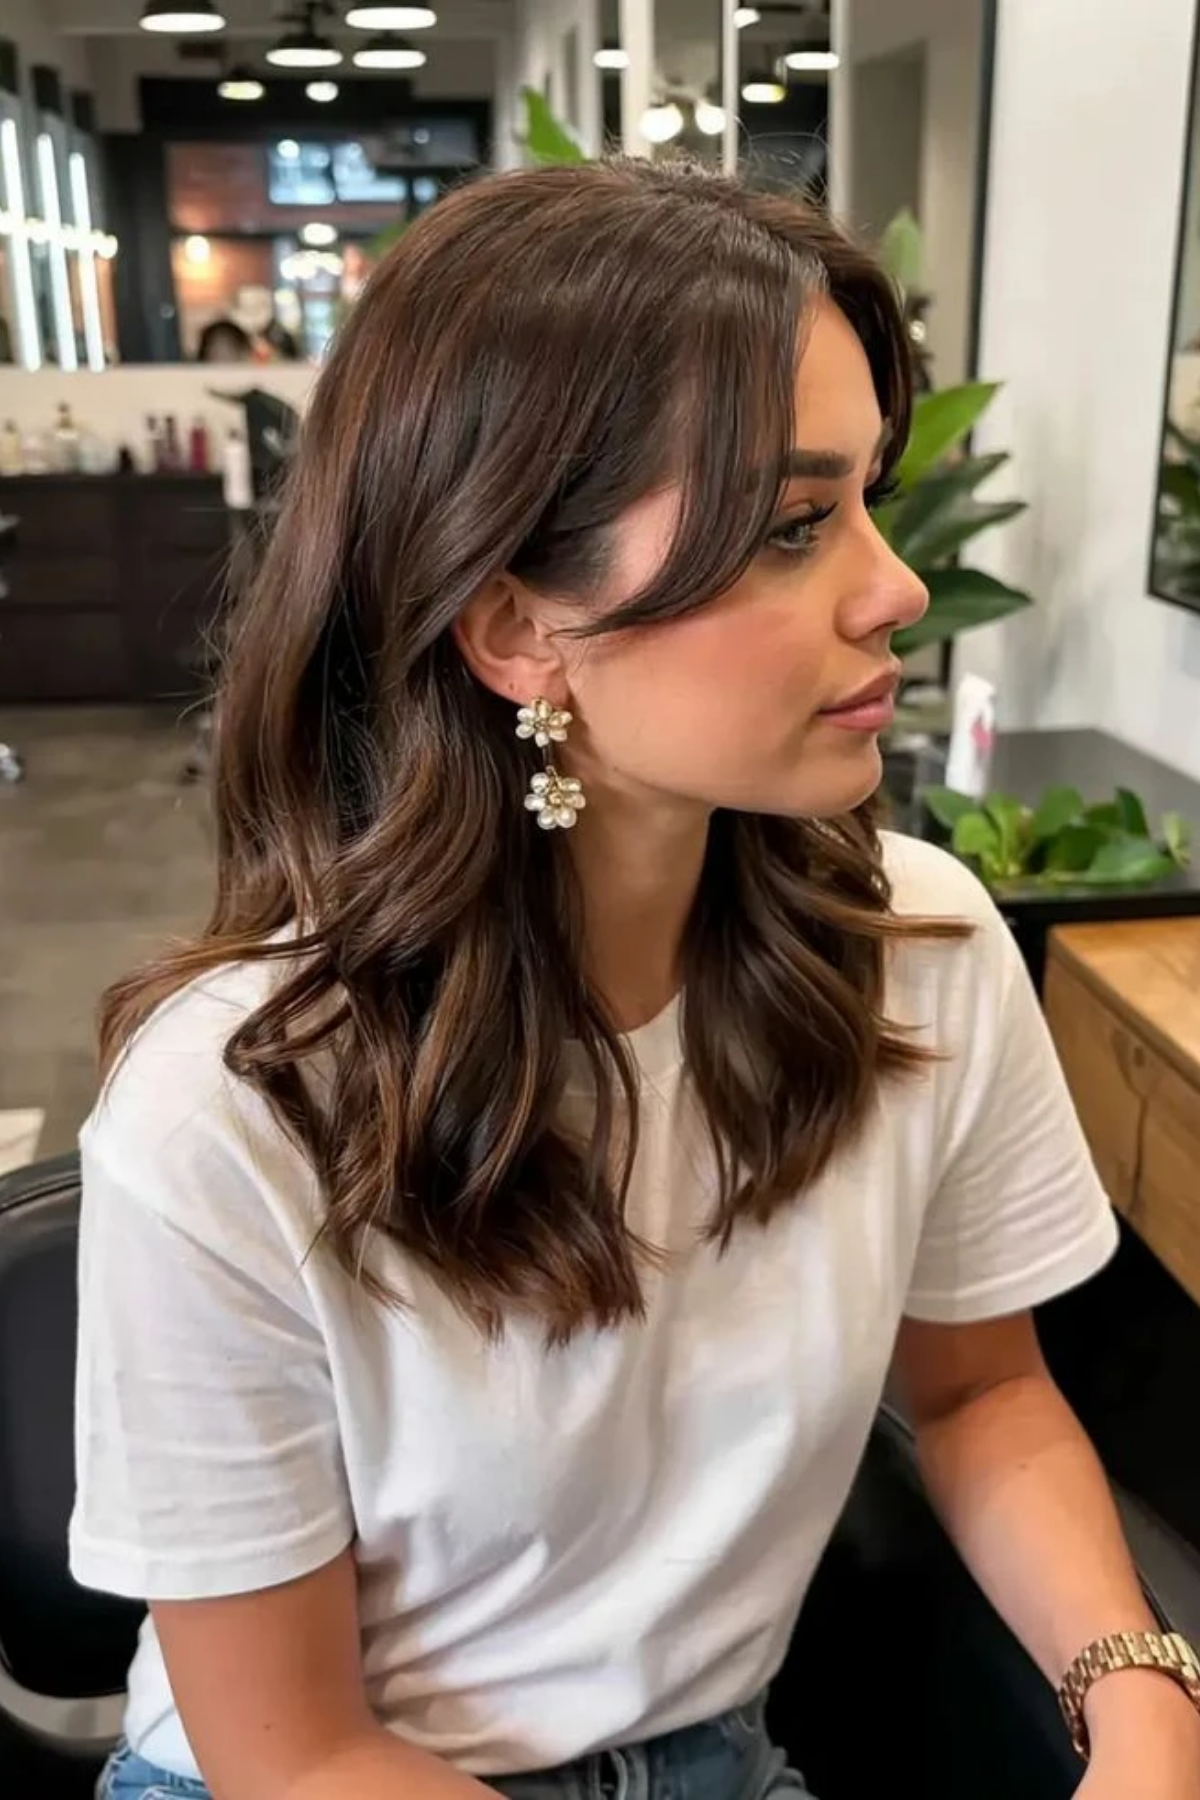

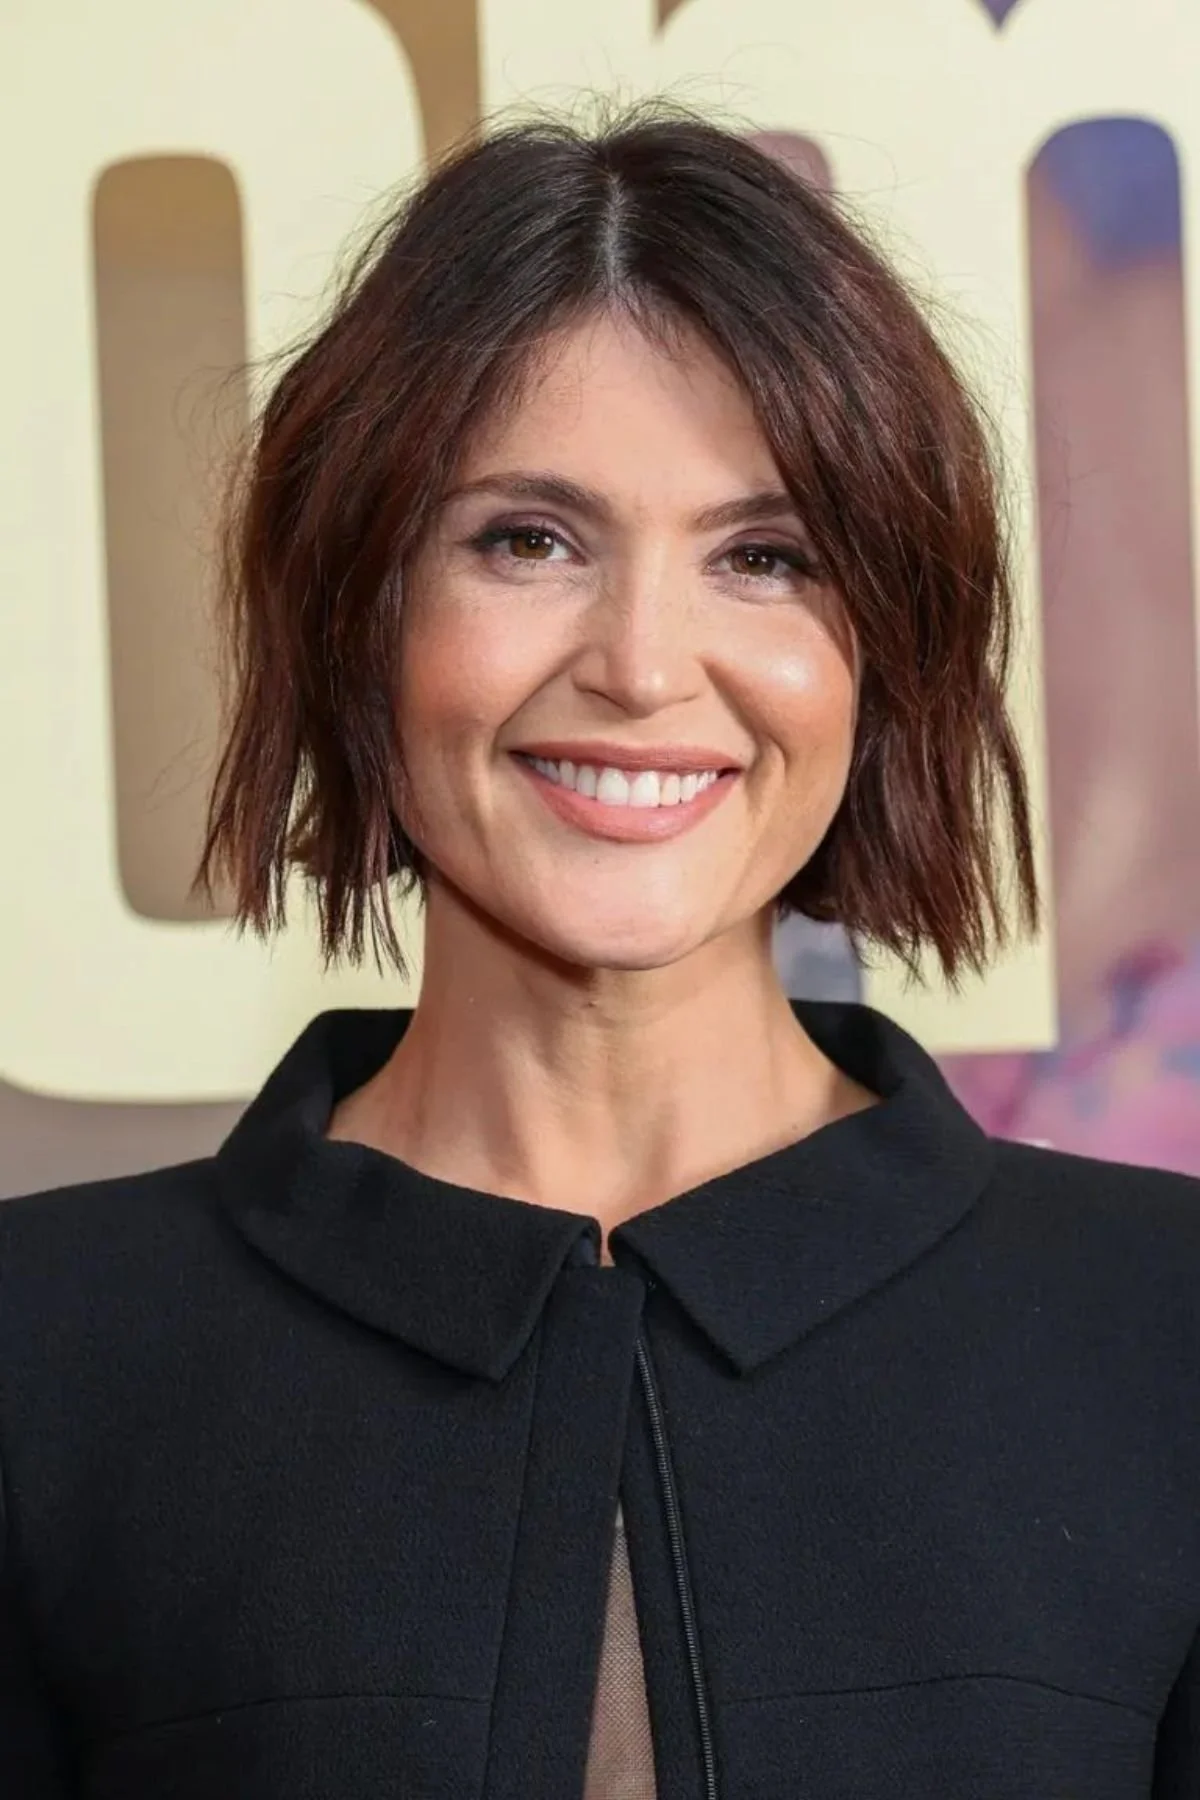
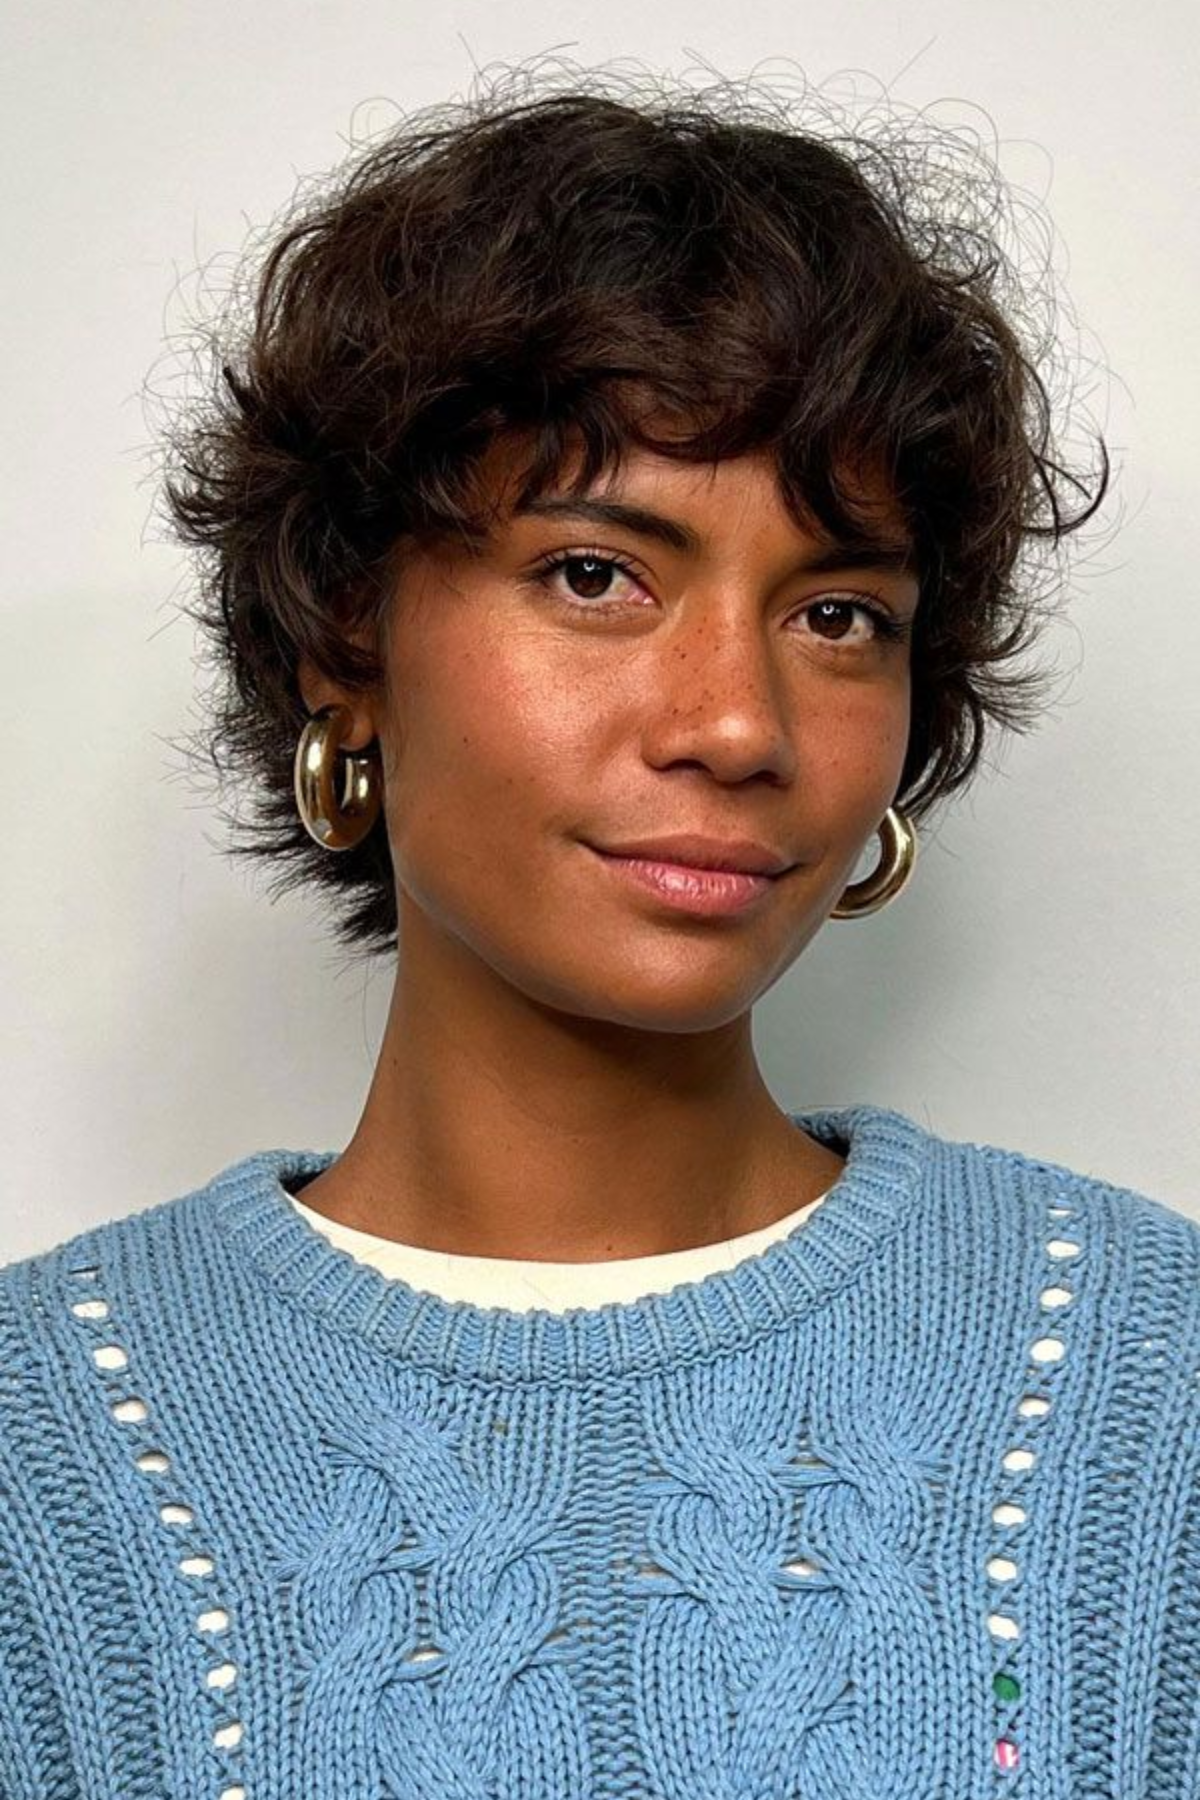




These 17 short winter haircuts are cut to make hair look fuller, sorted by whether yours is fine, thick, wavy, curly or straight. A stylist's picks.