How to Curl Your Hair with a Curling Iron for Beginners — No Clamp Skills Required
This post may contain affiliate links, which means I'll receive a commission if you purchase through the link at no extra cost to you. Please read the full disclosure here.
TL;DR
If you’ve ever wondered how to curl your hair with a curling iron and felt completely lost, this guide walks you through everything step by step. From choosing the right curling iron and prepping your hair properly to mastering both clamp and no-clamp techniques, this post covers it all. I also break down how to curl for your specific hair type (fine, thick, wavy, short), troubleshoot why your curls will not stay, and show you exactly how to make them last. There is even a video demo so you can curl along with me. Whether you are a total beginner or just tired of curls falling flat, this is the curling iron tutorial that makes sense and actually works.
Curling your hair with a curling iron shouldn’t feel like defusing a bomb. But if you’ve ever tried to wrangle a clamp or ended up with weird creases instead of waves, you’re not alone. I’ve watched clients stare at a curling iron like it might bite.
And hey, I’ve even seen seasoned pros struggle when they’re using the wrong tool or technique for the look they’re going for.
The very first time I taught a client how to use a curling iron, she was holding it upside down and clamping from the ends upward, classic rookie move.
But that moment stuck with me.
Because once I broke it down step-by-step, her face lit up. “That’s it? That’s all I had to do?”
Yep. That’s all. The problem isn’t you, but it’s that most tutorials assume you already know what you’re doing.
If you’ve been Googling how to curl your hair with a curling iron and still end up frustrated, I’ve got you.
In this post, I’ll walk you through the entire process from choosing a beginner-friendly tool to mastering both clamp and clamp-less techniques, plus pro tips that make curls actually last. Whether you’ve got thick hair, fine strands, short layers, or long mermaid lengths, I’ll help you create effortless, beachy waves that look advanced but aren’t.
Let’s start with why this all feels so confusing in the first place.
Why Curling Hair with a Curling Iron Feels Complicated
If curling your hair feels like a chore, it’s not because you’re “bad” at styling but because no one ever showed you how to do it properly.
Most tutorials skip over the small stuff that actually matters: how to hold the tool, which direction to curl, what size barrel to use, or even how long to hold the iron on your hair. And let’s not even talk about clamps. Those little metal jaws seem to sabotage beginners at every turn.
Add in the fact that different hair types react totally differently to heat, and it’s no wonder people give up. I’ve seen thick hair that won’t curl no matter how hot the tool is, and fine hair that fries after five seconds too long.
Then you’ve got the overwhelming range of tools, curling wands, clamp irons, auto-rotating barrels, and most don’t come with instructions that speak in real-life terms.
That’s why this post breaks down everything in stylist terms, not tech manual gibberish, so you can finally feel confident holding that iron.
Next up: let’s choose the right curling iron for you.
Choose the Right Curling Iron (Without Getting Overwhelmed)
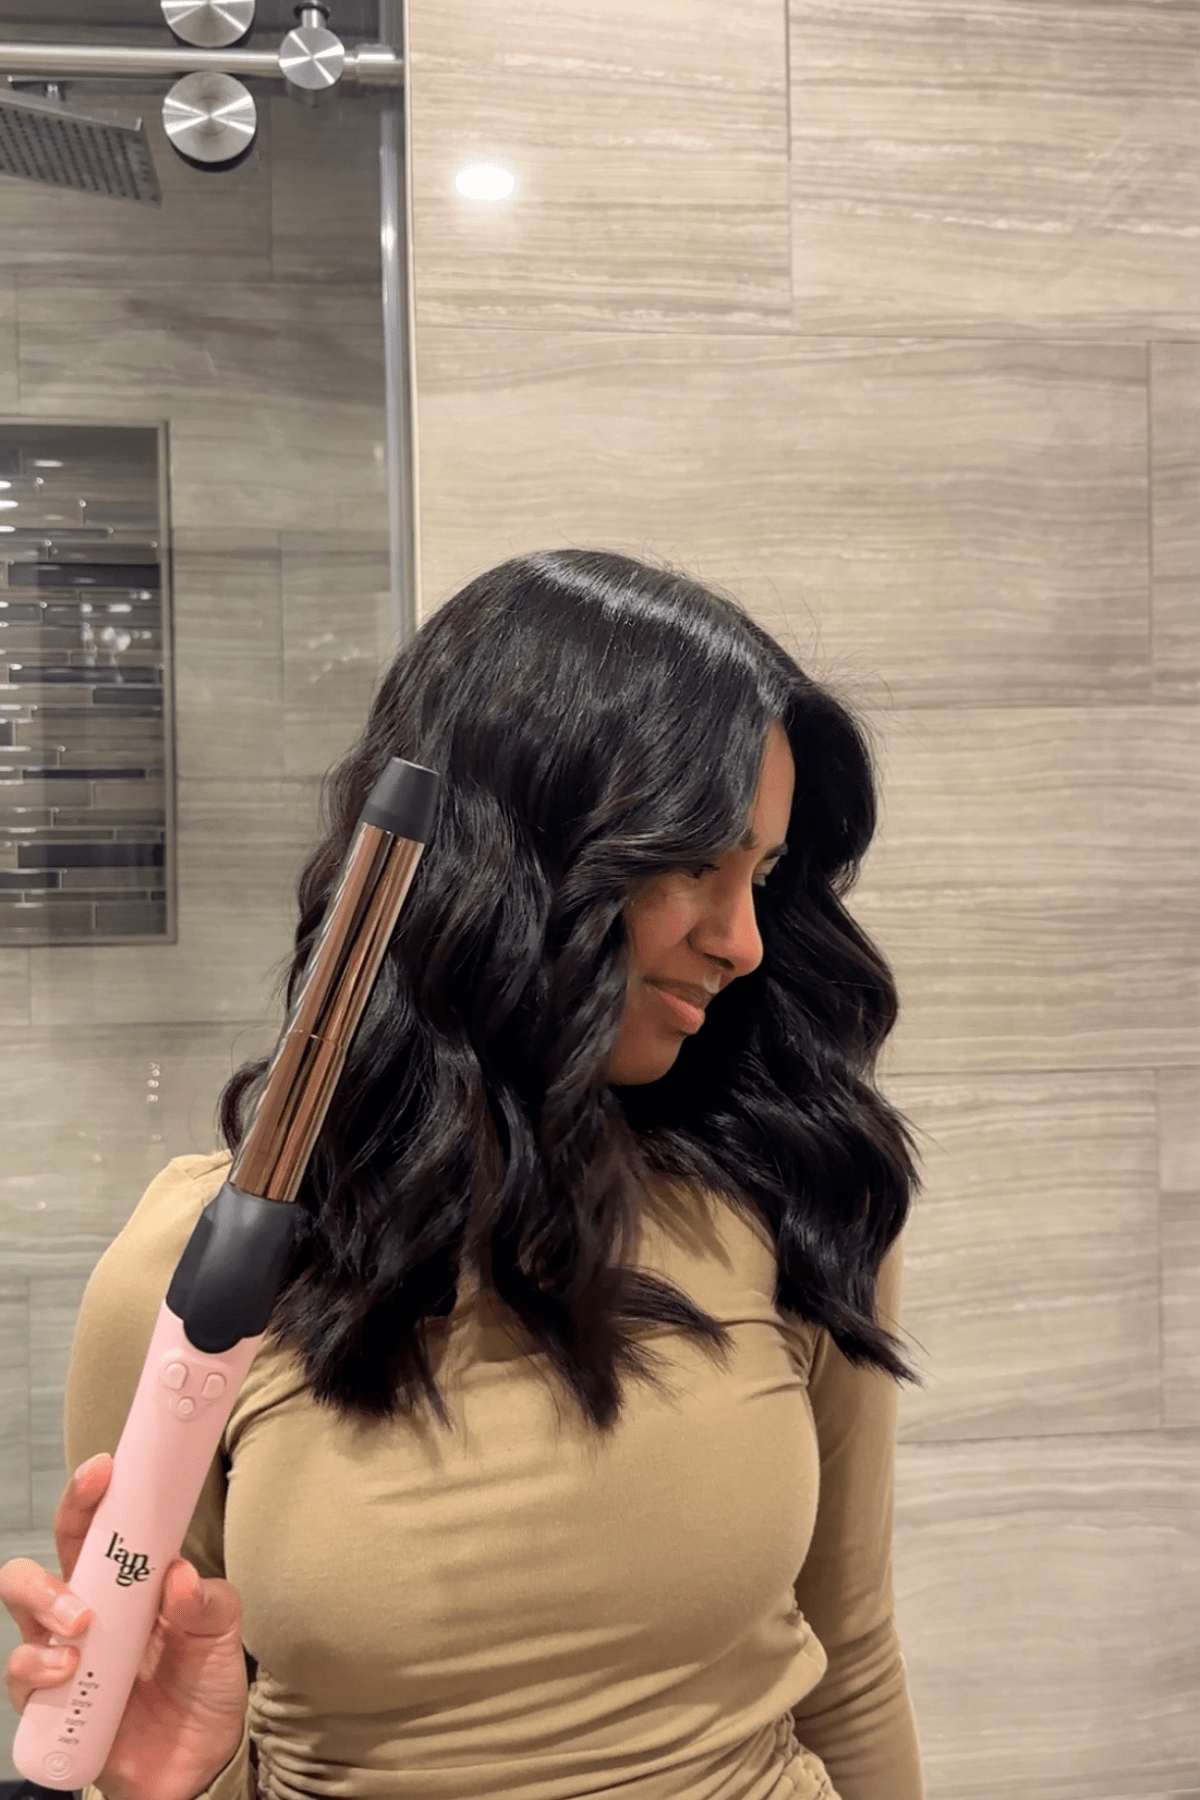
Source: Personal Image
Wandering down the hair tools aisle or scrolling Amazon for “best curling iron,” you’ve probably felt that decision fatigue hit. Clamp or wand? 1-inch or 1.25? Ceramic or titanium? It’s a lot.
So here’s what I tell every beginner: start with a classic 1-inch curling iron with a spring clamp and a ceramic barrel.
It’s the most versatile size for beachy waves, polished curls, or volume, and the clamp gives you control while you learn. Ceramic distributes heat evenly (so you’re less likely to burn your hair) and works well on most hair types.
Now, let’s talk clamp vs. clamp-less:
Clamp curling irons give you precision and hold the hair in place. Perfect if you’re new to curling and still figuring out hand positioning.
Wand-style irons (aka clamp-less) are great for looser waves and faster styling, but they require a bit more dexterity and definitely a heat glove if you’re not used to them.
Prepare Your Hair for Curling That Lasts
Long-lasting curls start before you even turn on your curling iron. If you’re curling dirty, damp, or unprepped hair… you’re setting yourself up for flat, limp waves that fall out in an hour (no matter how good your iron is).
Always Start with Dry Hair
Let’s get this out of the way first: never curl damp hair. I can’t say this enough.
Curling wet or even slightly damp hair can cause serious heat damage and it just doesn’t hold the shape. Use a blow dryer or air dry completely before you start curling. If you're short on time, give your roots a blast with the dryer to be safe.
Here’s Your Pre-Curl Checklist:
| Product Name | Why I Recommend It | Where to Buy |
|---|---|---|
| Heat Protectant Spray | This is non-negotiable. I like lightweight sprays that protect without weighing the hair down. | Buy Here |
| Volumizing Mousse (Optional) | Especially for fine or straight hair. It gives grip, so curls hold longer. | Buy Here |
| Sectioning Clips | To divide your hair into manageable layers (top, middle, bottom). | Buy Here |
| Texture Spray (for thick or slippery hair) | Adds a bit of grit to help curls “catch” better. | Buy Here |
Prep According to Your Hair Type:
Fine Hair: Use mousse at the roots and a medium-hold setting spray. Keep the heat below 325°F.
Thick Hair: Use a stronger hold spray and curl smaller sections to help heat distribute evenly.
Wavy Hair: Skip the mousse, just prep with heat protectant and texture spray for bounce and hold.
Short Hair: Focus prep on the mid-lengths and ends. A smaller barrel will give you more control.
Curl Your Hair With a Rotating Curling Iron (with Clamp)

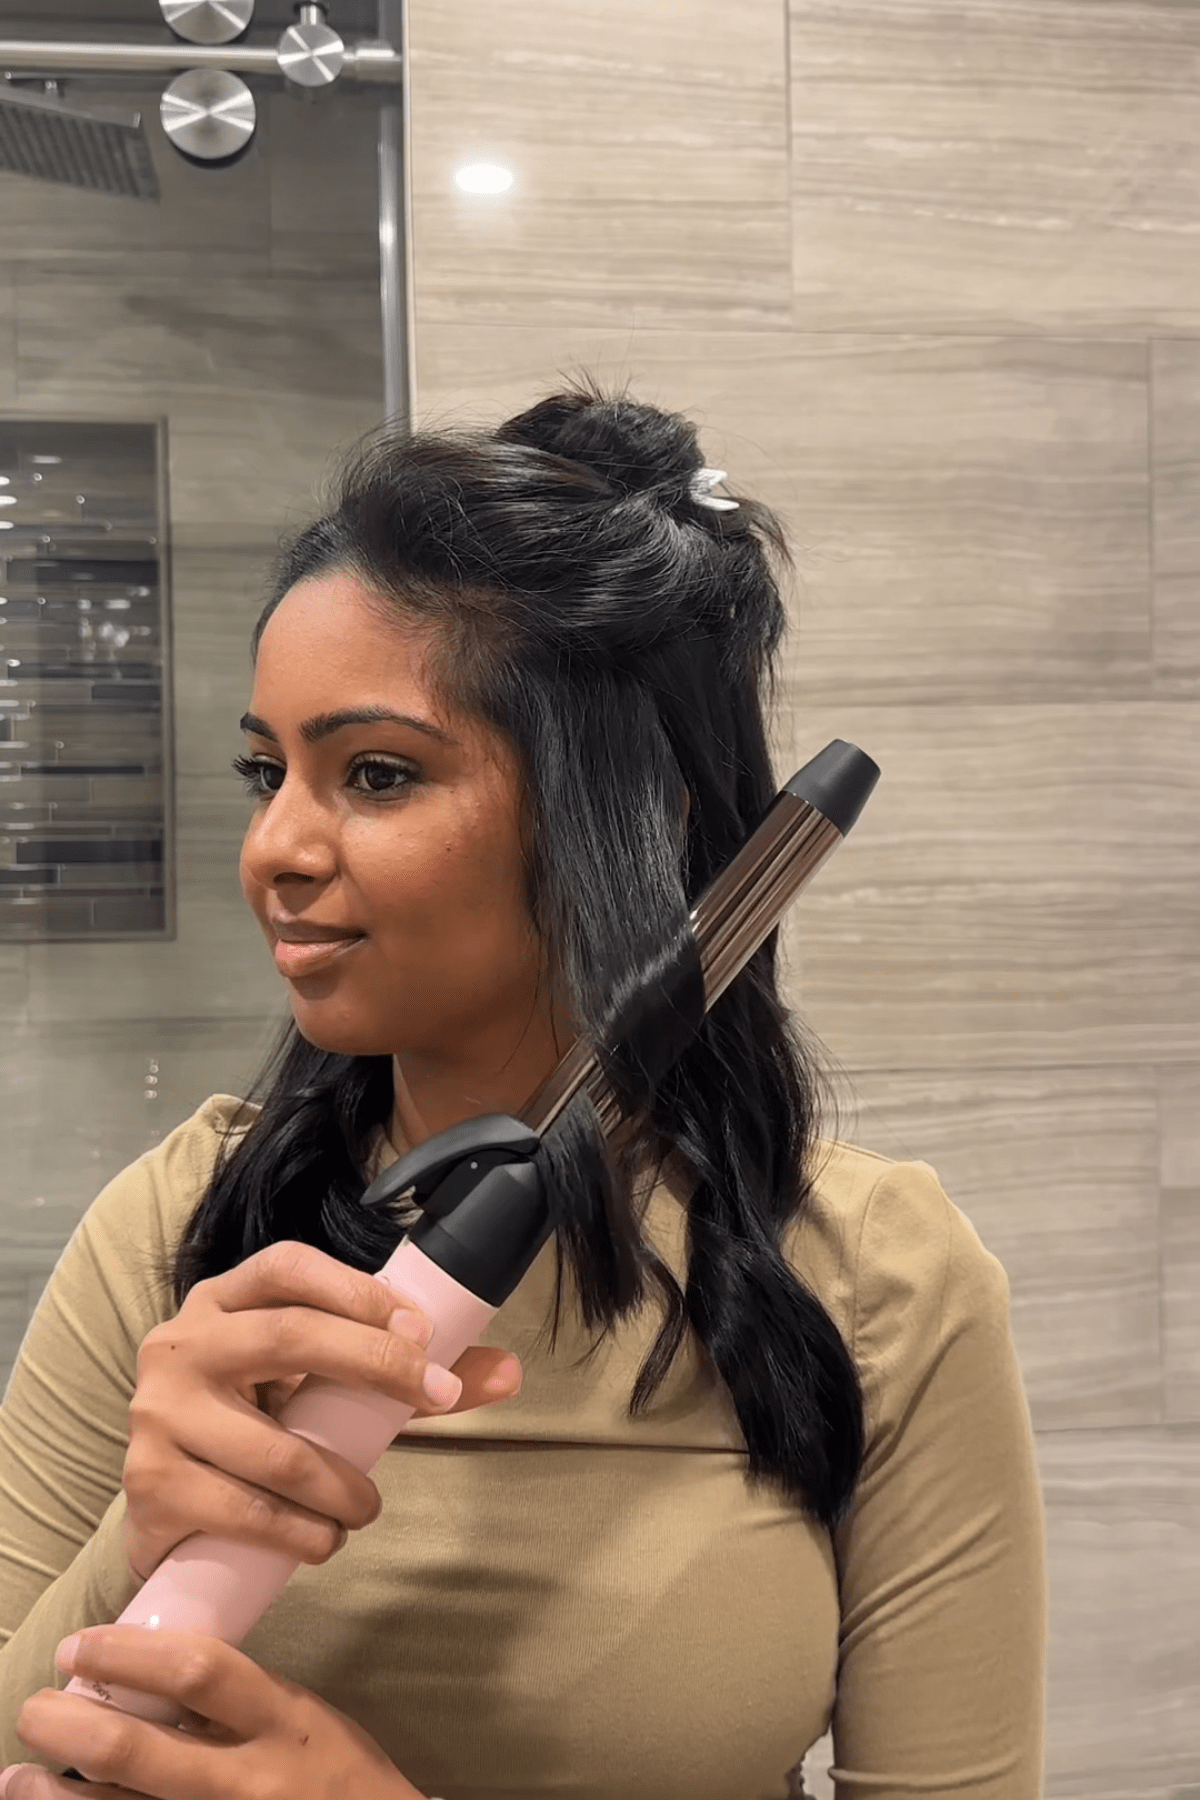
Source: Personal Image
If you're brand new to curling, using a curling iron with a clamp can feel like trying to pat your head and rub your stomach at the same time. But once you get the technique down, it's actually the most beginner-friendly way to create long-lasting curls with minimal hand strain if you're using a rotating barrel (yes, some tools do the turning for you).
Who It’s For
This method is perfect for absolute beginners with medium to long hair. The clamp holds your hair in place so you don’t need to worry about tension or wrapping technique.
Why It Works
The clamp gives structure and control. A rotating barrel helps you achieve consistent curls with even tension, which is key for lasting shape and a smooth finish.
Step-by-Step Process (Clamp + Rotating Iron)
Turn on your curling iron and set the right temperature.
For fine or color-treated hair, stay in the 300–325°F range. Thick or coarse hair can handle 375–400°F. Let it fully heat up before you start, don’t rush this. A properly heated tool gives smoother, longer-lasting curls.Section your hair into layers.
Start by splitting your hair into three horizontal sections: bottom, middle, and top. Clip up everything but the bottom layer. Working in sections keeps things organized and helps you avoid reheating the same hair over and over.Take a 1-inch section of hair.
Not too thick, as thicker sections won’t heat evenly. Comb through it once to smooth out any tangles before you curl.Hold the curling iron vertically with the clamp facing forward.
This part trips up a lot of beginners. “Forward” means the clamp should face the mirror, not your cheek. This positioning helps you wrap the hair away from your face more naturally.
👉 Read my guide on Curl Hair Towards Face vs Away for the secret to choosing the perfect curl direction for your vibe!
Open the clamp and place your hair mid-shaft (not at the ends).
Gently close the clamp so the barrel holds your hair; don’t clamp too tightly. You want it secure but not creasing. Starting in the middle gives you more control and less damage.Press the rotate button (or twist manually) to roll the iron toward your roots.
As the iron wraps your hair, keep the tool vertical and let it rotate until the curl reaches your root or stopping point. If you’re using a non-rotating iron, gently twist the iron while feeding the hair in.Hold for 5–10 seconds.
Fine hair? Aim for 5–7 seconds. Thick hair? You can go up to 10. Watch the steam; it’s normal, but if you smell burning, release immediately.Open the clamp and gently slide the iron out, don’t yank.
Then, catch the curl in your palm and hold it there for 5 seconds. This lets the shape set as it cools. If you drop it right away, the heat escapes before the curl has “memorized” the shape.Repeat all around your head, alternating directions.
On the right side, curl away from your face (clockwise); on the left side, go counterclockwise. This gives you that tousled, effortless finish instead of pageant hair.
Pro Tips
- Alternate curl directions (left, right, left, right) for a more natural, textured look.
- Always curl away from your face on the front sections for a softer, flattering frame.
| Curling Iron Tips, Tools & Styling Guides |
|---|
| Whether you’re choosing the right barrel, styling long hair, or learning to use specialty irons, these guides will help you curl with confidence: Explore these step-by-step tutorials and product picks to achieve effortless waves and long-lasting curls every time. |
Curl Your Hair With a Curling Iron (Without Using the Clamp)
Not a fan of clamps? This clamp-free method turns your regular curling iron into a wand (no new tool needed).
Who It’s For
Perfect for anyone who finds clamps awkward or wants that undone, relaxed wave look. Works beautifully on medium to long hair but great for layers, too.
Why It Works
You’re manually wrapping the hair, which gives you more freedom to control the wave pattern and keep the ends looser (key for beachy texture). Since there’s no clamping, you also avoid creases and get a smoother finish.
Step-by-Step Process (Clamp-Free Technique)
Turn on your curling iron and let it fully heat up.
Set the temp based on your hair type: lower for fine hair, higher for thicker strands. Even though you’re skipping the clamp, you still need a heat protectant; it’s non-negotiable.Hold the curling iron vertically with the clamp closed (facing forward).
Treat it like a wand. You won’t be opening or using the clamp, you’re just using the heated barrel.
👉 Ready to get short hair curls that hold? Check my guide on Using a Wand to Curl Short Hair for the full step-by-step method and pro hacks!
Grab a 1-inch section of hair and smooth it out with your fingers or a comb.
Always detangle before heat. If your hair has natural wave or texture, don’t brush it out completely, but just keep it smooth enough to wrap easily.Wrap the hair around the barrel, starting a few inches down from the root.
Point the iron downward over your shoulder, and begin wrapping from mid-shaft to ends. Leave out the last 1–2 inches for a more modern, beachy look. It also helps preserve the health of your ends.Hold the section with your fingers (or a heat glove) for 5–10 seconds.
Make sure the hair is laying flat against the barrel, not twisted. Twisting gives a more coiled effect, while laying flat gives soft S-shaped waves.Release the curl by sliding the iron out gently, then catch the curl in your palm.
Just like with the clamp method, hold the curl in place while it cools to lock in the shape.Continue working in sections, alternating curl direction as you go.
For a natural texture, curl one piece away from your face, and the next one toward it. It makes a huge difference in how lived-in the style looks.
Pro Tips
- Start your wrap lower on the head if you want beachy texture instead of full-on volume.
- Use larger sections for looser waves, smaller for more defined curls.
Curl for Your Hair Type (What No One Tells You)

Source: Personal Image
Most tutorials totally drop the ball: your hair type matters more than the tool you use. One-size-fits-all curling advice just doesn’t work when you’ve got thick, stubborn strands or super-fine hair that flattens in five minutes.
So let me break it down for you the way I do in the salon because once you tailor your technique to your hair type, everything changes.
Fine Hair
Keep your sections small, about ½ to 1 inch max. You want heat to hit evenly.
Use a lower heat setting (around 300–325°F). Too much heat will not only fry your ends but cause your curls to fall faster.
Apply a volumizing mousse at the roots before blow-drying.
Lock the curl in with a lightweight hair spray before you curl, not after.
Let the curl cool in your hand before dropping it. This is a game changer for fine hair.
Thick or Coarse Hair
Crank the heat up to 375–400°F is your friend here. Anything lower might not even bend your hair.
Work in smaller sections (even if it takes longer). The inside of thick strands needs time to heat through.
Use a strong-hold styling cream or hair spray pre-curl to help with grip.
After curling, pin the curl up to cool if you want major staying power.
Finish with a light layer of humidity-resistant hairspray to keep frizz at bay.
Naturally Wavy Hair
You already have texture, so you’re halfway there.
Focus your curling iron on enhancing and reshaping, not redoing the whole head.
Skip the ends for a lived-in look. Let your natural wave show.
Use a curl cream or light texture spray to define and hold.
Mix clamp and no-clamp methods to get more variety in the wave pattern.
Short Hair
Use a ¾ to 1-inch barrel, and you’ll have way more control.
Curl away from your face in front, then alternate in the back for volume and movement.
Focus on curling the mid-lengths and ends only, you don’t need root volume unless you want big lift.
Let each curl cool fully before styling. Then use a wax stick to break them up and shape the final look.
Troubleshoot: Why Your Curls Won’t Stay
| Mistake | Why It Happens | Fix It |
|---|---|---|
| 1. Curling Damp or Product-Heavy Hair | Even slightly damp hair won’t hold a curl. Heavy products weigh curls down before they form. |
|
| 2. Using the Wrong Barrel Size | A 1.5" barrel on fine, short hair creates bends, not curls. |
|
| 3. Overloading Sections | Large sections don’t heat evenly; outer hair curls while the inner portion stays straight. |
|
| 4. Touching the Curl Too Soon | Curls lose shape if handled while warm because they haven’t “set”. |
|
| 5. Skipping the Right Prep or Finish Products | No hold without grip. Heavy oils kill volume and structure. Finish products help curls “catch”. |
|
Make Your Curls Last (Even If You’re Dancing All Night)

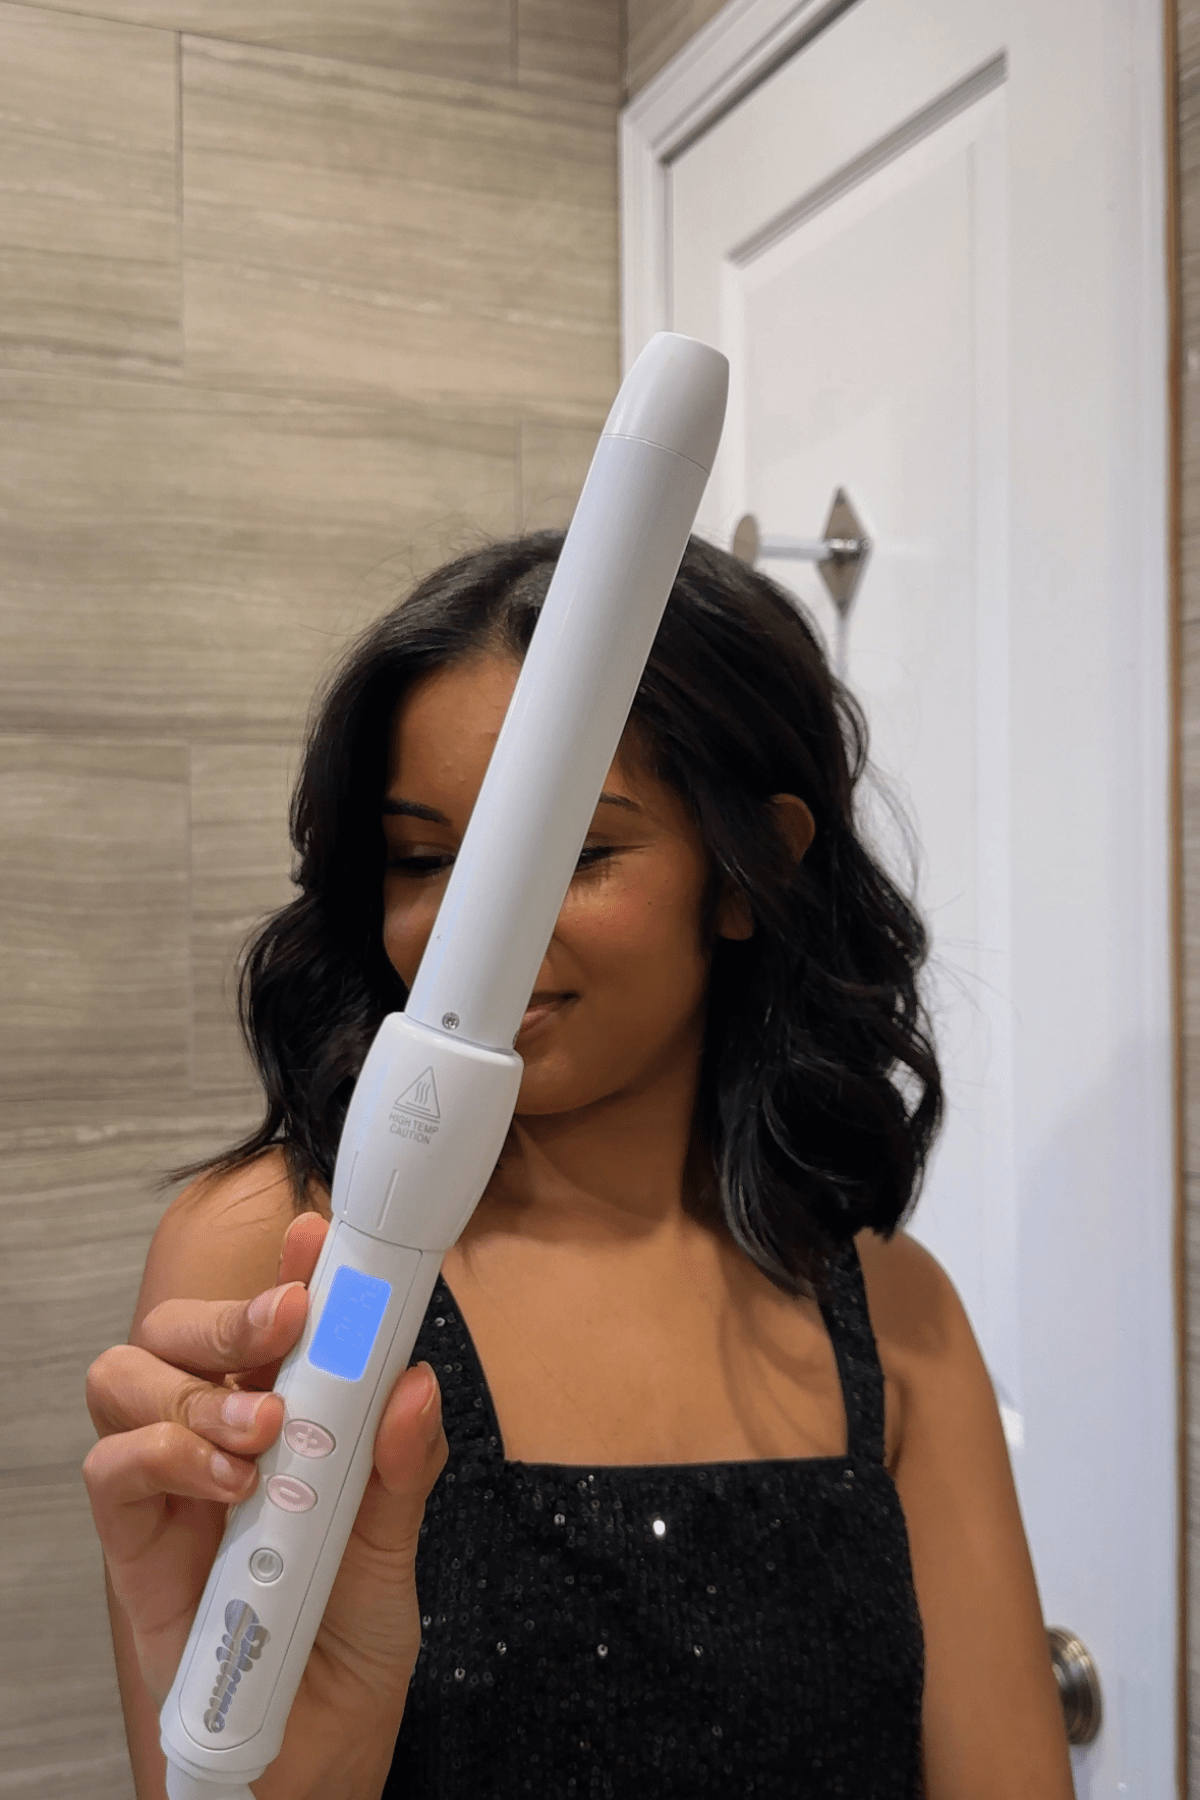
Source: Personal Image
You nailed the curl. You love the look. But… it’s already starting to deflate before you’ve even left the house? Let’s fix that. Longevity isn’t about using more hairspray but about the right layering, cooling, and preserving techniques that work with your hair.
Use the Right Styling Products in the Right Order
| Step | Product | Why It Matters |
|---|---|---|
| Before Curling | Heat protectant spray | Shields hair from heat damage; an absolute must before any styling. |
| Before Curling | Light hold mousse or setting spray | Adds grip and structure so the curl holds its shape. |
| Before Curling | Texture spray (optional) | Adds grit for slippery or freshly washed hair, helps the iron “grab” and shape the curl better. |
| After Curling | Let curls cool in place | Helps the curl “set” so it lasts longer, don’t skip this. |
| After Curling | Flexible hold hairspray | Locks in shape without stiffness; spray at the end, not between curls. |
Try the “Pineapple Method” to Sleep on Curls
Want curls on day two or even day three? Use this no-crush sleeping trick from the natural hair community, it works for all textures.
Here’s how:
Flip your hair upside down.
Gather it loosely into a soft scrunchie at the very top of your head (like a pineapple).
Sleep on a silk or satin pillowcase to reduce friction.
In the morning, shake out your curls and refresh with dry shampoo or a light mist of water + leave-in conditioner.
Refresh Day 2 Curls Without Re-Styling
Don’t want to use heat again? You don’t need to.
Try this:
Mist a light leave-in conditioner or water on the ends.
Twist sections with your fingers and clip them up while you do your makeup.
Let them air dry or hit them with a blow dryer on low heat.
Finish with a mist of texturizing spray.
Your Top Curling Iron Questions, Answered
How do I curl my short hair with a curling iron for beginners?
Use a ¾ inch to 1 inch barrel, and focus on curling the mid lengths and ends only. You do not need root volume on short styles because it can make the shape look bulky. Curl away from your face in the front, then alternate directions in the back for movement. Small sections give more control.
Why do my curls fall flat after curling?
Most of the time it comes down to one of three things:
• Your hair was not fully dry.
• You skipped the cooling step.
• You used too much product or not the right kind.
How long should I hold my hair on the curling iron?
Fine or damaged hair: 5 to 7 seconds.
Thick or coarse hair: Up to 10 to 12 seconds.
And remember, steam is normal, burning smell is not. When in doubt, start low and adjust. Never curl the same piece twice in a row without letting it cool.
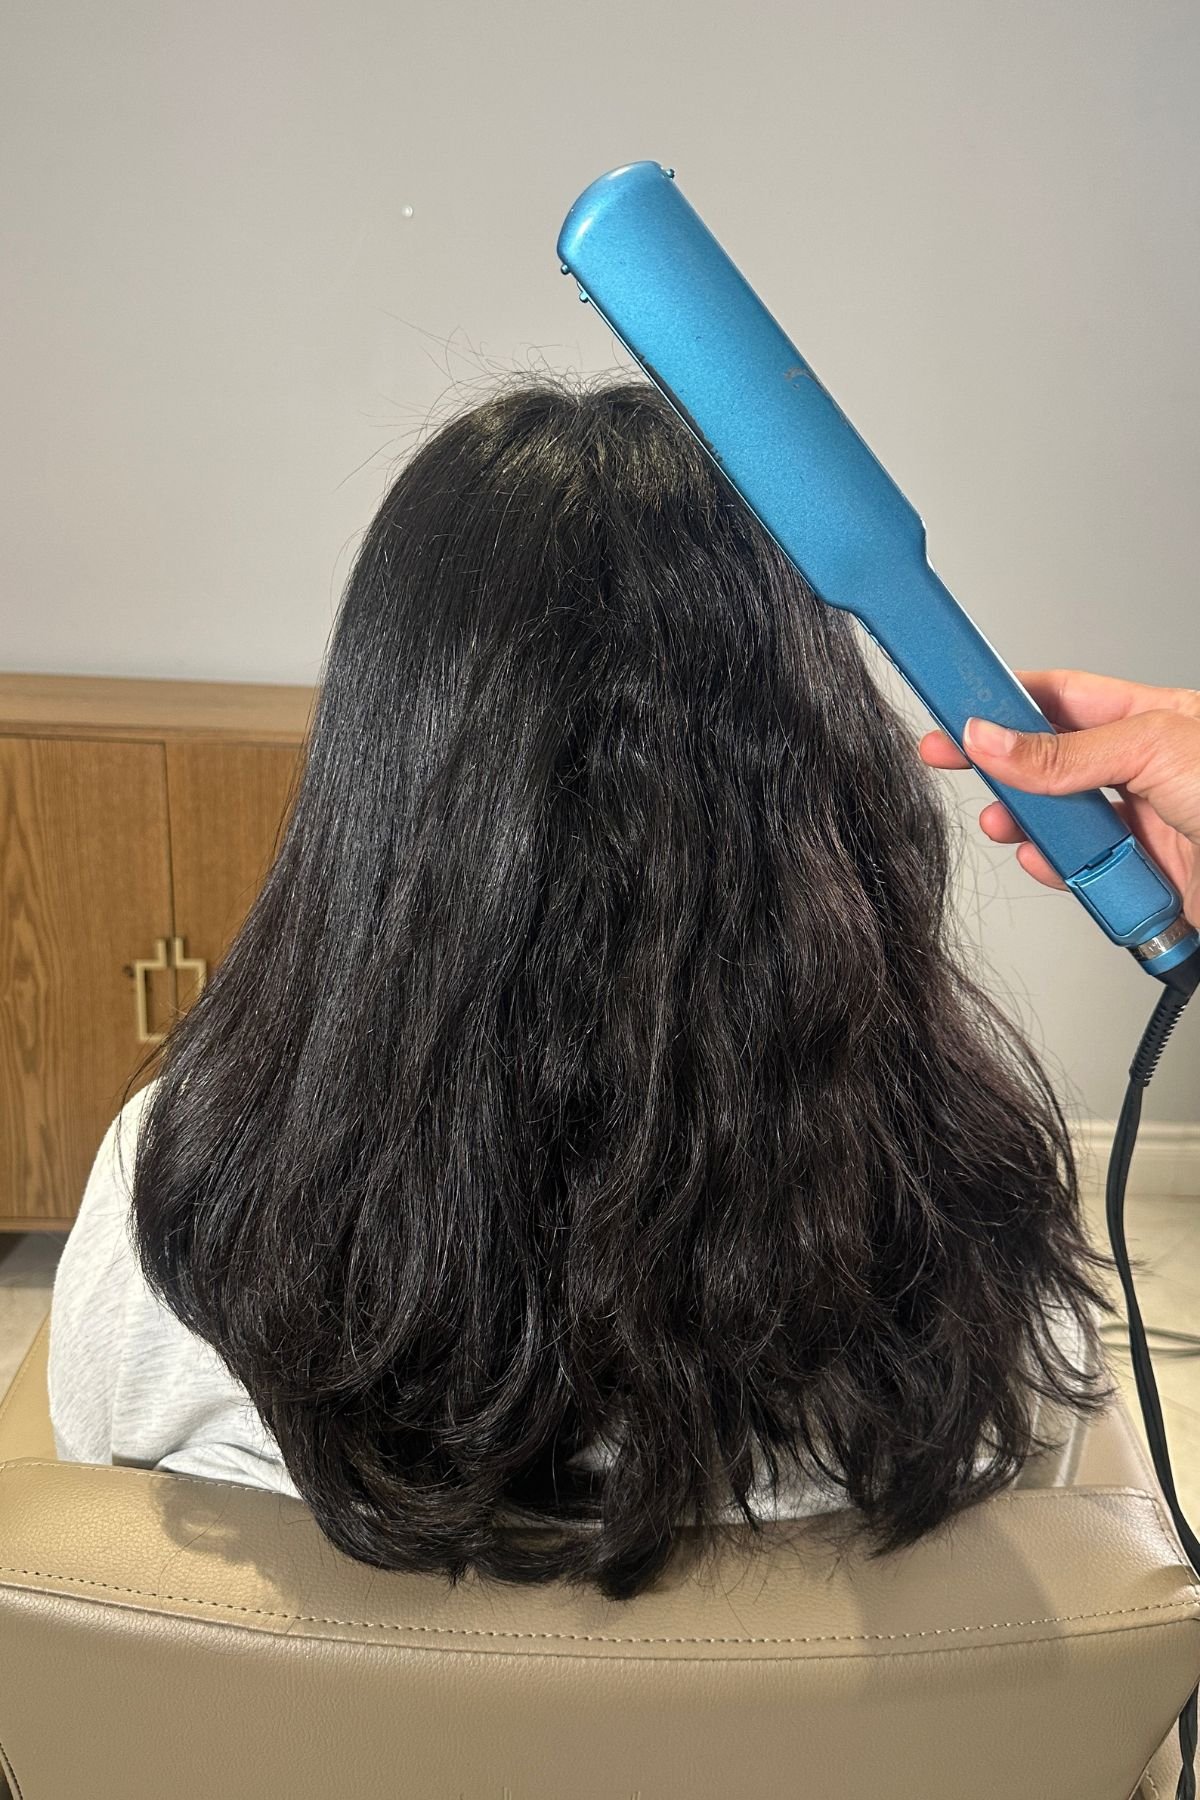
Can I use a straightener to curl my hair instead?
Yes, you can. It takes more technique, but it absolutely works. I have a full post on it here: How to Curl Hair with a Straightener.
Should I curl my hair on day one or day two?
Day two hair usually holds curls better because there is more natural oil and texture. Freshly washed hair can still work though. Just prep with texture spray or mousse so it is not too slippery.
Why does one side always turn out better than the other?
You are probably holding the iron at a different angle or rotating your wrist differently. Try switching hands or adjusting your mirror so you can see the challenging side better. It takes practice, but it will make sense with time.
Final Word From Haiirology
If you’ve made it this far, yes, you absolutely know how to curl your hair with a curling iron now. Whether you’re using the clamp or going clamp-free, whether you’ve got short layers or long mermaid hair, you’ve got the technique, prep, and pro tricks to make those curls last and actually look like the inspo pics.
This isn’t about doing it perfectly the first time; it’s about knowing what actually works for your hair type and tool. And as a stylist who’s helped hundreds of clients master curling (even the ones who swore they’d never get it), trust me: with a little practice and the right method, you’ll get there too.
So go ahead, give it a try. Snap a pic. Fluff those curls.
And don’t forget to tag me @HaiirologyByJen so I can see your masterpiece!


Struggling to get a salon-style blowout at home? These at-home blowout products break down what actually works, what to skip, and how to get smooth, long-lasting results without overdoing it.