How to Curl Short Hair with a Flat Iron: The 3 Viral Tricks Everyone’s Asking Me About

This post may contain affiliate links, which means I'll receive a commission if you purchase through the link at no extra cost to you. Please read the full disclosure here.
TL;DR
If you’ve struggled to curl short hair with a flat iron, this guide breaks down exactly how to do it without frying your ends or losing volume. You’ll learn how to prep your hair, choose the best tools, and master 3 stylist-approved techniques: Bend & Glide, Twist & Slide, and Clamp + C Motion. Each one creates a different curl type, whether you want soft waves or a more defined shape. Plus, I’ve included my favourite products and pro tips to help your curls last all day.
Flat Roots & Limp Curls? This Is for You
If you’ve ever tried to curl short hair with a flat iron and ended up with weird bends, no volume, or curls that completely disappear by lunchtime, you’re so not alone.
I get this question from clients all the time, and after posting this Instagram video, my DMs were full of “Wait! How did you do that without twisting?”
Curling your short hair with a flat iron is totally doable if you know a few key tricks.
In this post, I’m breaking down exactly how to get those soft, modern curls (without frying your ends or flattening your roots). You’ll get 3 beginner-friendly techniques, the exact tools I use, and my real-life tips from 10+ years behind the chair.
So if you're ready to finally get curls that actually hold, look intentional, and don’t fight your haircut… let’s get into it.
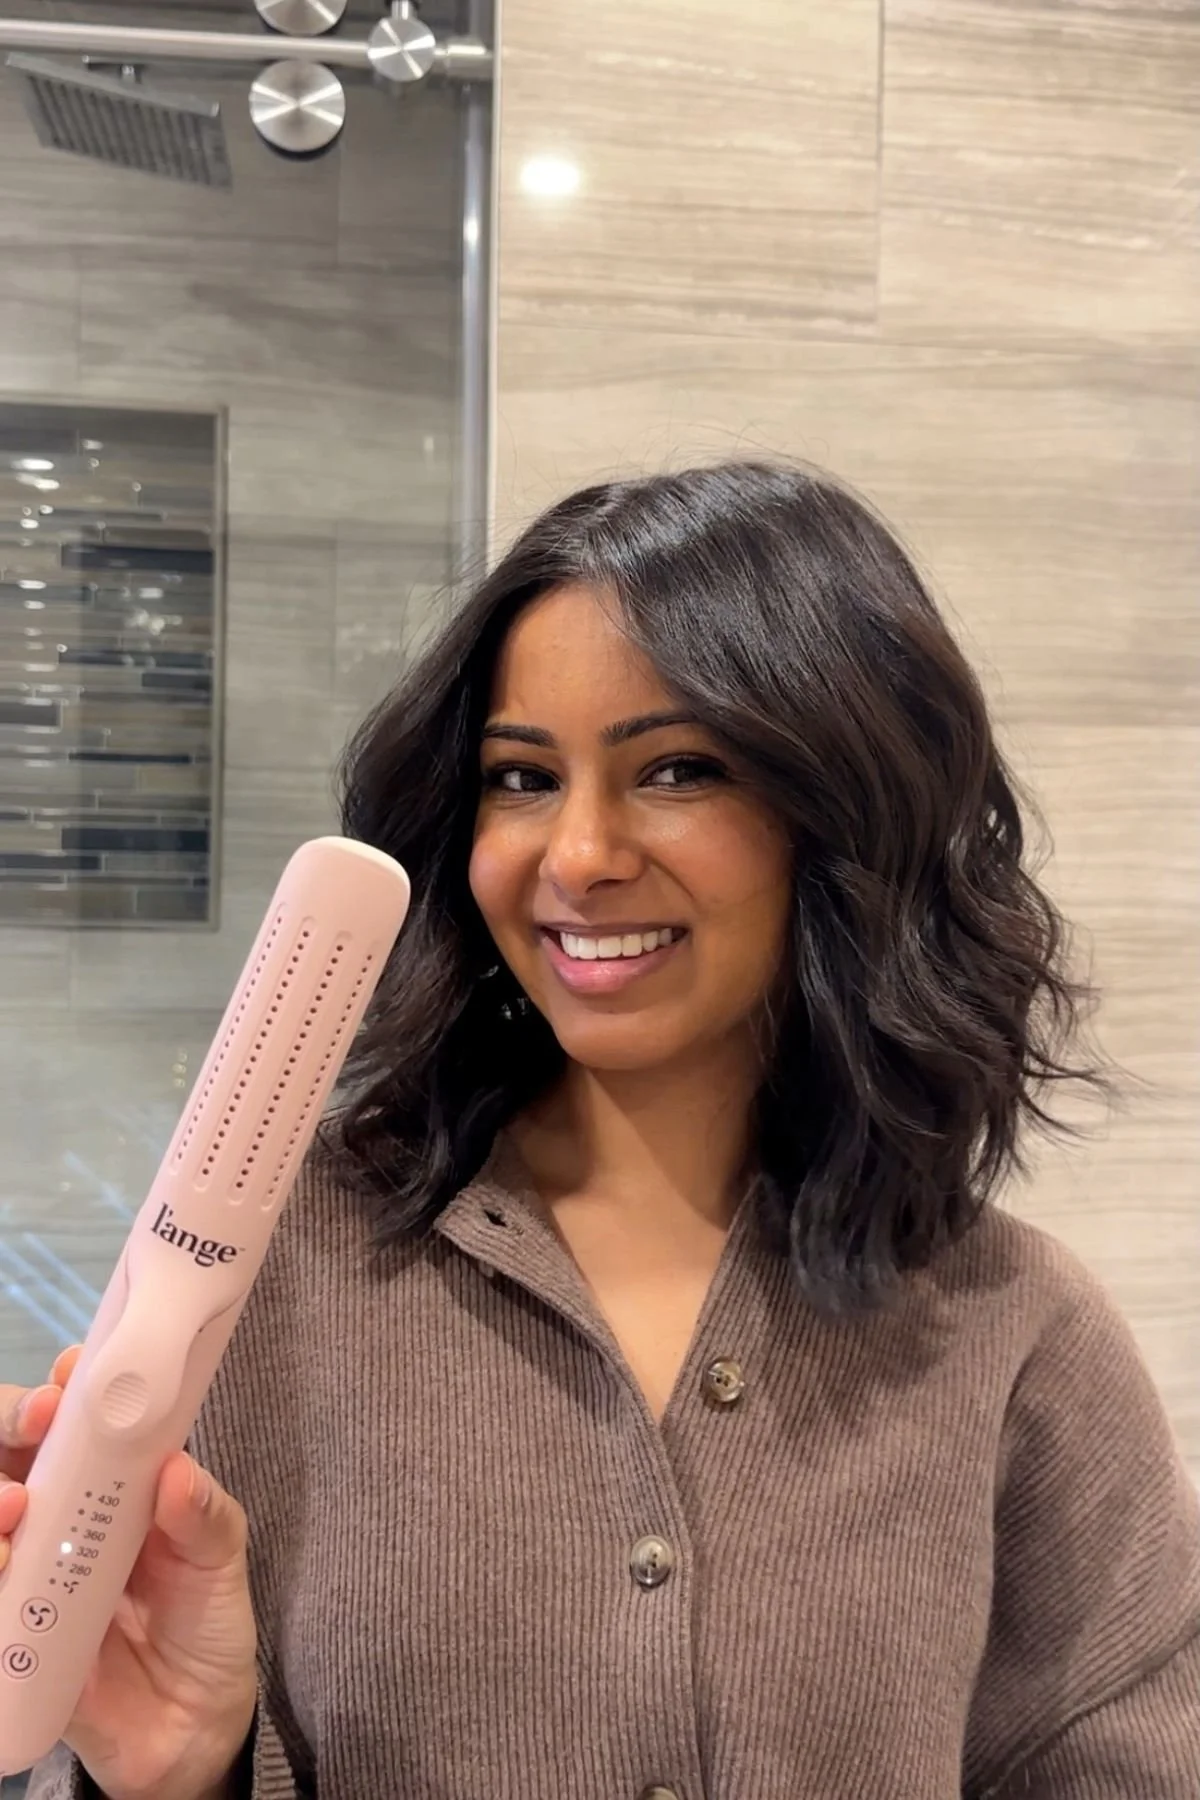
Your Essentials to Curl Short Hair with a Flat Iron
Before you even plug in your flat iron, let’s make sure you’re working with the right tools. When it comes to short hair, using the wrong heat tool or products can make the difference between soft, bouncy curls and flat, crunchy ends.
| Product Name | Why We Recommend It | Buy Here |
|---|---|---|
| 1” Flat Iron with Rounded Edges | Better control for short hair; rounded edges prevent dents and help curl easily. Avoid wide plates. | L'ANGE Le Duo |
| Heat Protectant Spray | Essential for protecting against heat damage while helping curls last. Lightweight and effective. | Moroccanoil Perfect Defense |
| Sectioning Clips | Keep your sections clean and consistent for better curling, especially with layered or cowlicked hair. | Shop Clips |
| Texturizing Spray | Adds grip, hold, and shape to curls without stiffness. Great for volume and soft texture. | IGK Beach Club Spray |
Prep Your Hair Like a Pro Before You Touch Heat
If you want curls that hold, start here. This step gets skipped way too often, and that’s usually why the style falls flat or worse, why the ends feel fried. Follow this routine before curling, and you’ll get smoother results with less heat and zero guesswork.
Step-by-Step Prep
Start with clean, dry hair: Curls don’t hold on damp or oily hair. Make sure your hair is completely dry, either freshly washed or refreshed with dry shampoo if you’re on second-day hair.
Apply heat protectant from root to end: Hold your spray about 6–8 inches away from your head and mist evenly through each layer. Don’t overdo it.
Comb the product through: Use a wide-tooth comb or detangling brush to make sure every strand is coated. This gives you even protection and smooths out any tangles before the heat touches the hair.
Wait at least 60 seconds: Let the product sit before you bring in the flat iron. If you hear a sizzle when you press the plates together, it’s not dry yet. Wait until the hair feels completely dry to the touch.
Section your hair into 2 or 3 layers: Split your hair horizontally, nape, middle, and crown. Use clips to pin up the top sections so you can start curling from the bottom layer.
Comb each section again before curling: This final pass helps you get a clean glide with the iron. Smooth sections = fewer kinks, more control, and better curls.
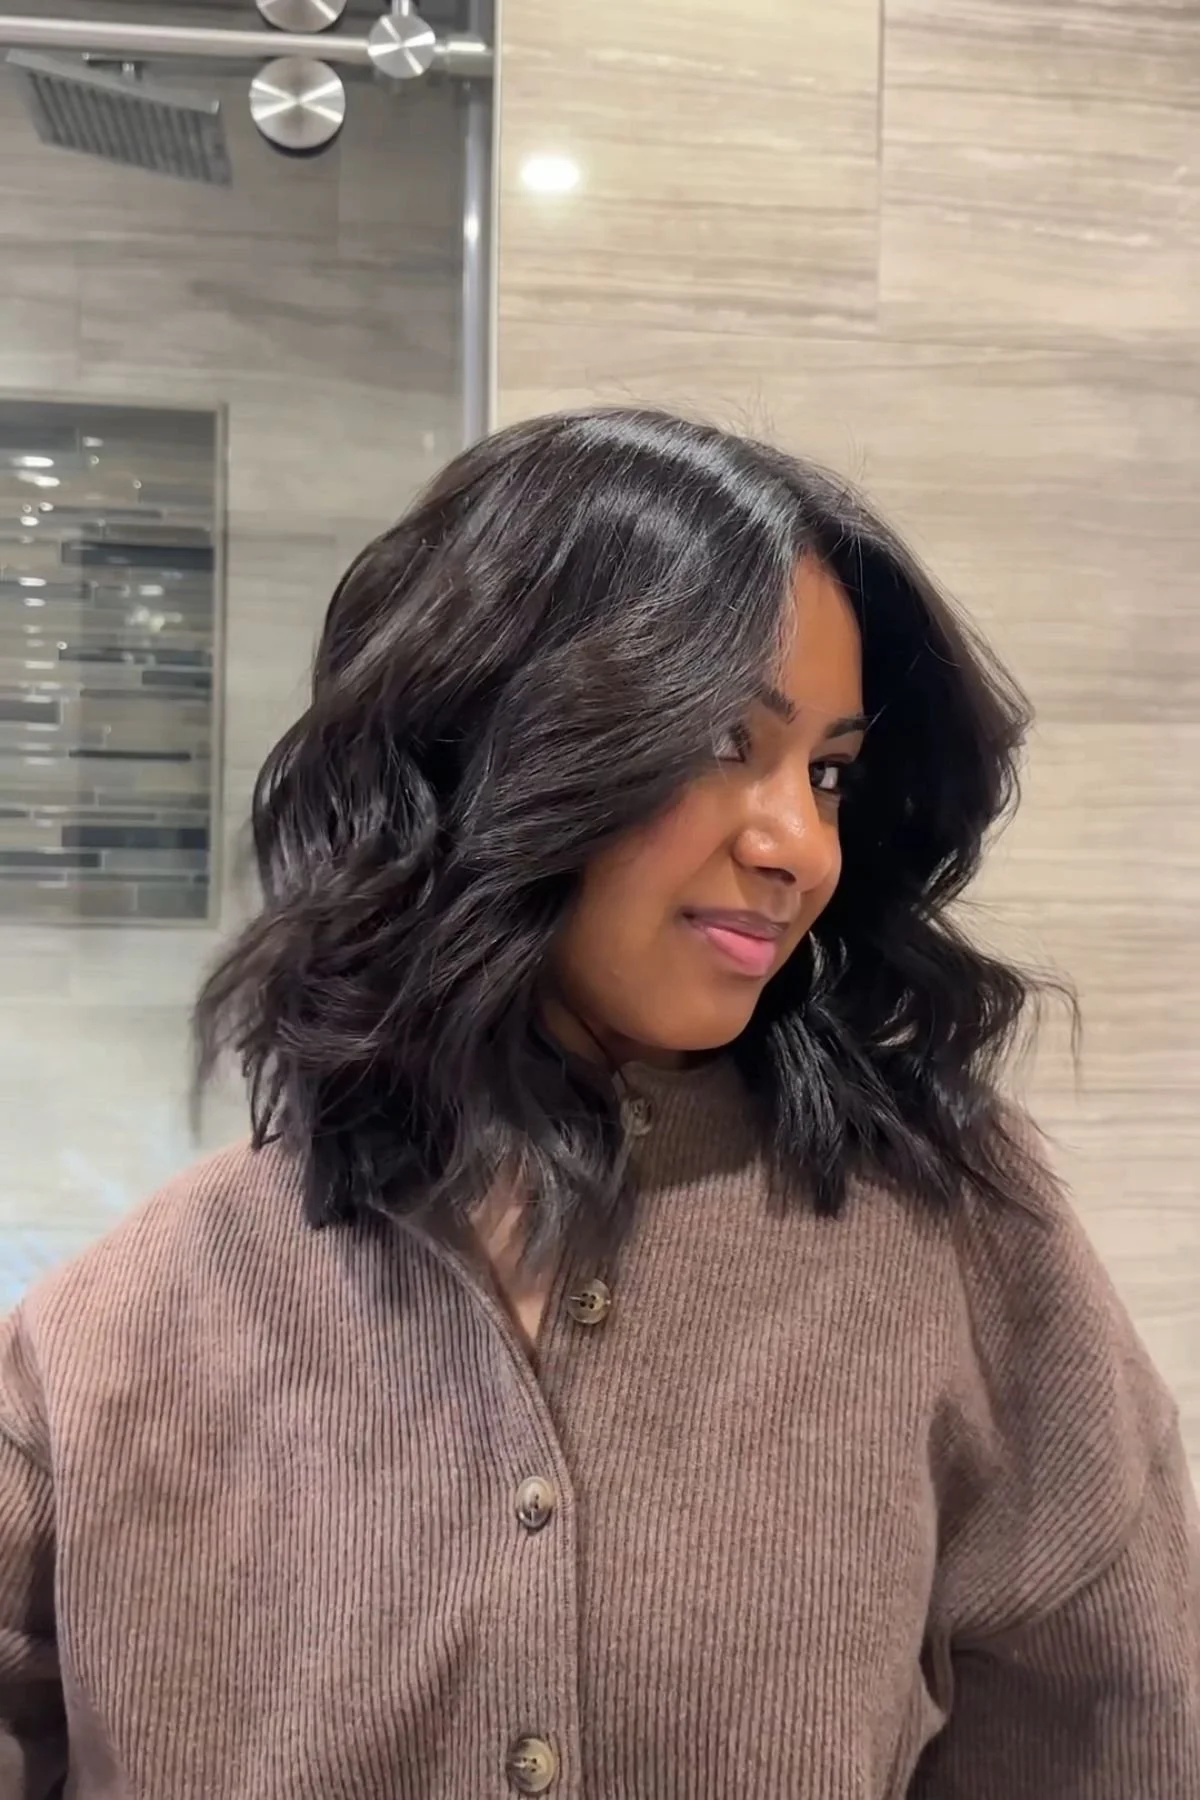
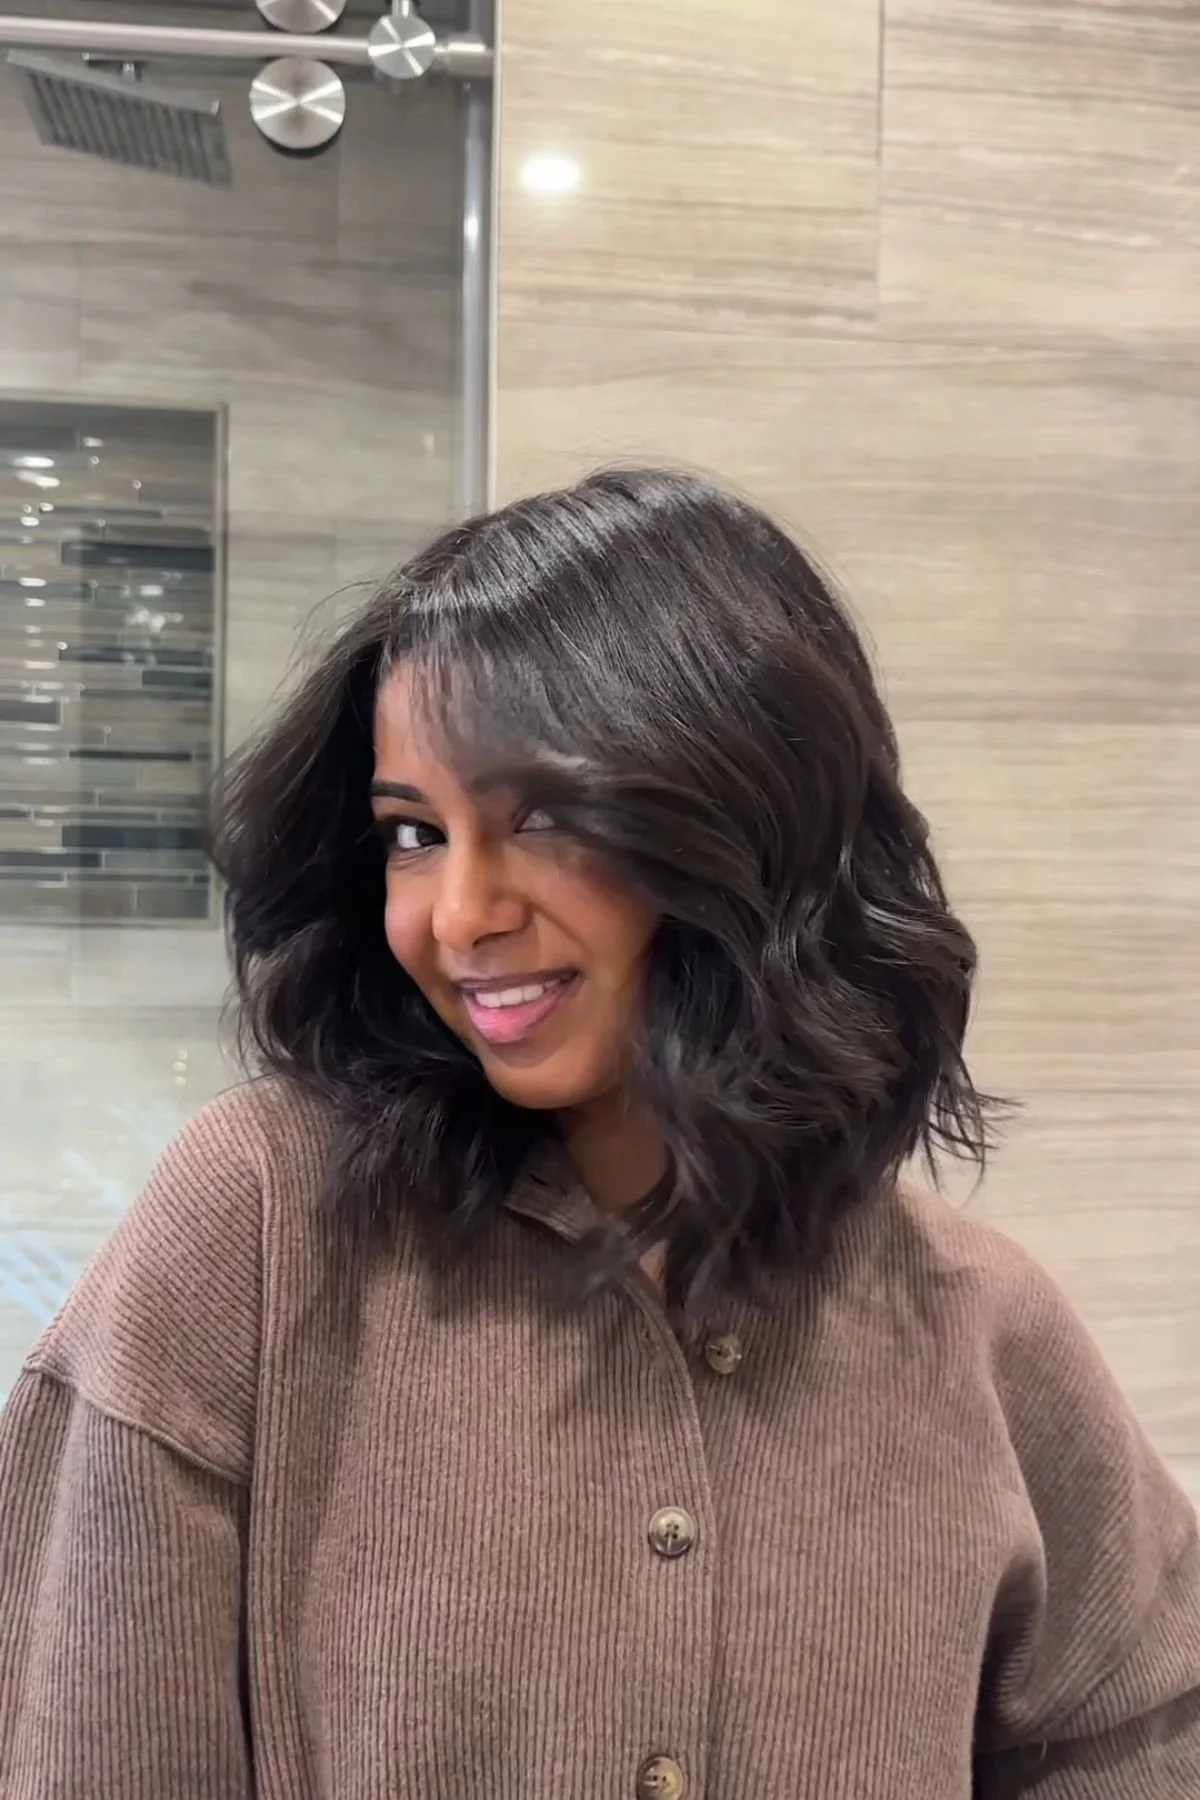
Method #1: Curl Short Hair with a Flat Iron Using the “Bend & Glide” Method
This is the technique I used in my video that had everyone asking, “Wait! How did you do that without twisting?” It’s my go-to for soft, wearable curls that give shape without sacrificing volume at the roots.
Who It’s For: Great for short bobs, lobs, or chin-length cuts. Ideal if you want volume near the scalp and a relaxed, natural curl. Works best on fine to medium hair, but you can tweak it for thicker textures too.
Why It Works:
Instead of twisting the flat iron (which can flatten your roots or crease your ends), this method bends the section and glides down in one smooth motion. You leave the ends out for a more modern finish.
Step-by-Step Process
Start near the root: Grab a small section; no wider than an inch. Place your flat iron close to the scalp, but not right against it. Keep the iron horizontal.

Source: Personal Image
Clamp and slide down one inch: Gently press and glide the iron about an inch down the strand. This gives you space to start your bend without losing volume at the root.

Source: Personal Image
Slightly tilt your wrist to create the bend: Instead of twisting the tool, you tilt it just enough to start curving the hair around the plate. It's like gently redirecting the strand and not wrapping it.

Source: Personal Image
Glide down slowly while keeping the bend: Continue sliding down while holding that slight tilt. Let the iron do the work. The slower you glide, the more defined the wave.

Source: Personal Image
Leave the ends out: Stop just before you reach the tips and let them hang straight. This is what gives the curl that modern, lived-in look instead of a tight spiral.
Repeat, alternating directions: For a natural finish, curl one piece away from your face, and the next toward it. This creates movement and keeps the shape from looking too perfect or stiff.
👉 Confused about whether to curl your hair towards your face or away from it?
Pro Tips
- For extra lift, use a volumizing powder at the crown.
- Pin each curl in place with a clip while it cools, if your hair has trouble holding shape.
- Avoid using sections that are too big.
| Style Short Hair Like a Pro: Tools & Techniques |
|---|
| Whether you’re rocking a chic bob or looking to add texture to your shorter strands, these guides cover the ideal tools and styling methods for curl and wave success: From selecting the right barrel size to mastering wand techniques, these resources are your go‑to for styled, high‑impact short hair. |
Method #2: Curl Short Hair with a Flat Iron Using the “Twist & Slide” Method
If you’re looking for a curl that holds all day and gives more definition, this is the method I recommend. It adds just enough twist to get a strong shape without going full ringlet.
Who It’s For: Ideal for short layered cuts or denser hair that needs help holding curl. Great for clients who want a more styled finish — “done but not overdone.”
Why It Works:
The twist locks in the shape by turning the strand around the heat evenly. But it’s all about control; you’re not wrapping the hair tight or turning the iron over and over. It’s one gentle 180° twist, then a steady slide.
Step-by-Step Process
Clamp near the root: Use a L'ANGE HAIR Le Duo 360° Airflow Styler and place it near your roots; not on the scalp, but close enough to lift the section.
Twist the iron 180°: Turn the tool just half a rotation so the hair wraps once around the outside of the iron. Keep the twist gentle; don’t yank or over-rotate.
Glide down slowly: As you move the iron down the strand, keep tension even and steady. Don’t rush, as speed changes the shape and can cause bends or creases.
Stop just before the ends: Let the tips fall out naturally. This keeps the look softer and less polished in a good way.
Alternate directions for a more natural feel: Curl some away from your face, some toward. This helps the shape look lived-in instead of too uniform.
Pro Tips
- Avoid twisting more than 180°, or you’ll risk a crimped look.
- Keep your wrist steady to avoid dents or heat lines.
Method #3: Curl Short Hair with a Flat Iron Using the “Clamp + C Motion” Method
If you’ve ever felt awkward trying to curl your hair with a flat iron, this is the one to start with. It’s low risk, easy to control, and helps you get comfortable with movement before you start twisting or bending anything fancy.
Who It’s For: First-timers learning to curl their own short hair. Anyone who wants a soft shape without a full curl. Best for short layers, pixie ends, or “my hair flips weird” zones.
Why It Works:
You’re not twisting or wrapping, you’re just drawing a soft “C” shape with the flat iron. This creates a subtle curve instead of a full curl, which is perfect if you want that tousled look without committing to tight waves.
Step-by-Step Process
Clamp a small section mid-shaft: Hold your flat iron horizontally and gently clamp the middle of the strand. Don’t squeeze too tight—you want to guide the hair, not flatten it.
Push forward slightly to form a “C” curve: Use your wrist to make a light inward motion, as if drawing the letter C with the iron. Keep it soft—you're bending, not folding.
Glide a little, then repeat: You can do this once along the strand or repeat the C motion, lower down for more shape.
Leave the ends out: Let the tips hang naturally. This keeps the look modern and prevents overstyling.
Pro Tip
Pair with a texture spray or light styling pomade to help hold the shape.
Avoid These Common Mistakes When Curling Short Hair with a Flat Iron
Even with the right tools and prep, a few small mistakes can totally throw off your results. These are the most common slip-ups I see and how to fix them.
Using a flat iron that’s too wide: Wide plates don’t give you the control you need on short hair. They make it harder to curl near the roots and often pull on the ends. Stick to a 1” tool with rounded edges.
Twisting too tightly: Over-twisting creates harsh angles or dents instead of smooth curls. If your curls look stiff or creased, loosen your wrist and use a bend or gentle twist instead.
Skipping heat protectant: This one’s non-negotiable. If you’re applying 350°F+ directly to your hair with no protection, expect dryness, breakage, and frizz on the ends.
Not sectioning your hair: Working with random chunks leads to uneven curls. Sectioning gives you cleaner results and makes the whole process faster. It’s worth the extra 60 seconds.
Touching curls while they’re hot: Let your curls cool before running your fingers through them. If you separate them too soon, they lose shape and fall flat before you even finish styling.
FAQs: Curling Short Hair with a Flat Iron
Can I curl hair with a flat iron?
Yes. In fact, a flat iron gives more control over short hair than a curling wand. You can create soft bends, tighter curls, or just flick the ends, depending on your technique.
Should I curl my hair wet or dry?
Always curl dry hair. Never use heat tools on damp strands, as it causes steam damage and makes your hair frizz up instantly.
What is the 2-inch short hair rule?
This refers to avoiding curling too close to the root if your hair is shorter than 2 inches. Start lower on the strand so you don’t flatten your roots or risk burning your scalp.
What’s the easiest way to curl short hair?
The “Clamp + C” method is the easiest for beginners. You’re just bending the hair gently; no twisting or wrapping needed. “Bend & Glide” is my next go-to once you’ve got the feel for it.
How do I curl short hair with a flat iron for beginners?
Start with small sections. Keep your iron horizontal. Use the “Clamp + C” or “Bend & Glide” techniques to get a soft, controlled shape. Practice on the bottom layer first, as it’s easier and less visible.
Try These Extra Hacks to Make Your Curls Last All Day
You’ve got the technique down, but if your curls drop out by lunch or look limp by dinner, these quick tricks can make a big difference. I use these in the salon and at home to stretch the life of every style.
Curl smaller sections near the back. The hair near your neck tends to be thicker or heavier. Smaller sections mean more heat control and longer-lasting shape.
Right after you finish curling, flip your part to the opposite side. This gives your roots a boost and adds movement without teasing or extra product.
Spray dry shampoo on your roots even if your hair is clean. It adds grip, reduces flatness, and helps the curls hold their shape.
Final Word From Haiirology
You don’t need a curling wand. You don’t need complicated tricks. And you definitely don’t need to fry your ends trying to figure it out.
Now you know exactly how to curl short hair with a flat iron. Whether you're bending, twisting, or just shaping the ends, each method gives you control, movement, and a style that fits your haircut.
Still figuring it out? Practice the bottom layer first. Try the “C” motion before diving into full curls. And don’t forget, cooling, sectioning, and prep are what really make it stick.
Tag me @HaiirologyByJen when you try it, or send me a message if something’s not working. I’ll help you figure it out.


How to curl your hair with a curling iron: step-by-step from my viral video! Beginner-friendly tips, pro tools, and tricks that actually make curls last.