How to Curl Short Hair With a Wand Without Losing Volume
This post may contain affiliate links, which means I'll receive a commission if you purchase through the link at no extra cost to you. Please read the full disclosure here.
TL;DR
If you're using a wand to curl short hair and struggling with flat roots or curls that don’t last, this tutorial breaks it all down. I’ll show you how to prep properly, choose the right wand size, and curl each section with volume in mind. From volumizing products to cooling techniques and finishing tricks, you’ll learn exactly how to get bouncy, touchable curls without sacrificing volume.
Curls falling flat on your short hair? Yep, been there, styled that.
When I first started using a wand to curl short hair without losing volume, I didn’t expect it to go viral. But apparently, I hit a nerve because so many of you DM’d me things like, “Why do my roots always go limp?” or “How do you get that bouncy finish without frizz or stiffness?”
So today, I’m walking you through the exact method I use in the salon and on myself to create full, voluminous curls that don’t deflate by lunchtime. We’re talking about everything: the tools I swear by, the prep steps most tutorials skip, and the pro secrets that make a big difference in the final result.
If you’ve got short hair and want those wand curls to actually hold with volume, this is your no-fluff guide.
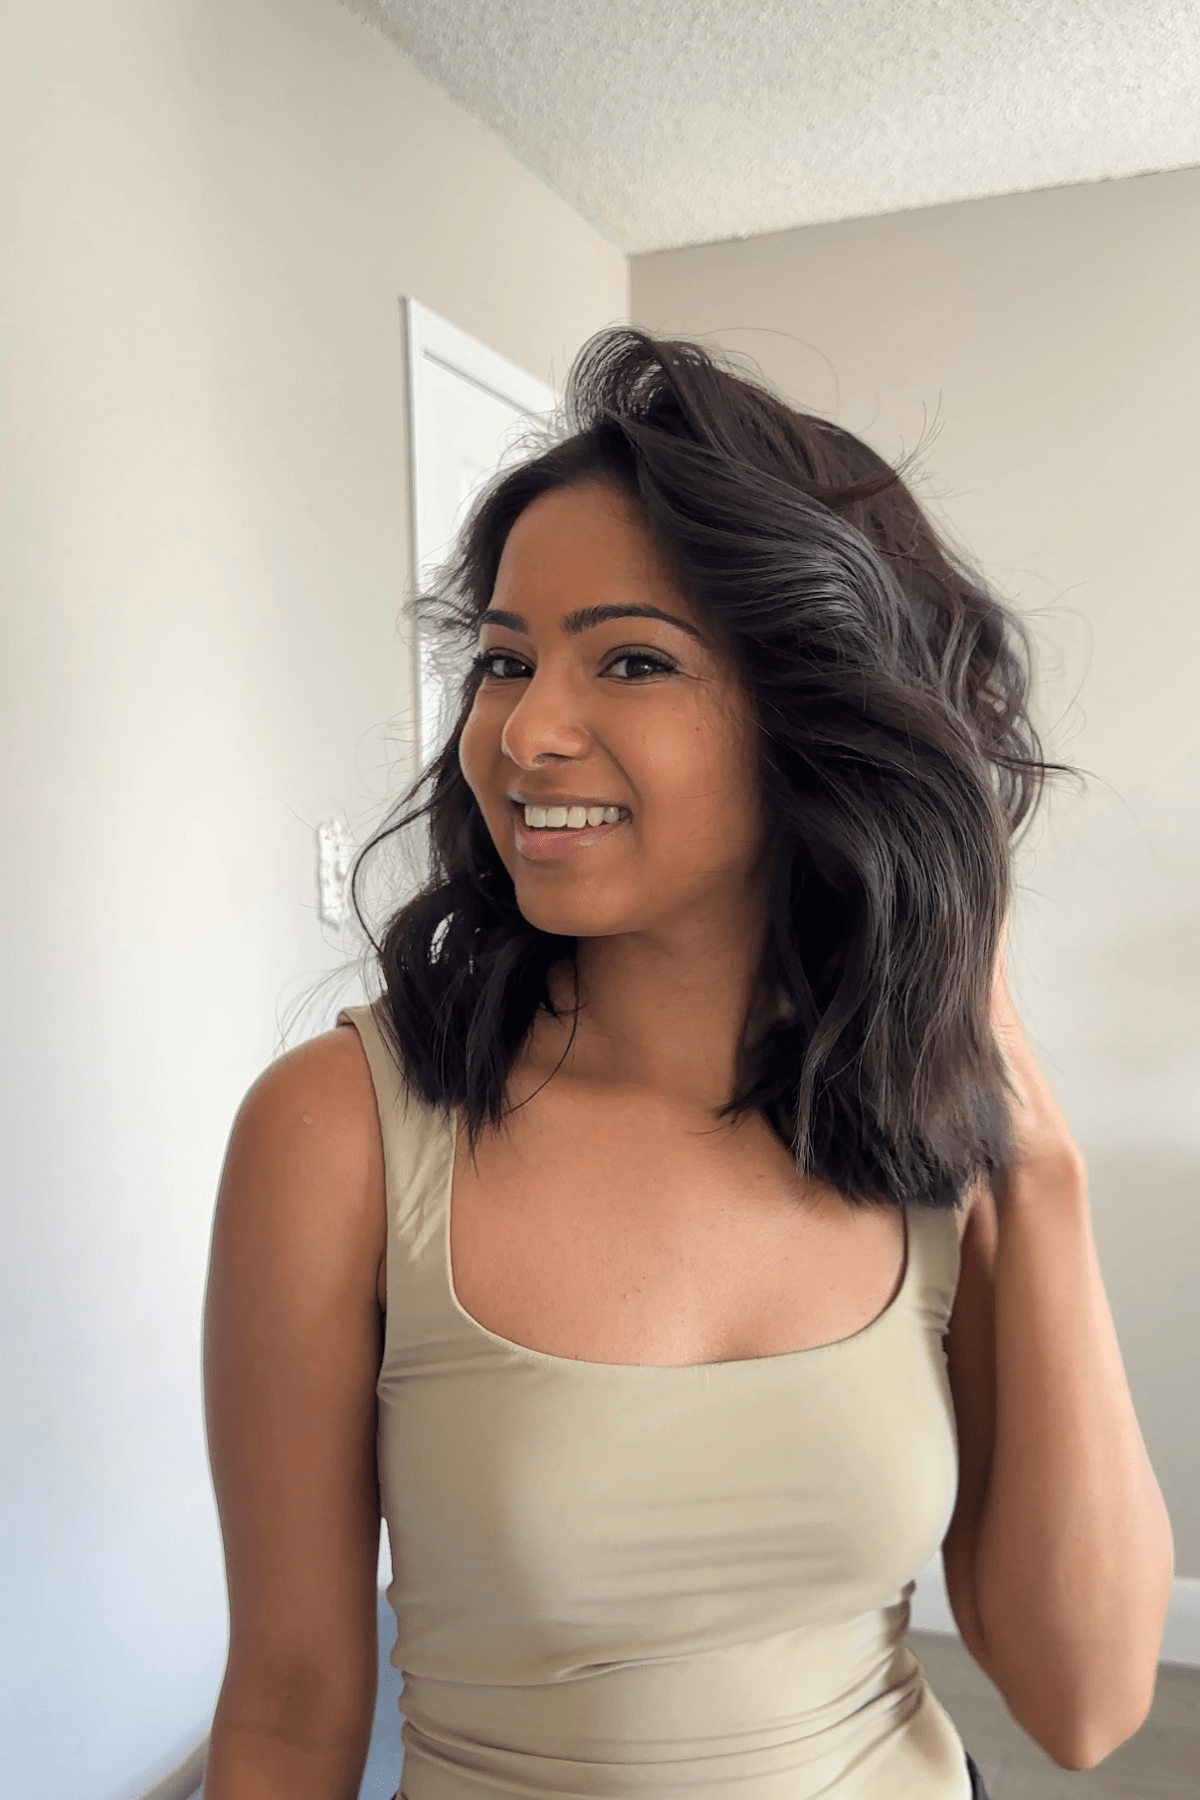
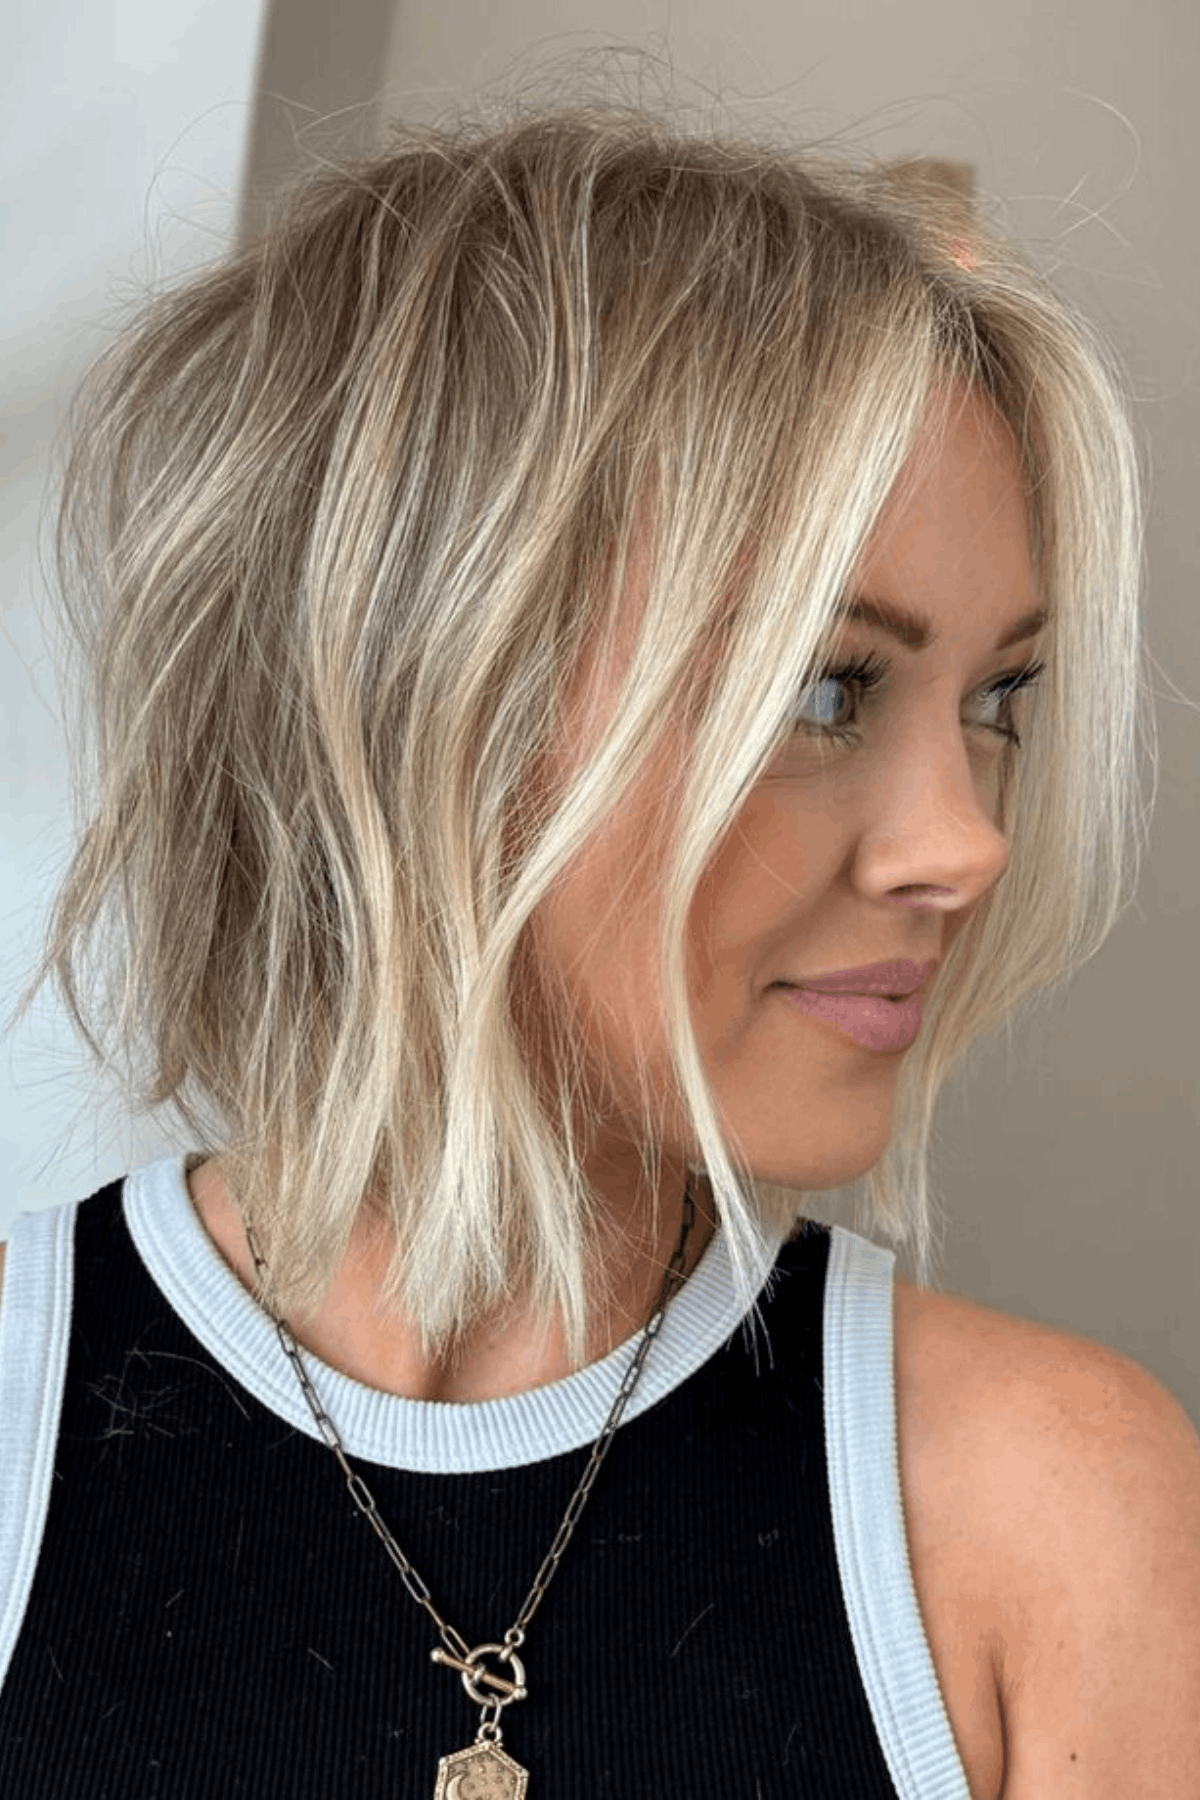
Tools & Products I Use to Curl Short Hair

Source: Personal Image
Here’s what I reach for every time I want bouncy, voluminous curls on short hair. Each tool plays a role in creating shape, holding it, and keeping your hair touchable, not crunchy or weighed down.
Curling Wand (0.75–1 inch barrel)
I always recommend a smaller wand for short hair as it gives you control and bounce. Look for one with a ceramic or tourmaline barrel that distributes heat evenly. Avoid larger barrel curling wands (1.25"+) unless you want soft waves instead of curls.
Heat Protectant (lightweight formula)
Please don’t skip this. It shields your hair from damage without you having to sacrifice volume. Go for a spray that’s light and dries fast. Creams or oils? Skip them unless you want flat roots.
Volumizing Mousse or Volume Sprays
These are your go-to volume starters. I like to work mousse through the mid-lengths to ends, then lift small sections and mist a volume spray right at the base. This combo sets the foundation before I go in with any hot tools.
Sectioning Clips + Wide-Tooth Comb
Sectioning clips keep your hair organized while styling, especially when you're working with shorter layers that need more control. I use a wide-tooth comb to detangle without causing frizz and to evenly distribute product before applying heat.
Finishing Product: Texturizing Spray or Flexible Hold Mist
After curling, I lightly mist a texturizing spray throughout my hair to boost volume, add definition, and help the style hold. It gives your hair that full, lived-in look, without making it feel stiff or crunchy.
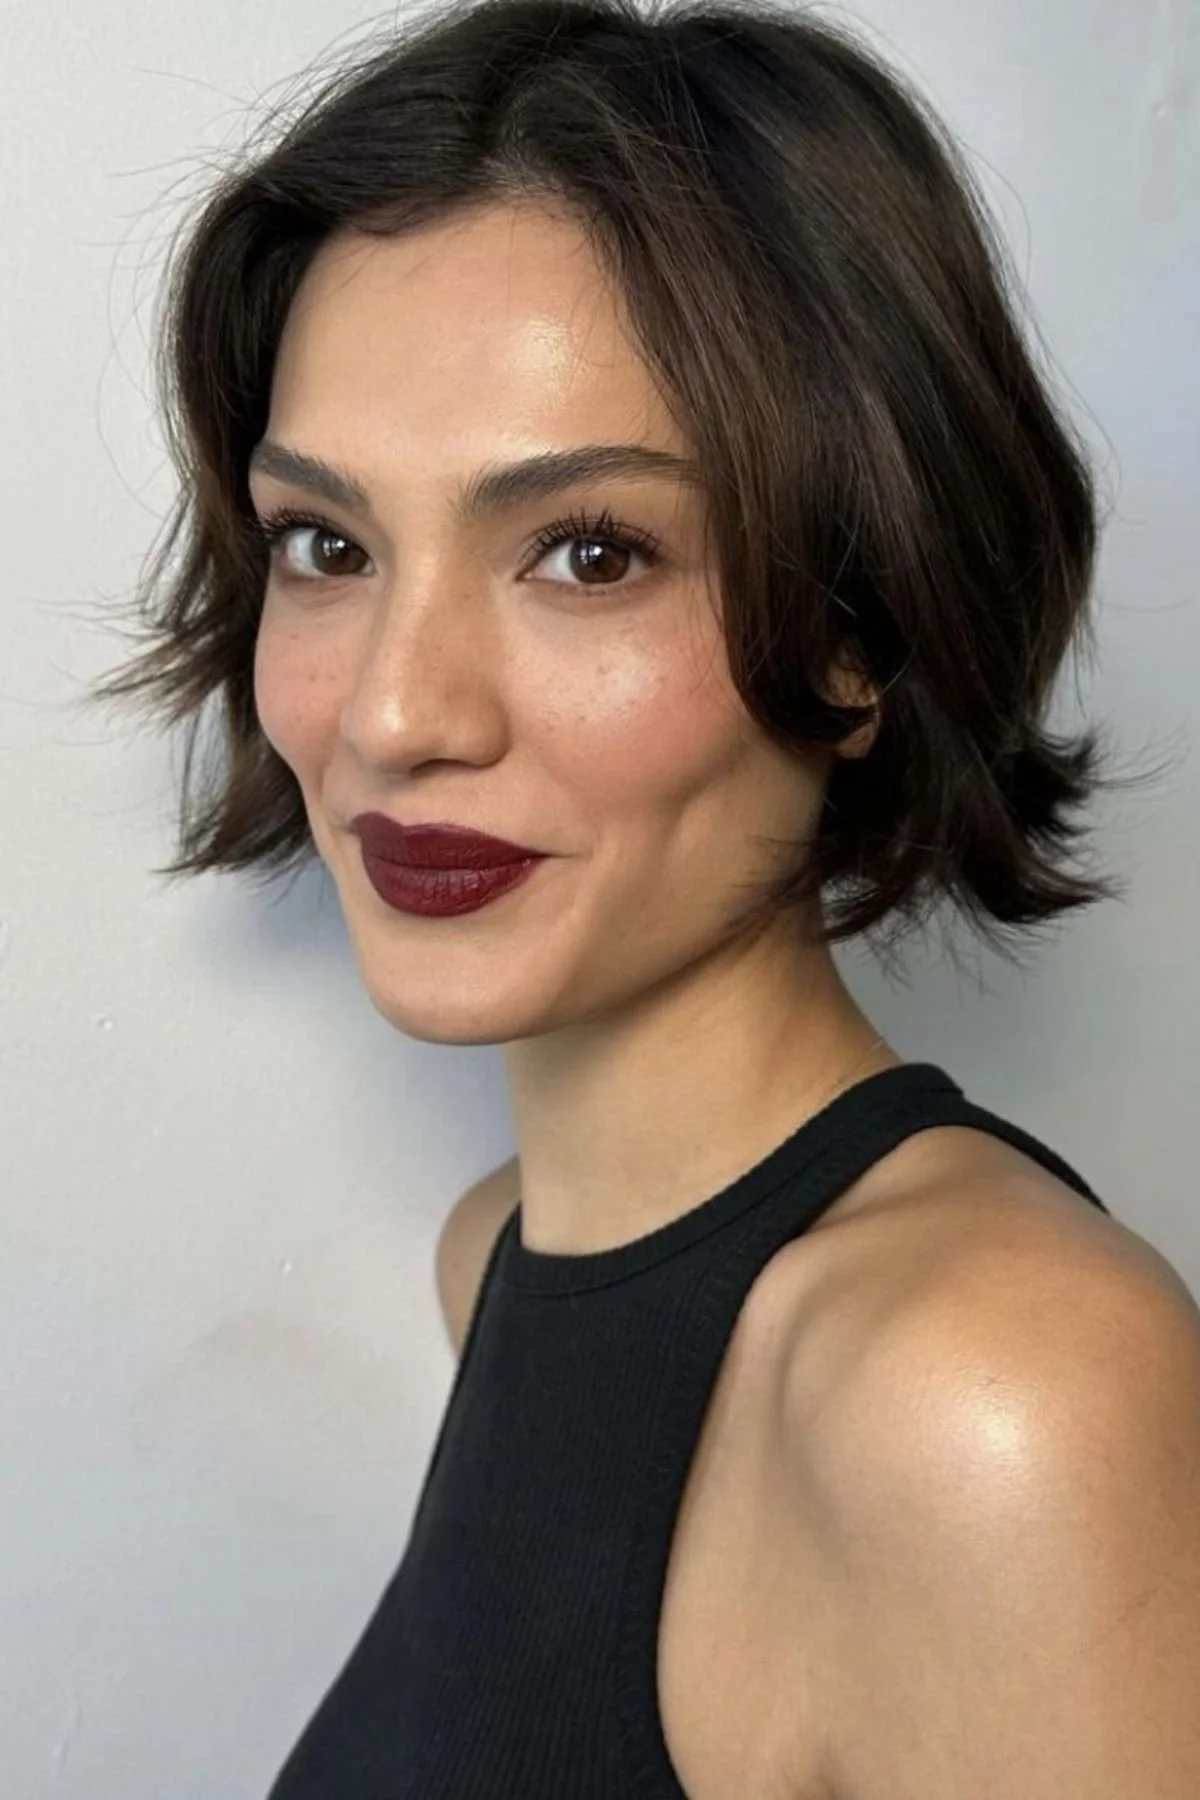
How I Prep Hair Before Using a Wand to Curl Short Hair
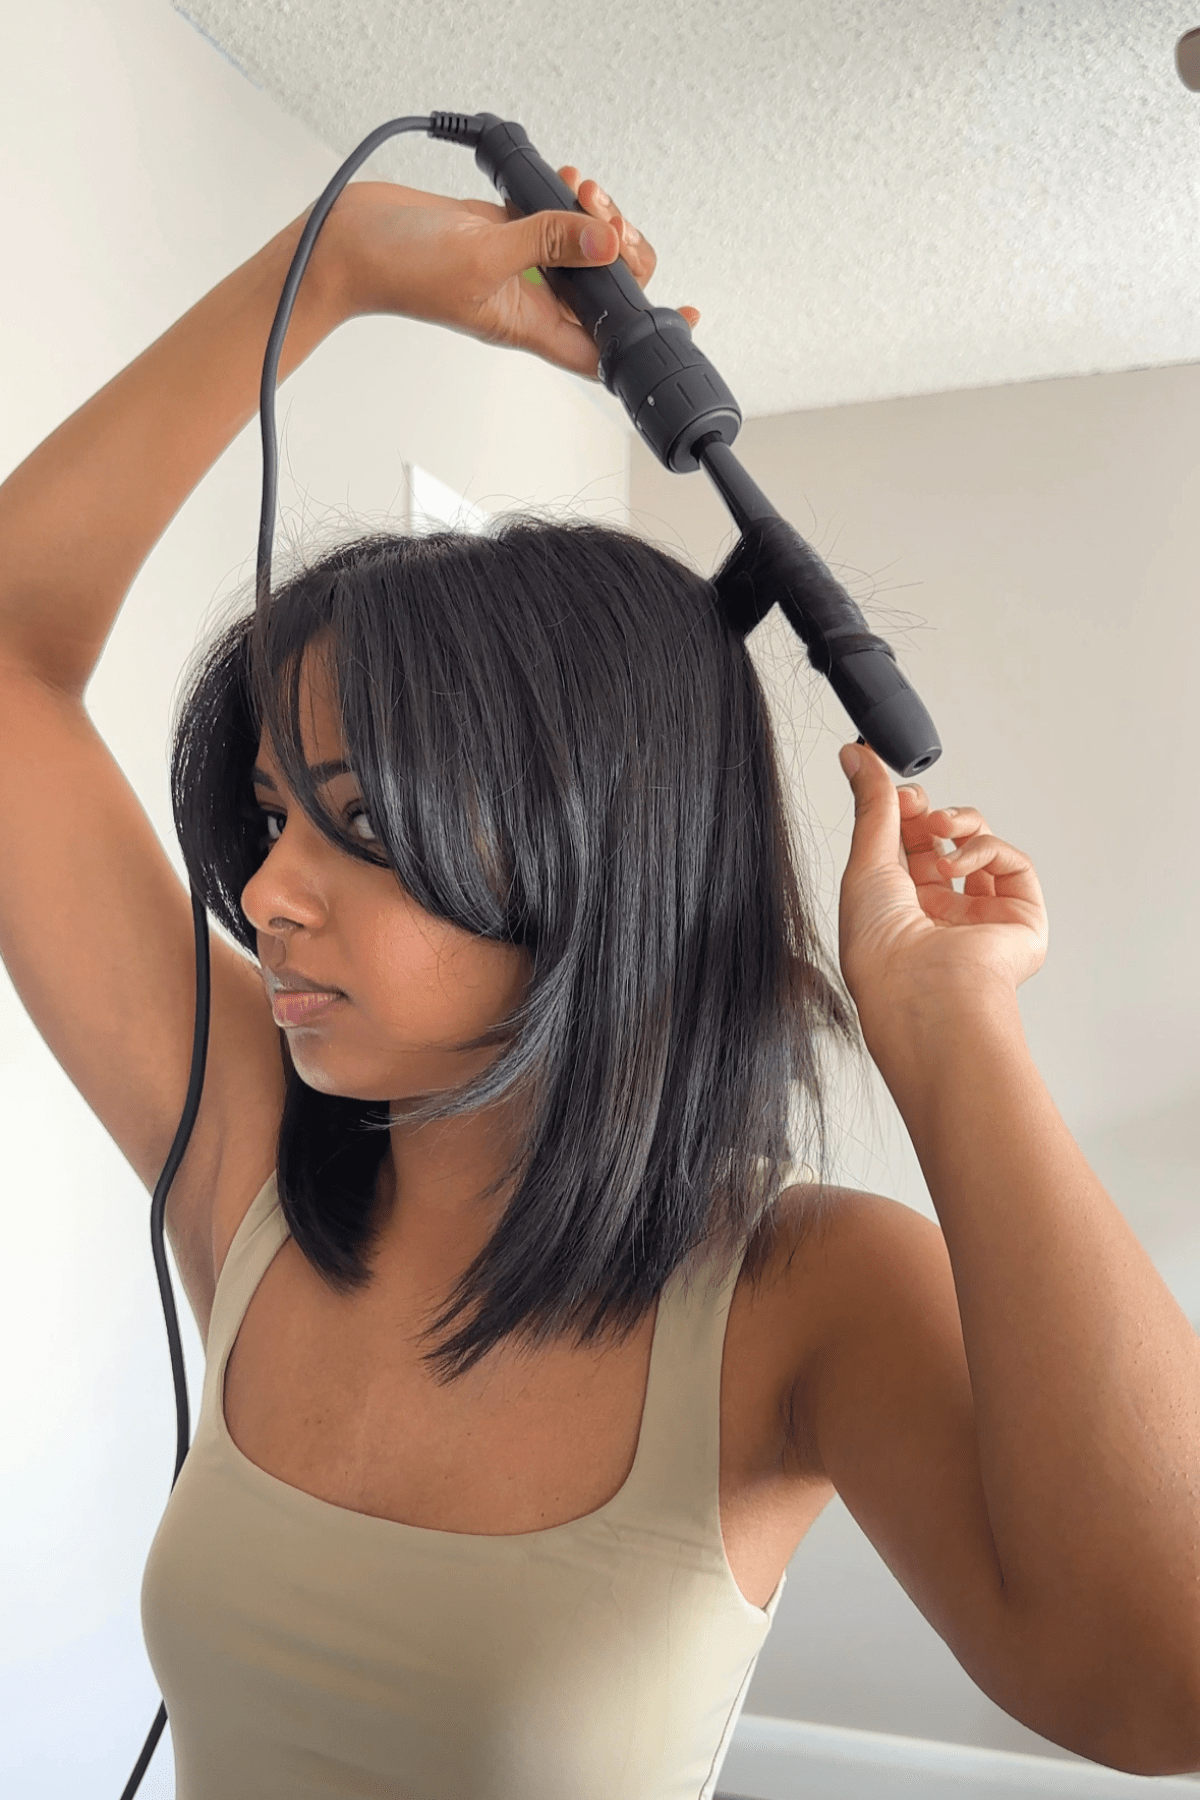
Source: Personal Image
If there’s one thing I’ve learned after styling short hair for over a decade, it’s this: your curls are only as good as your prep. Skip the right products or rush your sectioning, and even the most expensive wand won’t deliver lasting results.
I think of prep like priming a canvas before painting. It sets the tone, it creates structure, and it helps every curl stay exactly where you want it.
Here’s how I set the stage for bouncy, voluminous curls that don’t fall flat by lunchtime:
My Go-To Prep Routine
Start with dry, detangled hair
Sounds basic, but it matters. Wet hair + hot wand = sad, saggy damaged hair. Make sure your hair is 100% dry and smoothed out first.Add mousse to the mids and ends, and root spray at the base
Don’t just slather it on, be strategic. I like to work in a light volumizing mousse through the lengths. Then I lift small sections and mist a root lifter directly at the scalp.Section the hair like a pro
I break it into three layers: bottom, middle, and top. Clip up the top layers as we’ll hit those last for maximum bounce. And trust me, this makes curling way easier (no guesswork about what’s curled and what’s not).
Stylist Secrets That Make a Big Difference
Blow-dry with intention
The way you dry your hair affects the whole vibe. I use upward airflow at the roots to encourage lift, then smooth it down the shaft to control frizz. It’s a small switch that makes a big difference.Avoid anything heavy before heat styling
Oils, thick creams, butters- save them for your next deep treatment. Before curling, they’ll just weigh everything down and kill your volume before you even start.The “2-inch rule” is real
This is one of my non-negotiables for short hair. When curling the bottom layers, I always leave 1.5 to 2 inches near the root untouched. That little bit of straightness at the base = natural volume without the puffball effect. Then, when I get to the top layers, I curl much closer to the root for that lifted finish.
👉 Ready to pump up your hair’s volume? Check out my guide on How to Blow-Dry Hair for Volume to learn the root-first technique that gives lift and lasts!
| Curling Tools & Techniques for Effortless Curls |
|---|
| From choosing the right barrel size to styling soft, natural curls, these guides will help you master the art of curling like a pro: These posts break down tool selection, technique, and styling secrets so you can create salon-worthy curls at home. |
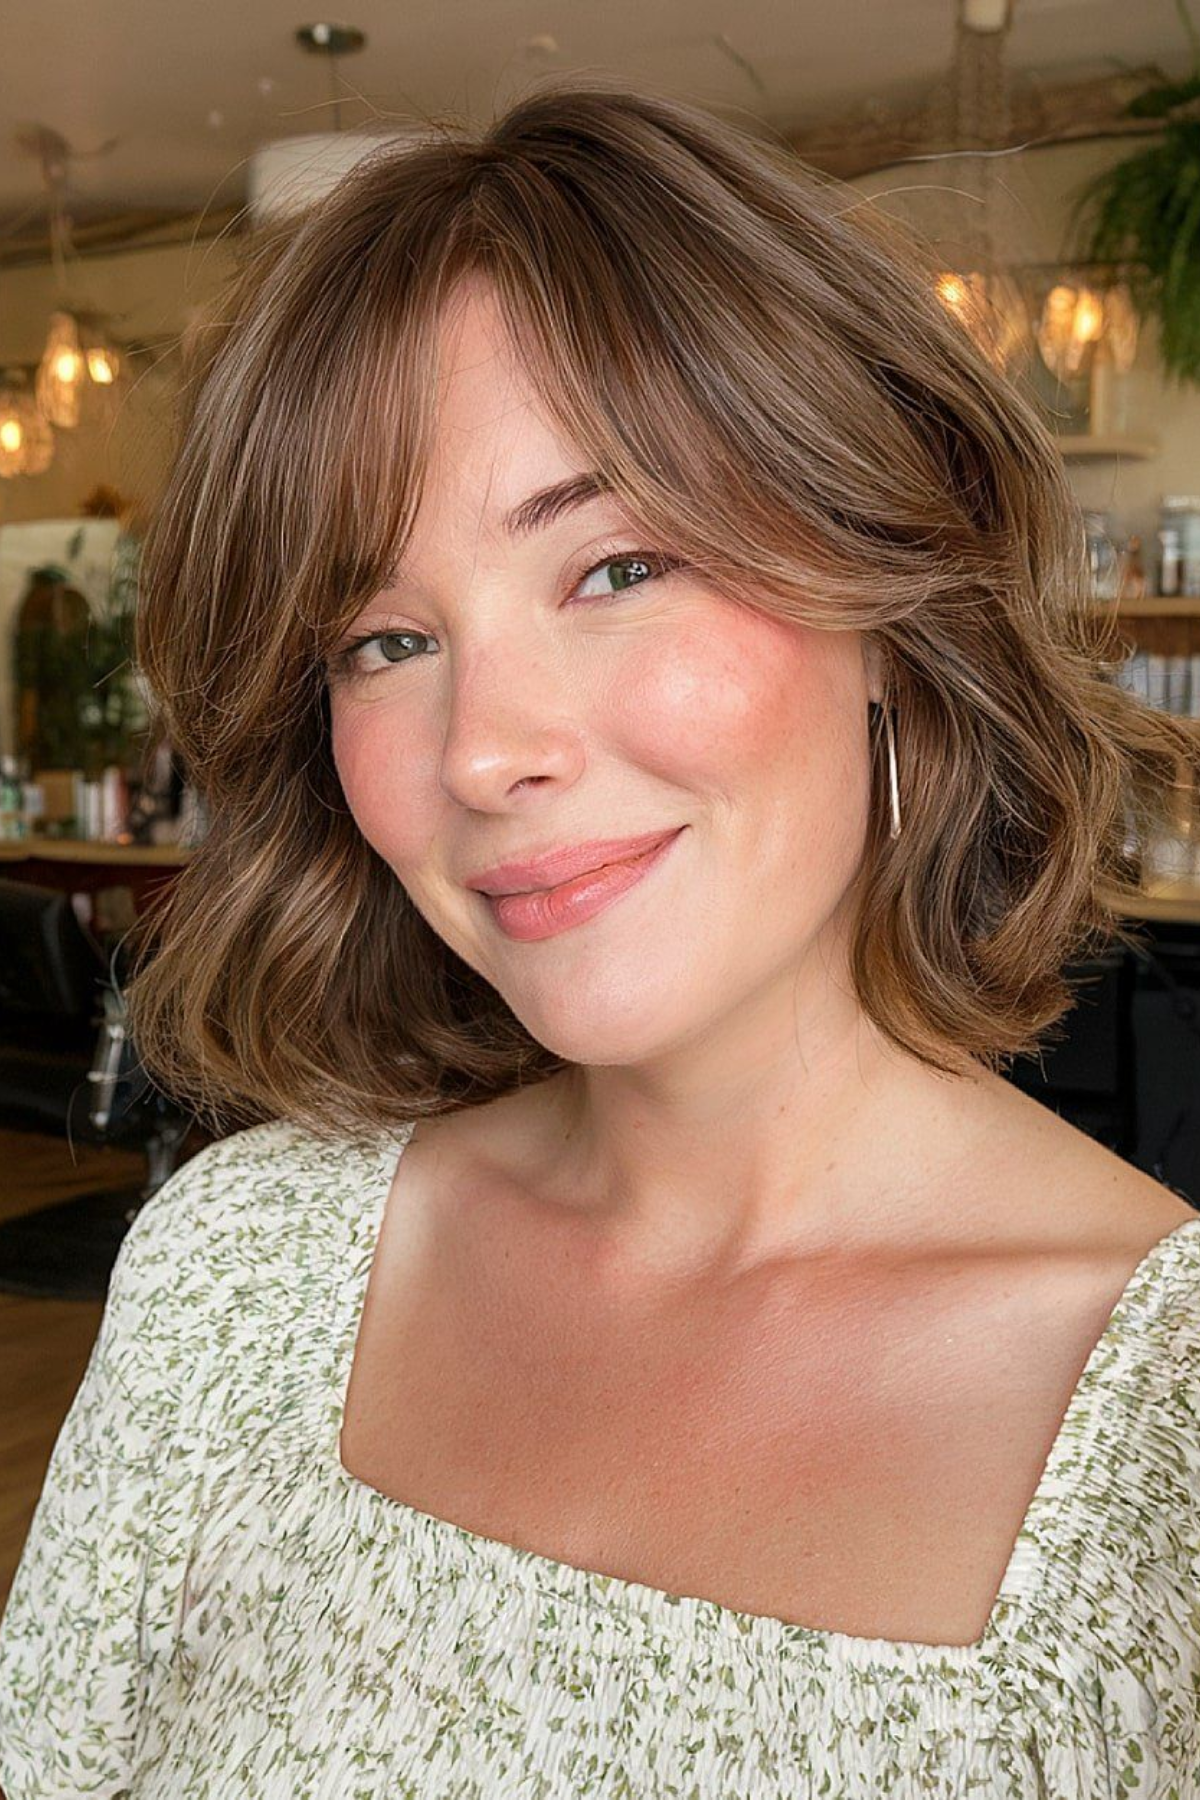
My Exact Method to Curl Short Hair With a Wand for Volume That Lasts

Source: Personal Image
This is the technique I use behind the chair and on my own hair when I want curls that actually stay full and bouncy, not limp by noon.
Most tutorials just tell you to wrap and go. But when you’ve got short hair, it’s all about where you start the curl, how you let it cool, and the tiny tweaks that give you that effortless, voluminous finish. Here’s how I do it:
Who This Works For
- ▪ Perfect for chin-length to collarbone cuts (bobs, lobs, layered pixies)
- ▪ Especially helpful if your hair tends to fall flat, or you’ve got finer strands
- ▪ Works best on straight to wavy hair, but can be adapted for tighter textures too
Why This Method Works
- ▪ It skips the root on the bottom layers (so you keep the lift)
- ▪ Adds extra bounce at the crown (where volume matters most)
- ▪ Alternating directions give it natural movement
Step-by-Step: How I Curl Short Hair for Volume

Source: Personal Image
Use a smaller barrel wand (0.75–1 inch is your bestie). Anything bigger will just give you soft lived-in curls and that’s not the look we are going for.
Hold the wand vertically and curl away from the face, but alternate each section. This keeps the curls from clumping together and gives that effortless, natural look.
Don’t curl too close to the root on the bottom layers. Leave 1.5 to 2 inches straight near the scalp. This space is what keeps those ends from flipping out awkwardly and gives your style that airy lift.
On the top sections, curl closer to the root. This is your volume zone! Getting closer to the scalp here will give you longer-lasting lift, so just be sure not to hold the wand in place too long.
Hold each curl in your palm and let it cool curled up. This step is SO underrated. By letting the curl cool in its coiled shape, you lock in bounce and reduce droop.
Once all curls are done, flip your head upside down and gently tousle with fingers. This wakes up the style, separates the curls, and adds that lived-in movement without brushing anything out.
Finish with a texture spray or light flexible hold mist. Mist just the mid-lengths and ends, don’t weigh down the crown!
Things You Shouldn’t Ignore (Trust Me)
Use a volume powder after curling: Sprinkle it lightly at the crown and massage it in. It adds grit and fullness without needing a backcomb.
Pin curl each section and let them cool off before removing the pins (optional but game-changing): Especially if you’re styling for an event or a long day, as this keeps the shape super bouncy.
Let every curl cool before touching it: If you separate while it’s warm, it’ll lose structure fast.
Avoid curling wands larger than 1.25 inches: They create more of a beach wave, not the kind of curl that gives structure or volume on short hair.
Fix Common Short Hair Curling Mistakes
Even if you’ve got your technique down, small missteps can undo all your hard work. Here’s a cheat sheet of the most common short hair curling mistakes I see and exactly how to fix them.
| Mistake | Why It Happens | How to Fix It |
|---|---|---|
| Curls falling flat at the crown | Curling too far from the root or letting them cool flat | Curl closer to the root on top sections + let curls cool in an upward position |
| Curls clumping or sticking together | Too much product, not enough separation | Use lighter styling products + separate curls with your fingers only |
| Ends look too tight or dried out | Wrapping the ends too tightly around the wand | Leave 0.5-1 inch of the ends out when curling + wrap looser on the lower half |
| Uneven curl shape throughout | Curling in the same direction or sectioning unevenly | Alternate curl direction and keep sections uniform in size |
| No volume despite curling | Using heavy products or starting curls too close to the root on the lower sections | Skip oils and creams pre-curl + keep the lower curls away from the root |
FAQs About Using a Wand to Curl Short Hair
Can you use a curling wand on short hair?
Absolutely. The key is choosing the right barrel size (0.75 to 1 inch is ideal) and adjusting your technique so you are not curling too close to the root on lower sections. It is all about control and sectioning.
What’s the best curling wand barrel size for short styles?
For most short cuts, a wand between 0.75 and 1 inch gives the best results. It is tight enough to create lift and bounce, but not so tight that it looks vintage or overdone.
How do I keep curls from looking too “done” or tight?
Alternate the direction of each curl, do not over-wrap the ends, and always shake out the style with your fingers instead of a brush. A quick flip and tousle at the end gives that soft, effortless finish.
What’s the difference between wands and curling irons for short hair?
Wands give a more modern, lived-in curl with less clamp crease, while irons can create more structured curls. I prefer wands for short hair because you can wrap more naturally and avoid those old-school dent marks.
How do I make curls in short hair last longer?
Let each curl cool fully in your palm or use pin-curl clips. Avoid overloading product at the start; finish with a texturizer or volume powder instead. And do not touch them until they are cool.
Track Your Curling Results & Adjust Over Time
Perfect curls don’t happen on the first try every time and they don’t have to. One of the most helpful things you can do (that almost no one talks about) is track what actually worked each time you style.
It takes the guesswork out of your next curl session and helps you figure out what your hair loves.
Try using a simple tracker like this:
Screenshot your favourite looks and jot a few notes in your phone. That way, you’ll know exactly what to do (and what to skip) next time.
Quick Curl Tracker Template Inspo
| Date | Products Used | Tools Used | Curl Quality (1–10) | Notes / Adjustments for Next Time |
|---|---|---|---|---|
| Oct 17, 2025 | Volumizing mousse, root spray, texture mist | 0.75" wand | 8 | Great volume! Try curling the top sections even closer to the root |
| Oct 21, 2025 | Heat protectant only | 1" wand | 5 | Too soft. Add mousse + hold curls in hand to cool next time |
| Oct 24, 2025 | Mousse, texture spray, and root powder at the crown | 0.75" wand + finger separation | 9 | Loved this combo-curls held shape all day |
My Finishing Tricks to Add Volume to Short Hair
These are my go-to finishing moves that I use behind the chair (and on myself!) to lock in volume without teasing everything to death:
Finger-Lift Method: After your curls have cooled, flip your head upside down and gently rake through with your fingers. Flip back up and use your fingertips to lift and separate the crown. It adds soft, rooty movement without frizz or fluff.
Add Layers to Support Volume: If your short cut is one-length, curls tend to sit too flat. Ask your stylist for soft crown layers, as they give your style structure and help curls stack instead of clumping.
Spray Strategically at the Roots: Use your volume spray or texture spray only at the crown and around the part, not all over. This gives root lift without weighing the ends down.
Remember the 5.5 Haircut Rule: If your curls feel heavy or fall flat right after styling, you might be past the sweet spot for length vs. density. Short hair needs that “just enough” length to hold shape, but not so much that it flattens. A fresh trim can bring that bounce right back.
Final Words from Haiirology
Using a wand to curl short hair without losing volume comes down to smart prep, the right barrel size, and cooling each curl with intention. Leave the roots alone on the bottom layers, curl closer at the crown, and finish with lightweight products for that airy, bouncy finish.
Tried this method? Tag me on Instagram @HaiirologyByJen, I’d love to see!
And if you’re not sure your haircut is helping or hurting your volume, download my free guide to find your perfect shape.


Struggling with styling? Discover low-maintenance haircuts for women over 40 that add volume, flatter your face, and save time every day.