Master Curling Hair Towards Face Vs Away for Soft Glam or Major Bounce

This post may contain affiliate links, which means I'll receive a commission if you purchase through the link at no extra cost to you. Please read the full disclosure here.
Have you ever stood in front of the mirror, curling iron in hand, wondering whether you should curl your hair toward your face or away? It might seem like a small decision, but the direction you curl your hair can make all the difference in how your style turns out.
The idea for this post came after I made a video about curl hair towards face vs away that went totally viral. People were flooding my DMs, asking for more details on how to get the perfect curls in each direction. So, I thought why not write this all down and break it down step by step for you?
In this blog post, I’ll walk you through both techniques, showing you exactly how to curl your hair toward and away from your face and explain how each one can give you a different look. Whether you're going for soft, vintage curls or bouncy volume, you’ll be able to master both. Let’s get started!
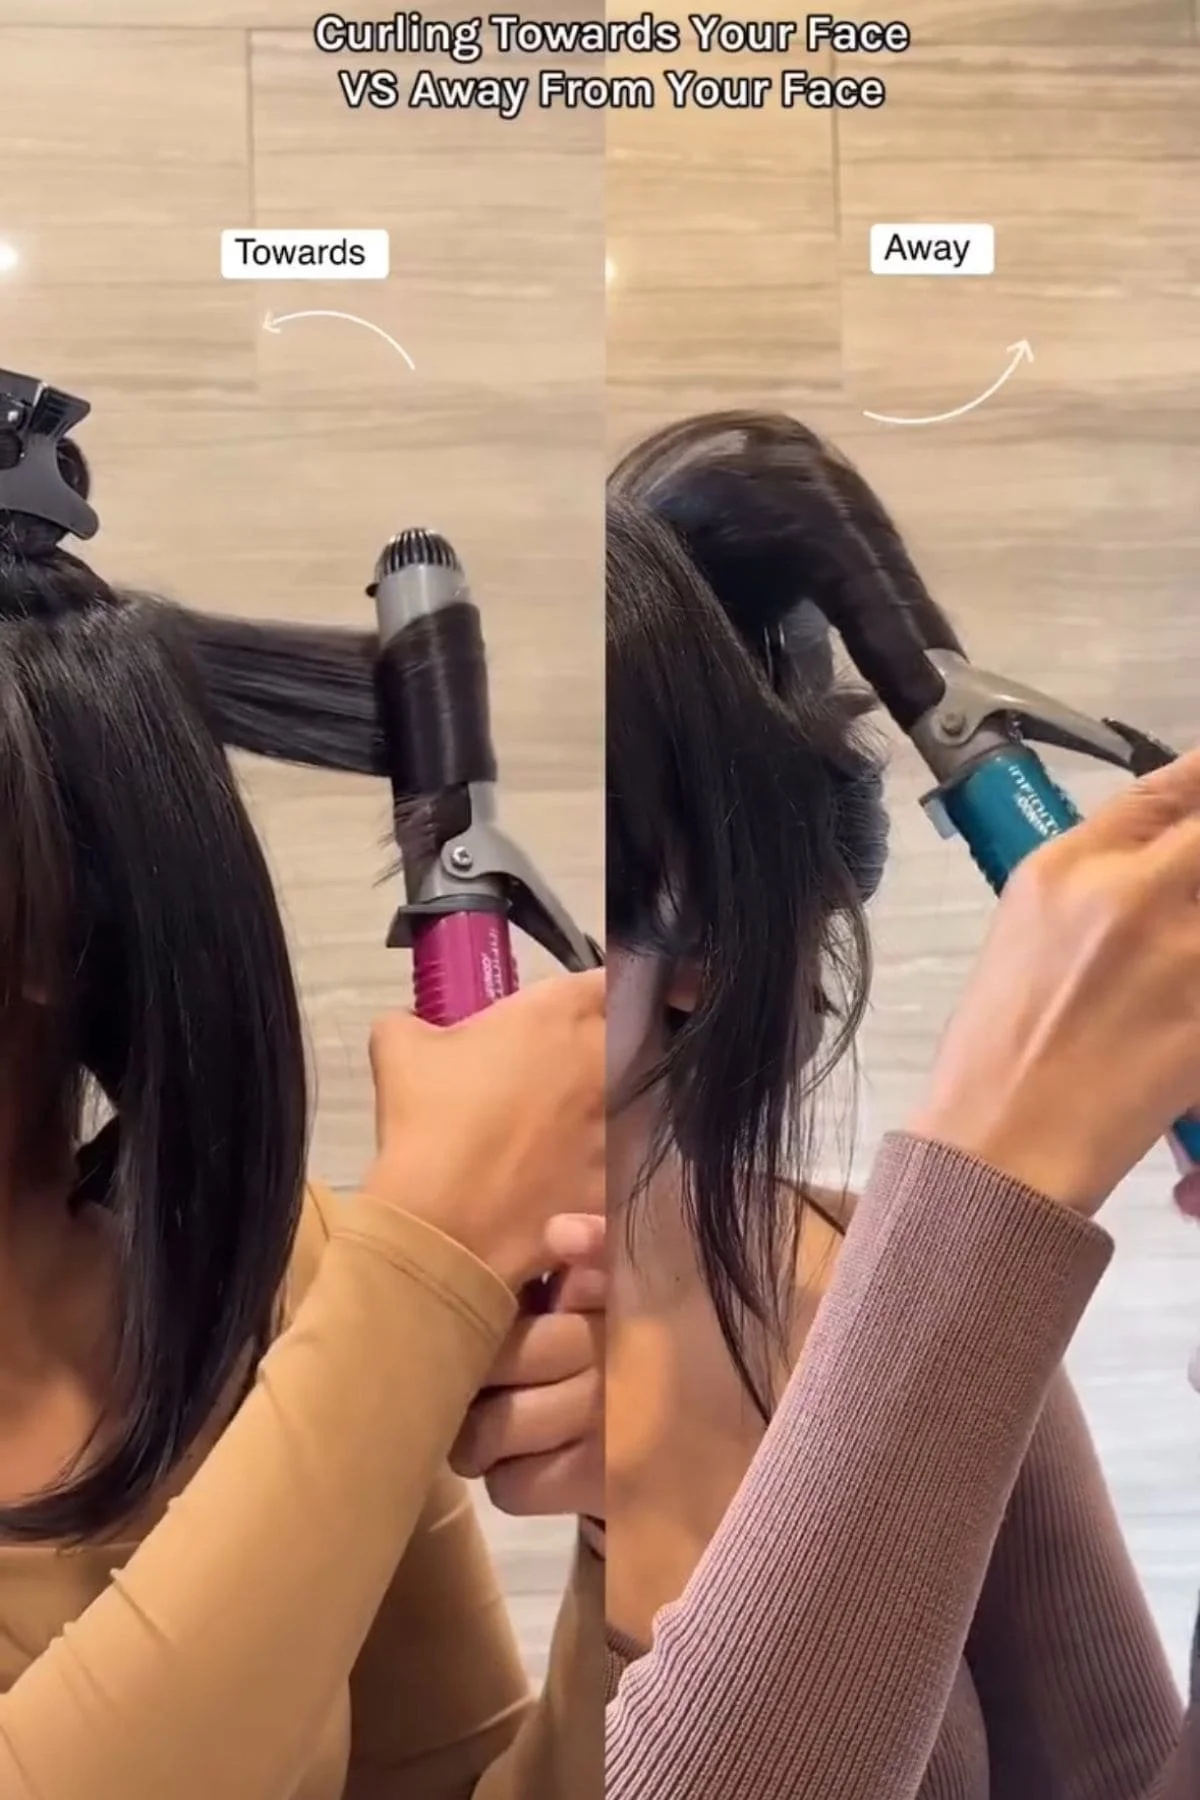
Why Curling Hair Towards Face Vs Away Matters
In a decade behind the chair, I’ve seen it in the salon a million times that the direction you curl in makes all the difference. Curling toward your face versus away from it can drastically change your entire look.
Curling away from your face is the one I reach for when I want that natural, bouncy volume. The hair lifts, the roots have that “I just walked out of a salon” feel, and you get the movement that looks super fresh. It’s perfect for a beachy, undone look, or a more voluminous, modern style. It’s that cool-girl, “I woke up like this” moment but, you know, with some intentional effort behind it.
Now, curling toward your face? This is all about smooth, structured elegance. It gives you soft curls that naturally frame your face, almost like a little love letter to old Hollywood. It’s classic and polished, and it never goes out of style. So, if you’re aiming for something sleek, structured, or vintage, curling toward your face brings out that sophistication.
No matter which direction you choose, it all comes down to the vibe you're going for. Whether it’s that soft, vintage elegance or full-on volume and bounce, knowing which direction to curl can help you create the look that’s just right for you.
Want To Eliminate Frizz In Your Curl Routine?
Your Frizz-Free Styling Routine
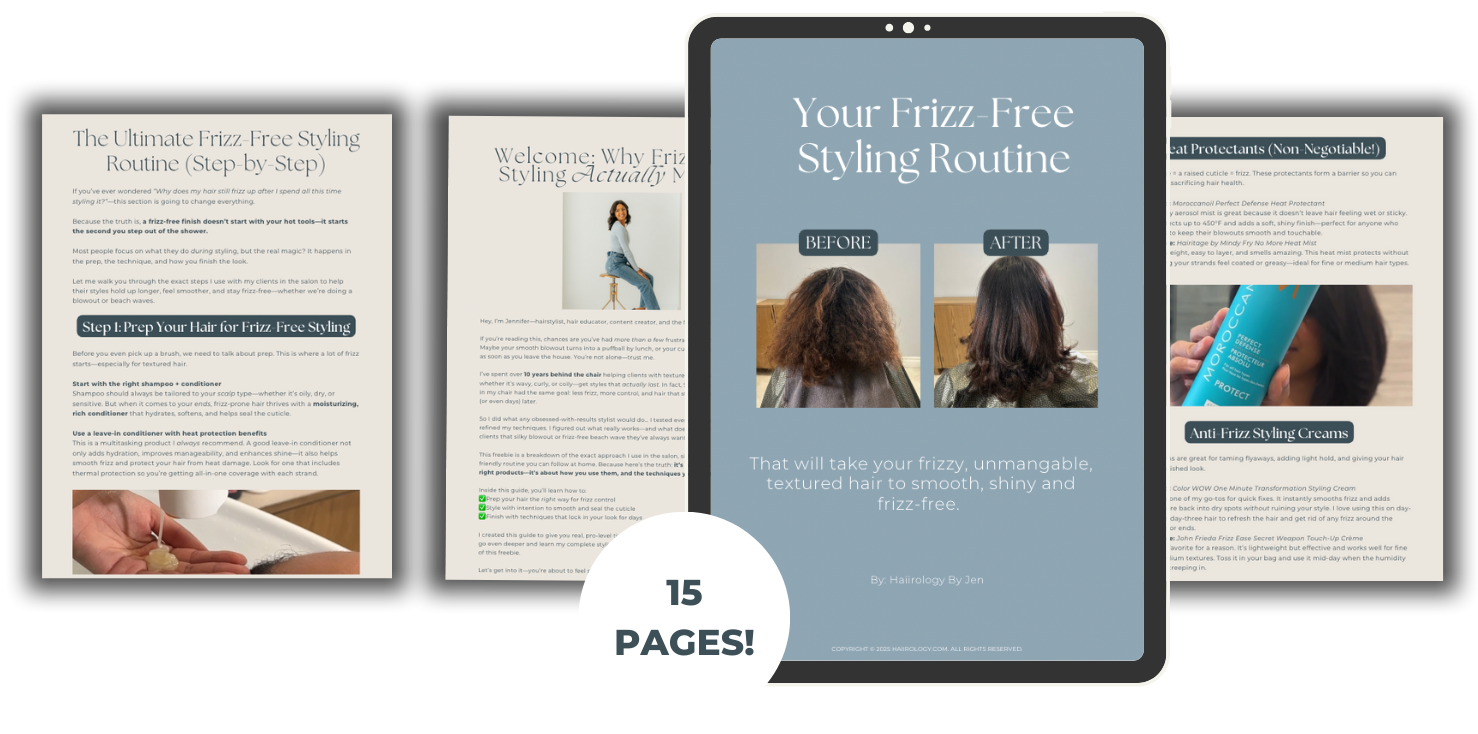
If you're dealing with frizz, this free guide is your solution! It’s a beginner-friendly breakdown of the exact method I use in the salon to eliminate frizz—simplified so you can do it yourself at home.
- ✅ Learn the exact routine I use on clients with frizz
- ✅ Discover the techniques and product layering that actually work
- ✅ Build a frizz-free styling routine that fits your real life
No spam—just real salon-tested advice you can actually use.
Grab Your Tools and Let’s Get Curling!
Alright, before we dive into the curling techniques, let’s talk about the tools I’m using because no matter which method you choose (curling toward or away from your face), the same tools are gonna do the job.
In the video, you saw me using the Conair Infinity PRO 1-inch curling iron and the 1 1/4-inch curling iron, which are my go-to tools for creating smooth, voluminous curls. But whether you’re into curling wands, straighteners, or even rollers, you can achieve the same results with what you’ve got.
Here’s a quick breakdown of the tools that’ll work perfectly for both methods:
| Product Name | Details | Shop Here |
|---|---|---|
| Conair Infinity PRO 1 Inch Curling Iron | Perfect for smooth, classic curls. Adjustable heat works on all hair types. | 🛒 Shop the one I use |
| Dyson Airwrap | I use the round brush attachment to add volume before curling. Great for root lift. | 🛒 Shop the one I use |
| GHD 1.25 Inch Soft Curl Iron | Go-to for beachy, natural waves with bounce. Soft, undone finish every time. | 🛒 Shop the one I use |
| BaBylissPRO Nano Titanium Flat Iron | For sleek curls with volume. It gives bounce without sacrificing smoothness. | 🛒 Shop the one I use |
So, whether you’re team curling iron, flat iron, or wand, these tools will have you covered for both curling toward and away from your face. Simple, right? Let’s get into the techniques now!
How to Curl Hair Away from Your Face for Volume & Bounce
If you’ve seen my video (or gonna play below), you know this is the trick I reach for when I want that big, bouncy volume. Curling away from your face adds this effortless lift at the roots that lasts all day. It’s a technique that looks simple, but trust me, the details matter.
I use this same method on myself and clients whenever I want to achieve that natural, modern vibe without the flatness. Ready to try it for yourself? Let’s dive in!
The Exact Step-by-Step Process You're Watching
Now, let’s talk about the process! You saw me do this in the video, and I’ll walk you through exactly how I achieve those perfect, bouncy curls.
Curling Wand
Take a section of hair (about 1–2 inches), wrap it around the barrel of your curling wand, and make sure it’s curling away from your face.
I like to hold it for 5–7 seconds for a more defined curl.
Once I let go, I let it cool for a few seconds before touching it. This helps set the curl, so it stays looking fresh.
I like leaving the ends out for a more relaxed vibe, but you can wrap the hair more if you want tighter curls.

👉 Want to master those effortless, bouncy curls? Check out my step-by-step guide on How to Get Loose Curls with a Curling Iron for expert tips and techniques!
Straightener
If you prefer a straightener, you can use it to curl away from your face. I clamp the section of hair at the root, twist the straightener away from my face, and pull it down slowly. This gives you that sleek, bouncy curl without frizz, and the best part? You still get that gorgeous lift at the roots.

👉 Check out my beginner-friendly guide on How to Curl Long Hair with a Flat Iron for step-by-step instructions and pro tips to achieve salon-worthy curls at home!
Rollers
Not feeling the heat? No worries! After curling a section with your wand or straightener, just roll it away from your face and let it cool. This is perfect if you want volume without all the heat damage. Rollers work wonders for that soft, bouncy look!

Pro Tip
Once your curls have cooled, gently run your fingers through them to break them up a little. This will give you that natural-looking volume without it feeling too styled.
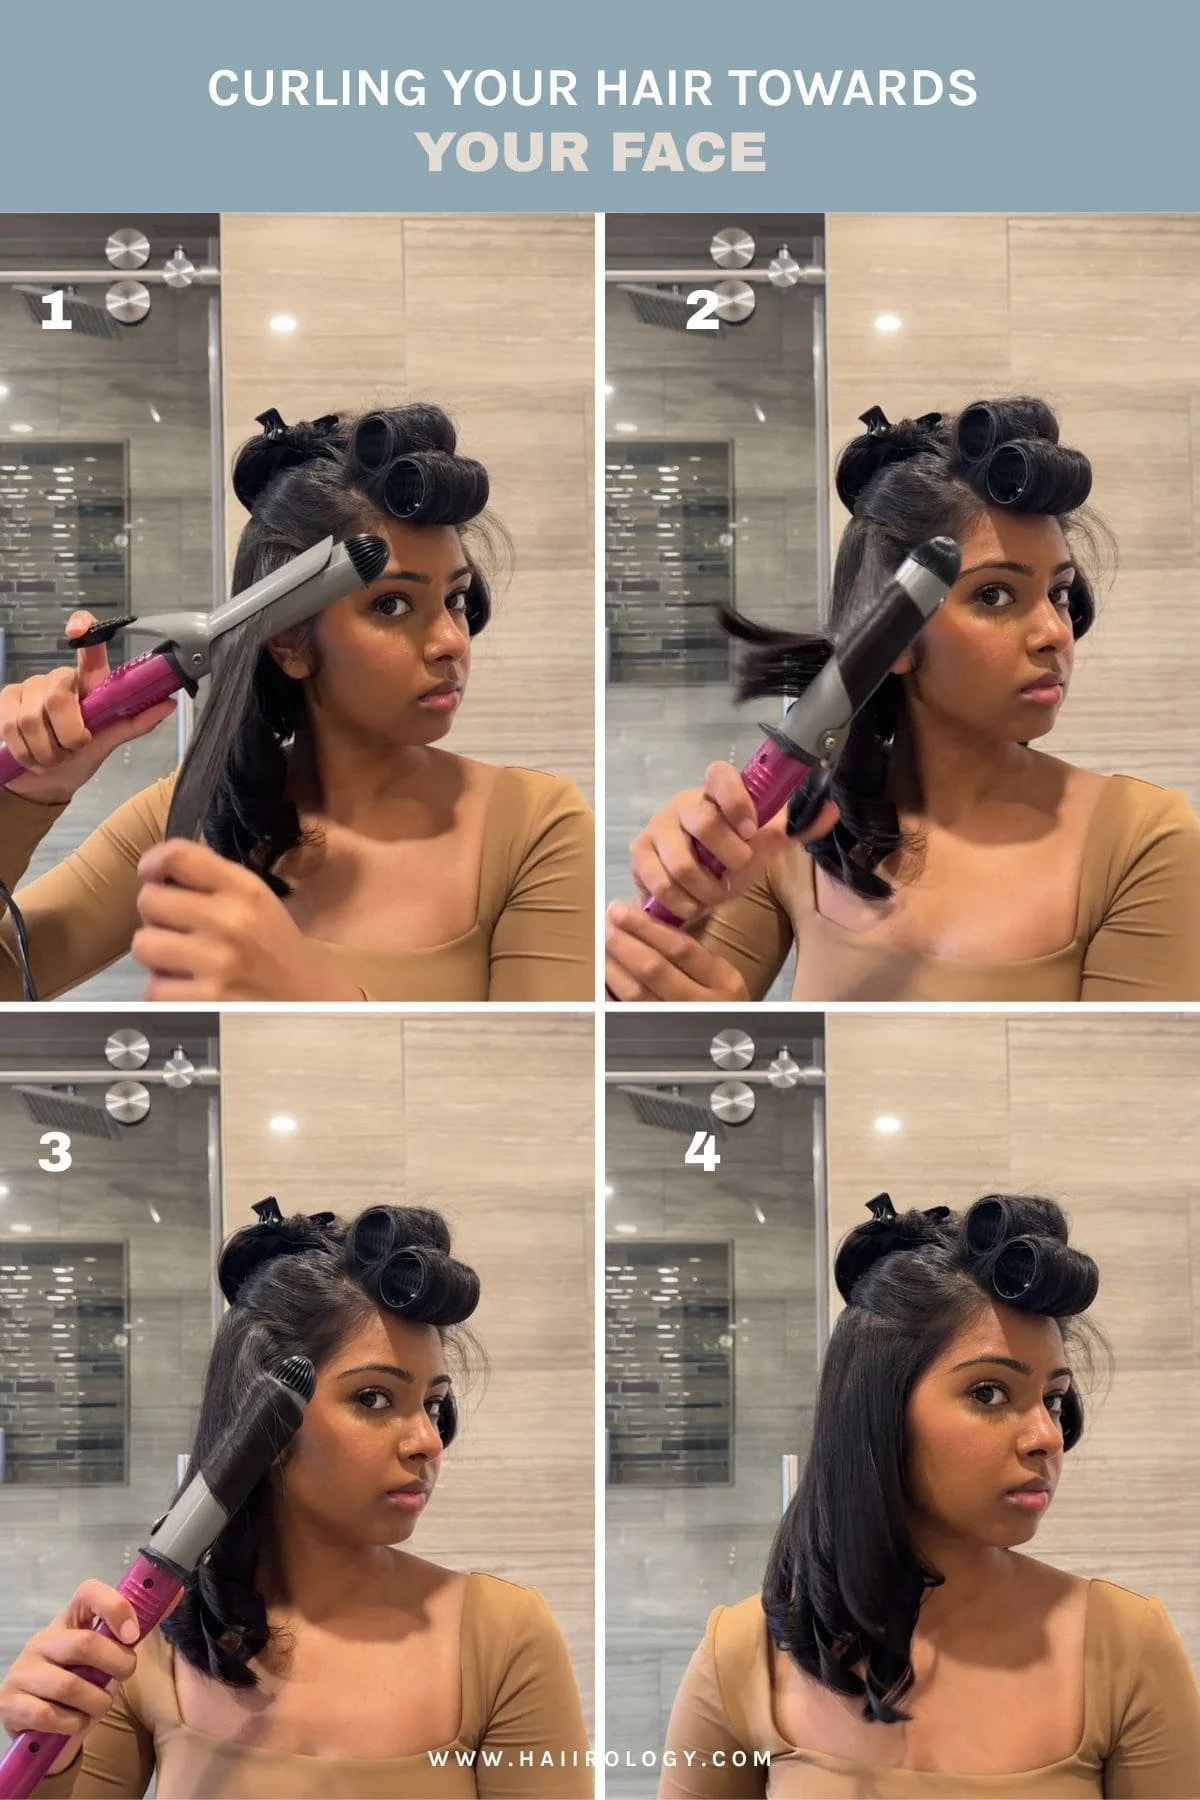
How to Curl Hair Towards Your Face for Softness & Symmetry
If you’re aiming for soft, polished curls that hug your face just right, curling toward your face is the move. This is the technique I reach for when I want that vintage-inspired, face-framing curl; think chic, retro vibes but with a modern twist. It gives you that sleek, structured finish without the frizz. You will see me doing this in the video below, and I’m going to break it down for you so you can nail it yourself. Ready to get those perfectly smooth, symmetrical curls? Let’s dive in!
The Exact Step-by-Step Process You're Watching
Let’s break down the exact process below!
Curling Wand
Let’s get to the fun part! Start by taking a section of hair and wrapping it around the barrel of your curling wand, making sure to curl towards your face.
Hold for about 5–7 seconds, depending on how tight you want your curl.
Once you release it, let it cool for a second to set the shape.
I like curling toward my face because it gives me that smooth, vintage-style curl that frames my face just right.
Straightener
If you’re using a straightener, here’s how I do it: clamp a section of hair at the root, twist the straightener toward your face, and pull it down slowly to create that smooth, controlled curl. The straightener gives it a more sleek look, but you still get that soft, polished volume.
Rollers
Not feeling the heat? Use Velcro rollers for that perfect inward curl! After curling with your wand or straightener, roll each section toward your face, then let them cool. This is a great way to get volume without all the heat damage and still achieve that soft, symmetrical look.
Which Technique Is Best for Your Face Shape?
Round Faces: Got a round face? Curling away from your face is definitely the way to go. It’ll help elongate your face and add structure, giving you that natural, sharp look. Plus, it creates a more lifted, angular vibe that looks super flattering!
Square Faces: If you've got a square face, curling toward your face is your best friend. It softens the angles and creates a more oval, balanced shape. The inward curl helps frame your face in a way that feels super polished but still natural.
Heart-Shaped Faces: For heart-shaped faces, curling inward can work wonders! It complements the sharper features around your chin and adds volume around the cheeks, giving you that beautiful balance. You’ll get soft, flattering curls that frame the face without feeling too heavy.
Pro Tips for Getting the Best Results
Always start with a good texture spray before curling to help your curls hold longer.
After curling each section, let the curl cool completely before touching it.
Finish with a flexible hairspray. It gives hold without making your curls stiff or crunchy.
Protect your hair with a heat protectant spray.
Keep your curling tool at a moderate temperature. For fine hair, keep it under 300°F. This minimizes damage. For thicker hair, you can go a bit higher, but the lower, the better for healthy curls.
If you're using a flat iron or curling iron, always make sure it’s ceramic or tourmaline. These materials help distribute heat evenly and protect your hair from overheating.
For extra fullness, try a bit of dry shampoo to add volume and texture to the roots after you curl.
| Master the Art of Curling Your Hair |
|---|
| Whether you're a beginner or just want more defined, long-lasting curls, these guides and tools will help you get it right every time: From choosing the right tool to nailing the technique, these resources have everything you need to curl with confidence. |
Master Frizz & Get Gorgeous Curls With My Frizz-Free Routine! ⬇️
Your Frizz-Free Styling Routine
If you're dealing with frizz, this free guide is your solution! It’s a beginner-friendly breakdown of the exact method I use in the salon to eliminate frizz—simplified so you can do it yourself at home.
- ✅ Learn the exact routine I use on clients with frizz
- ✅ Discover the techniques and product layering that actually work
- ✅ Build a frizz-free styling routine that fits your real life
No spam—just real salon-tested advice you can actually use.
Now that you’ve learned how to master curling your hair towards & away from your face, the real question is: do you know how to prevent the damage curling will cause, and keep your hair healthy at home?
If not, don’t worry! I’ve got you. As a hairstylist of 10+ years (and a product junkie who’s tried it all), I’ve rounded up my top hair tools, styling picks, and everyday must-haves in one easy-to-shop page. P.S. I even snuck in a few of my beauty + outfit faves!
Explore Jen’s FavoritesFinal Word from Haiirology
Now that you’ve got the lowdown on curling hair towards face vs away, it’s time to try both techniques and see which one works best for you. Whether you’re going for that classic, face-framing look or big, voluminous curls, knowing the difference will change the way your hair looks and feels. Don’t forget to experiment with different tools and products to find what works for your hair type!
And, I’d love to see how your curls turn out! Send me a DM on Instagram with your results. I can’t wait to see your gorgeous curls in action!
Related Posts


How to curl your hair with a curling iron: step-by-step from my viral video! Beginner-friendly tips, pro tools, and tricks that actually make curls last.