Rachel Green's Hairstyles in Friends: Every Look Decoded

This post may contain affiliate links, which means I'll receive a commission if you purchase through the link at no extra cost to you. Please read the full disclosure here.
TL;DR
Rachel Green's hair is built around three elements: soft, face-framing layers, a round-brush blowout, and styling that lifts the roots while flipping the ends. Those details create the volume and movement that made her hairstyles so recognizable throughout Friends.
Each season featured a slightly different version of the cut, so the best option depends on your hair texture, desired length, and styling routine. Lightweight volumizing products help recreate the signature bounce without weighing the hair down.
This guide breaks down Rachel Green's hairstyles by season, explains how to adapt each one for different hair types, and shows how to recreate the look at home.
Let’s Talk About Rachel Green's Hair (Yes, From Friends!)
If you’re even slightly hair-obsessed and a Friends fan, you know the hairstyles of Rachel Green in Friends were basically their own subplot. From that iconic layered flip in Season 2 to the sleek, grown-up look in later seasons, she had a hair era for every vibe.
And honestly? After more than 10 years behind the chair as a licensed hairstylist, I still have clients asking for some version of 'The Rachel.'
Recently, I recreated the ultimate 90s blowout of Rachel Green on Instagram, and your DMs blew up. I heard everything from “How do I style my hair like Rachel from Friends?” to “Is this the ‘Rachel Green haircut season 3’ look?”, so I figured, why not break it all down here?
In this post, I’m walking you through the viral step-by-step from my reel, every major Rachel Green hairstyle, season by season, what to ask your stylist if you want the look, tools, and pro tips to make it work today.
Whether you’re here for that bouncy '90s volume or just trying to figure out which Rachel era fits your vibe, I’ve got you. Let’s dive in!
Watch the Viral Rachel Green Blowout Everyone’s Talking About
You’ve probably seen this one already, but if not, let me catch you up. I posted a quick reel recreating that effortless, flippy blowout Rachel Green wore all throughout Friends, and it immediately struck a nostalgic nerve.
The shine. The bounce. That subtle flip that somehow made it look like you had your life together.
It’s giving season 2 to season 5 Rachel energy, right when her layers were face-framing perfection and her blowouts looked like they had a full glam team behind them (but spoiler: it’s all about brush technique and angles).
This look is what most people mean when they search for things like:
“How to do Rachel Green's hairstyle”
“Modern Rachel haircut”
“How did Rachel Green do her hair?”
Let’s break it down step-by-step so you can actually get the look, even if you’re not a pro (yet).
Recreate This Rachel Green 90s Blowout (Step-by-Step from My Reel)
You don’t need a full glam squad to get that classic 90s Rachel vibe; just the right tools, a few pro techniques, and a bit of patience.
Here’s exactly how I styled the Rachel Green-inspired blowout in my video.
(Screenshot this part if you're planning to try it later!)
Step 1: Start with Damp Hair and a Round Brush
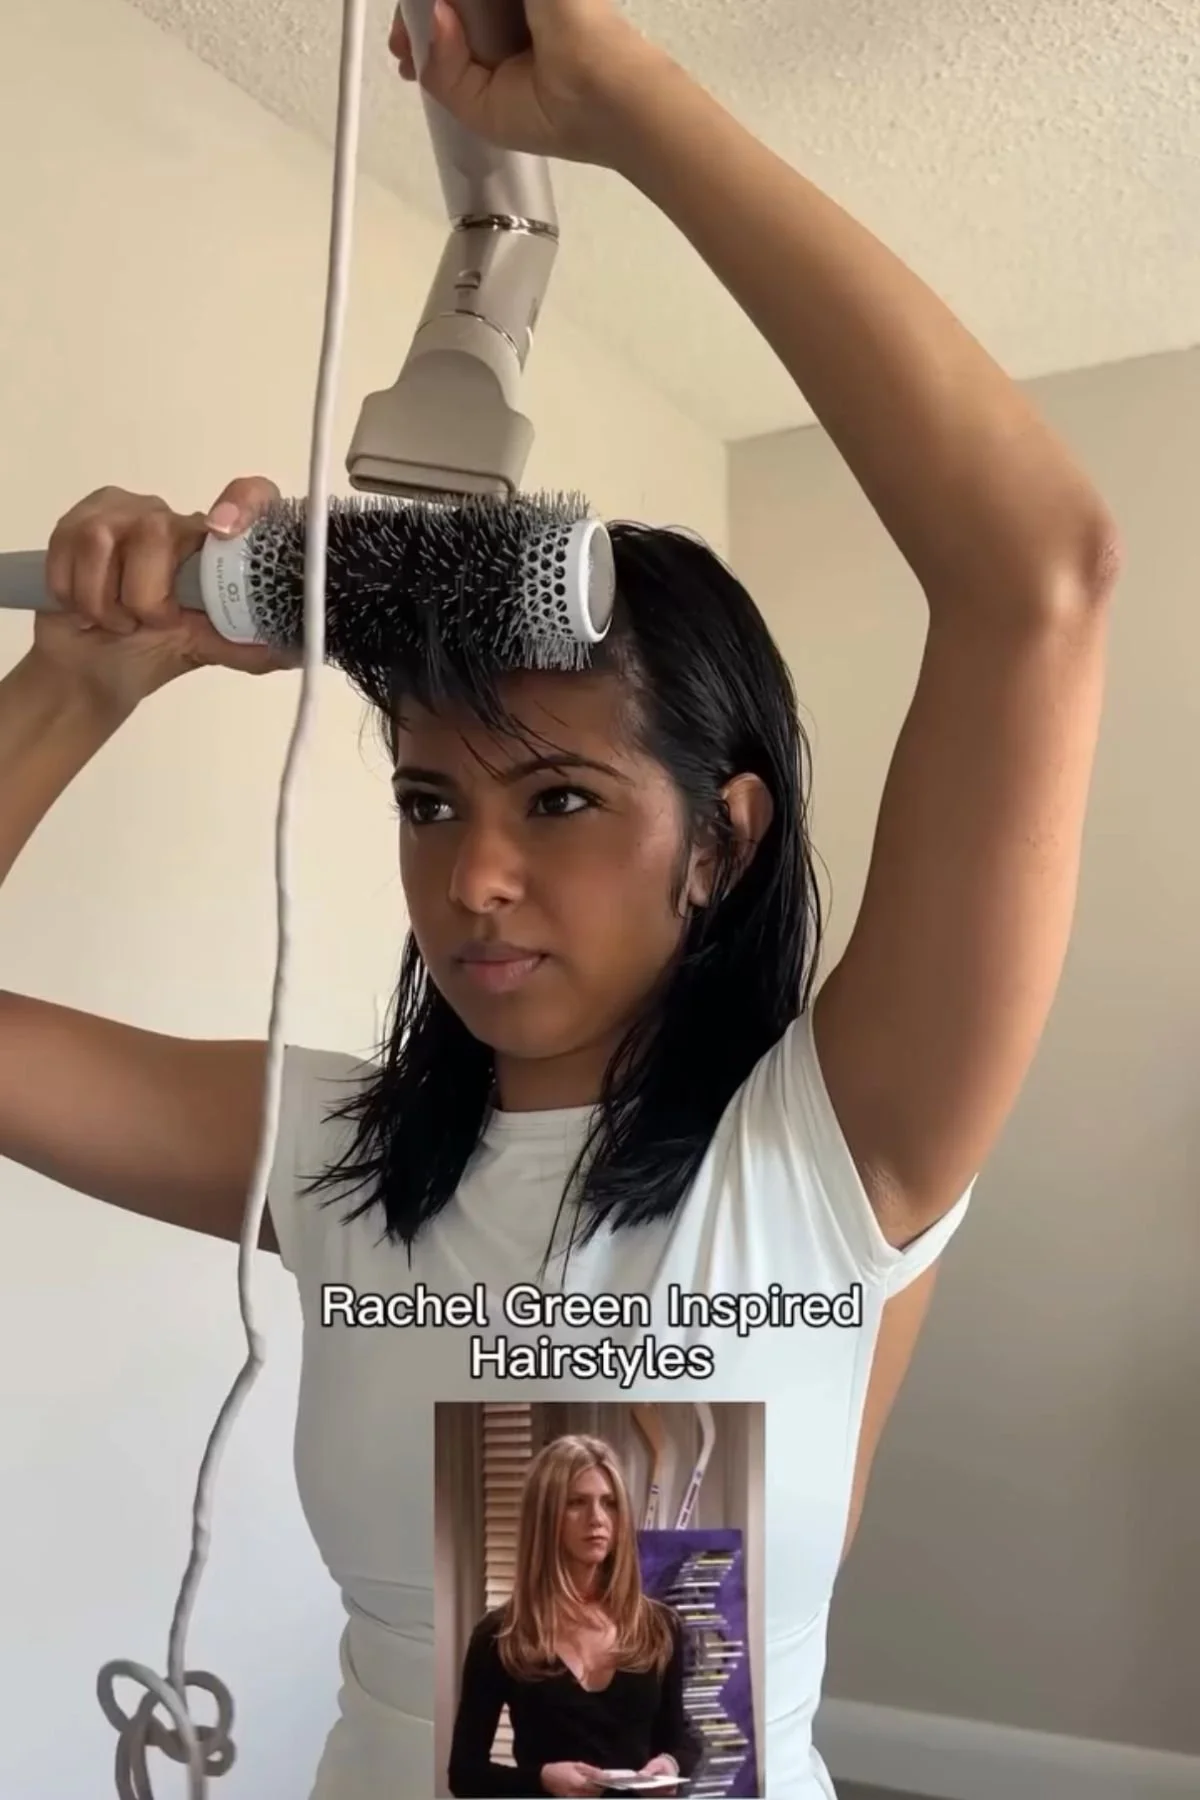
Source: Personal Image
Place your round brush under your bangs with the hair resting on top of the brush.
While blow-drying, drag the brush forward and gently curl the ends inward.
This creates that classic swoop that gives face-framing magic.
And always shield your hair before anything else, I reach for the Amika The Shield Anti-Humidity Spray to lock out heat and humidity.
Step 2: Lift and Flip with the Brush on Top
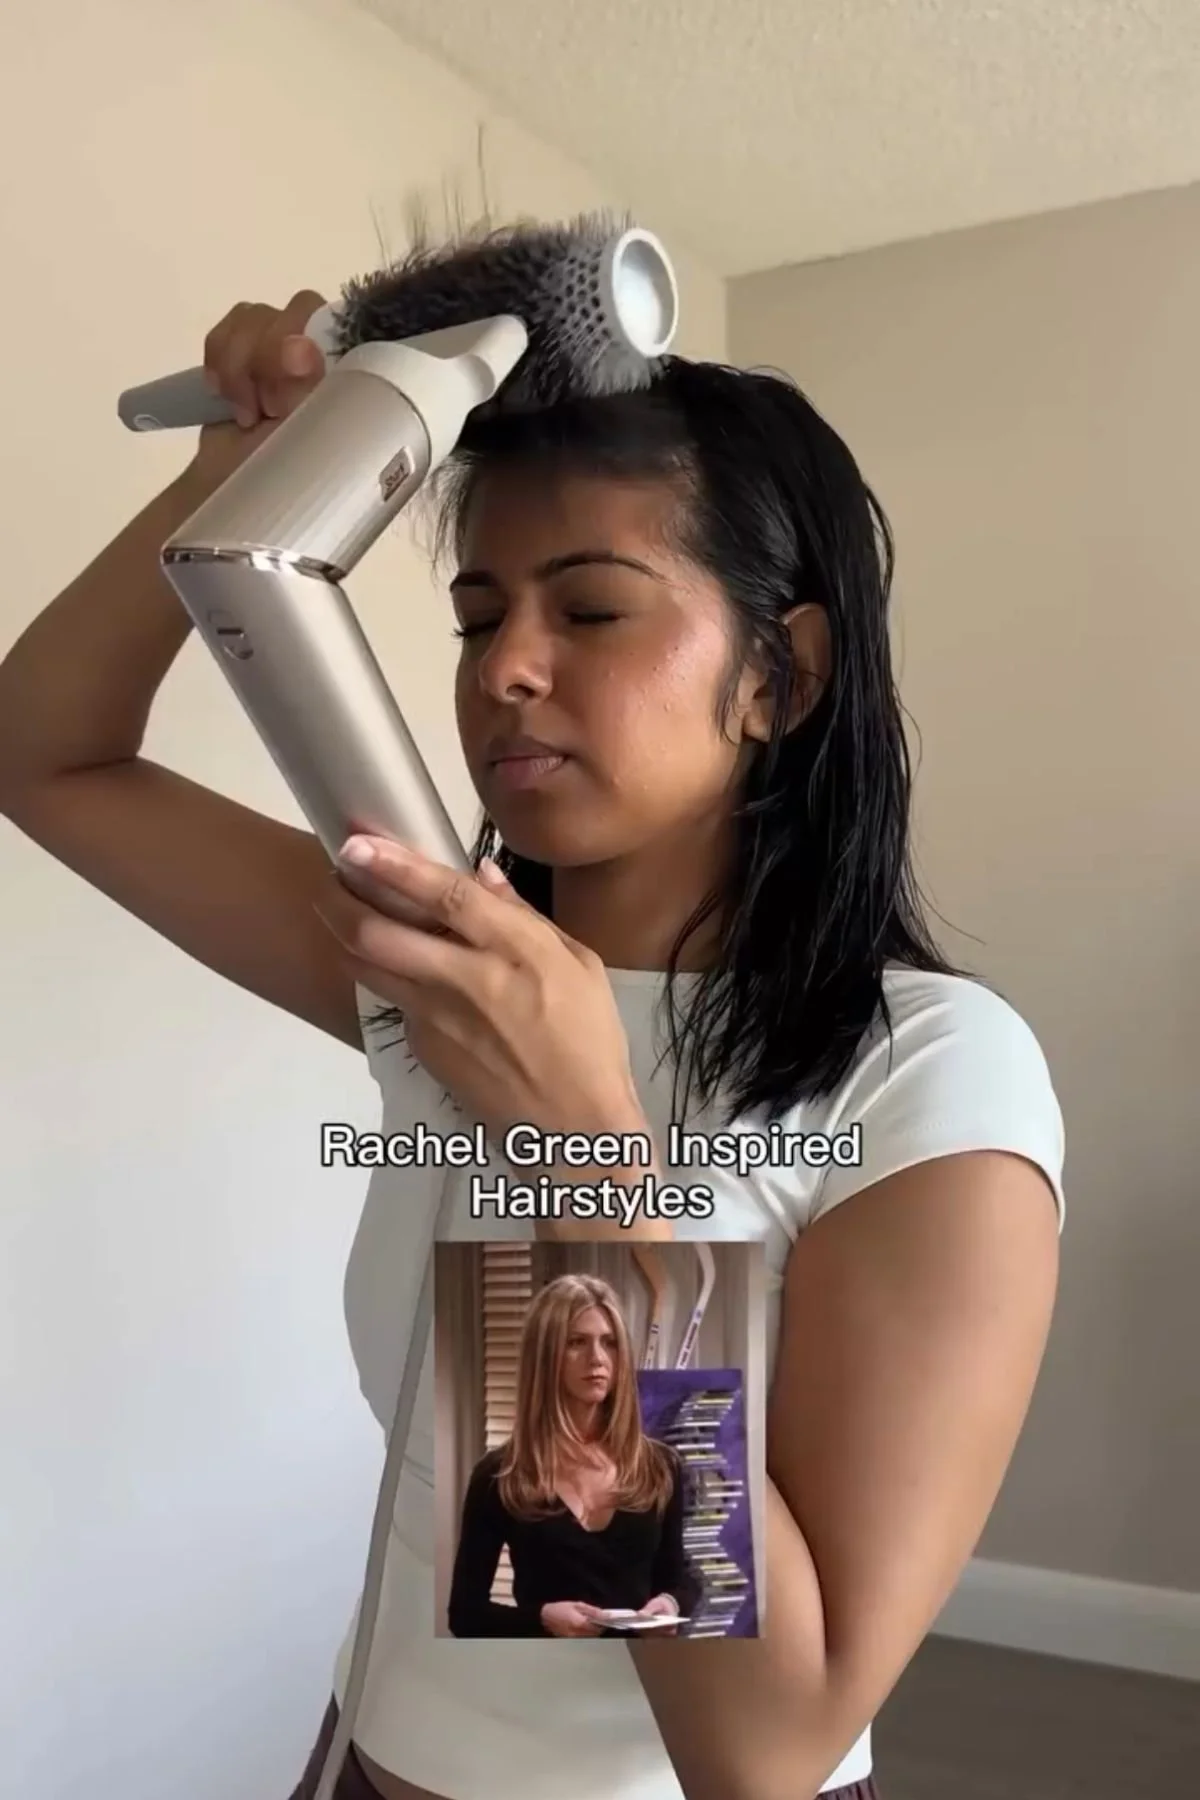
Source: Personal Image
Once your bangs are about 85–95% dry, switch it up.
Place the round brush on top of the bang section and blow-dry going up and forward so the ends flip away from your face.
This gives you that feathered lift that defined Rachel’s layers.
Step 3: Set It With a Roller While You Blow Dry the Rest

Source: Personal Image
Grab your Kitsch Ceramic Thermal Hair Rollers, roll up your bangs, and let them cool and set.
While that’s happening, you can blow-dry the rest of your hair.
This is key to holding volume without having to use tons of product or redo it in a few hours.
Only add a light spritz of the TRESemme Keratin Smooth Weightless Finishing Hairspray before rolling when you want extra hold.
Step 4: Flip Out the Ends with a Thermal Brush

Source: Personal Image
Once your hair is dry, go back in with the BondiBoost Infrared Bounce Brush and curl the ends of your layers toward your face.
It gives you that soft, flipped-out finish Rachel rocked in the midseasons of Friends.
This step is where the real “modern Rachel haircut” feel kicks in.


That’s the full routine!
Easy enough to do at home once you’ve got the flow down, and so worth it for that nostalgic-but-elevated 90s look.
Every Iconic Rachel Green Hairstyle by Season
Rachel Green didn’t have one signature hairstyle. She had an era every season.
Whether it was that choppy layered bob or her long, shiny waves in the later seasons, there’s a Rachel look for basically every hair type and vibe.
Here’s my stylist breakdown of each major phase:
Season 1: The Baby Bob

Source: Pinterest
Rachel’s short hair in Season 1 was all about soft beginnings. A shoulder-grazing bob with barely-there layers and a casual, effortless vibe. It was the kind of haircut you’d get when you're in transition, like a new job, new city, new roomie (Monica, duh).
Want it today? Ask for a blunt bob with soft layering at the front that complements your texture. It’s low-maintenance and flatters most face shapes when styled with a slight bend or natural wave.
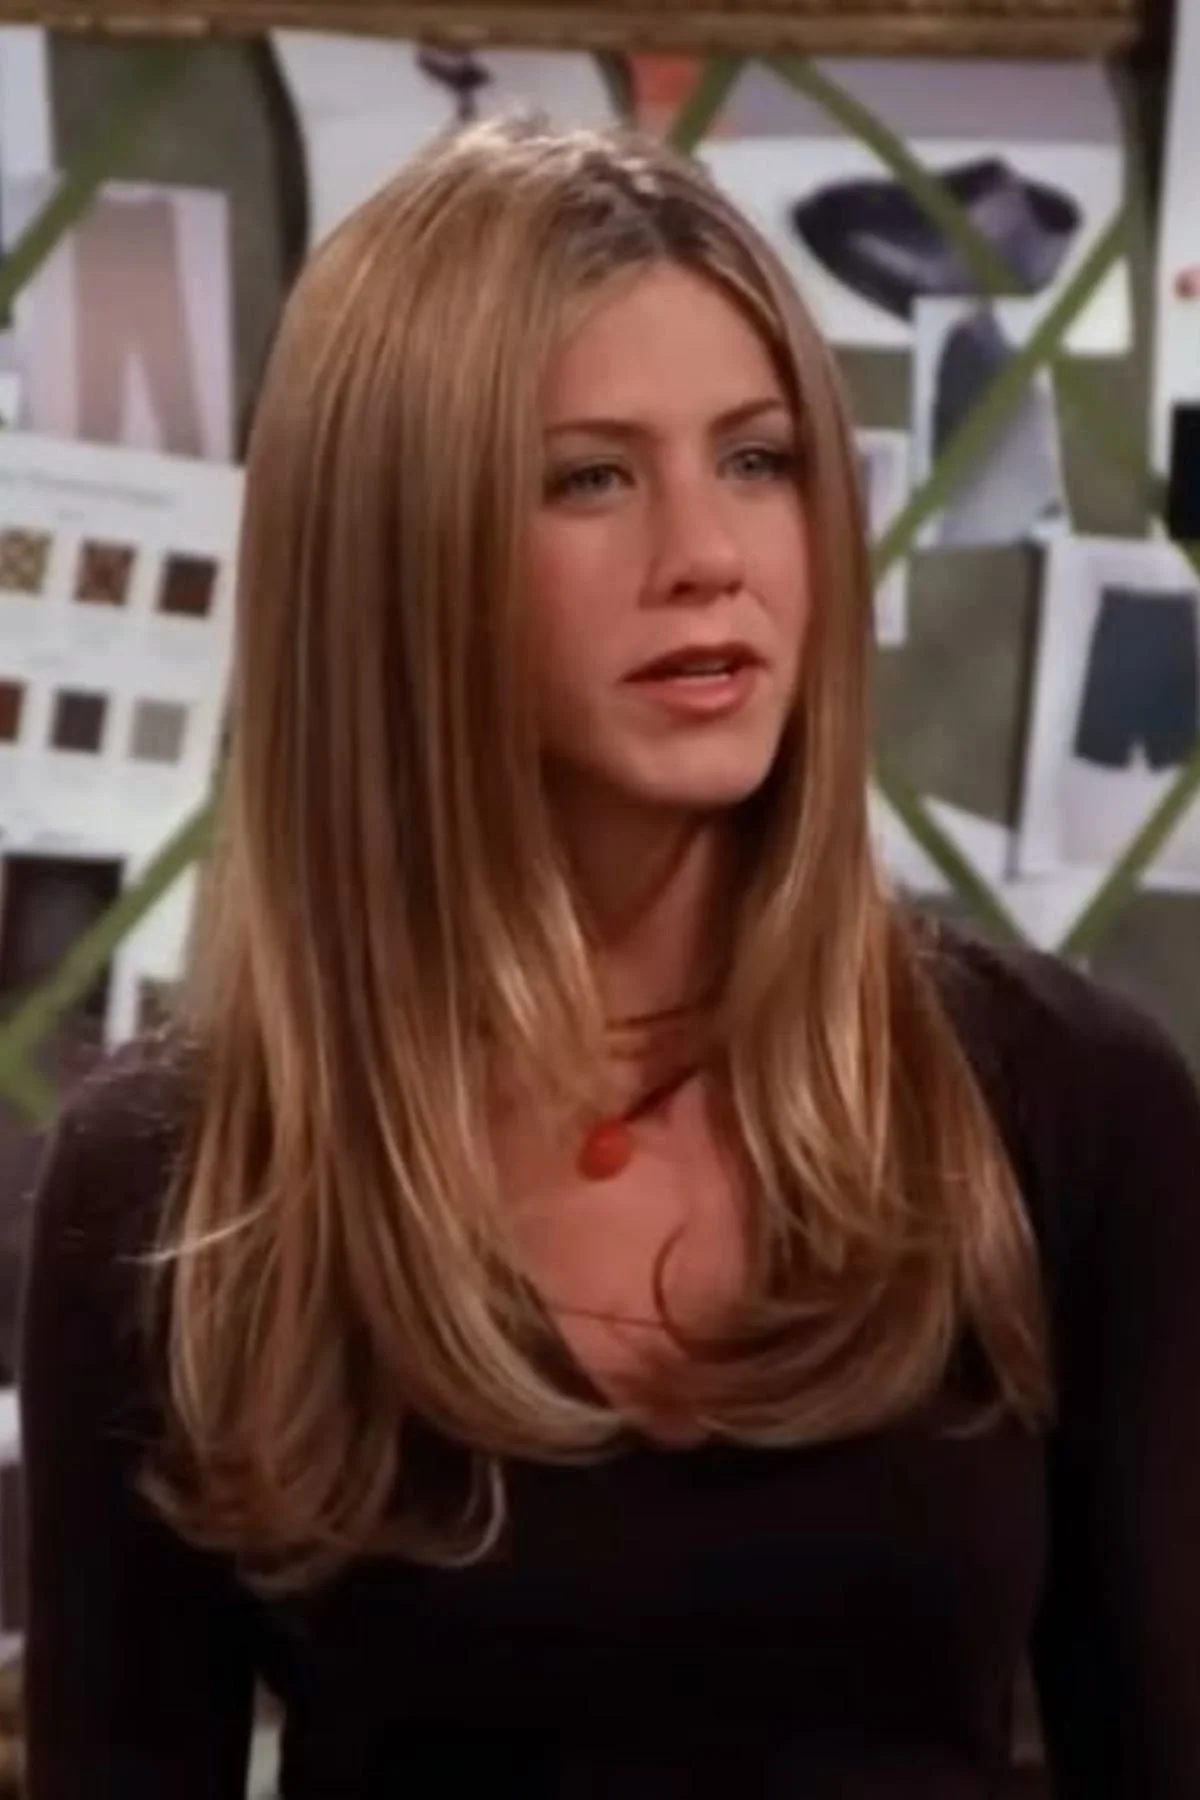
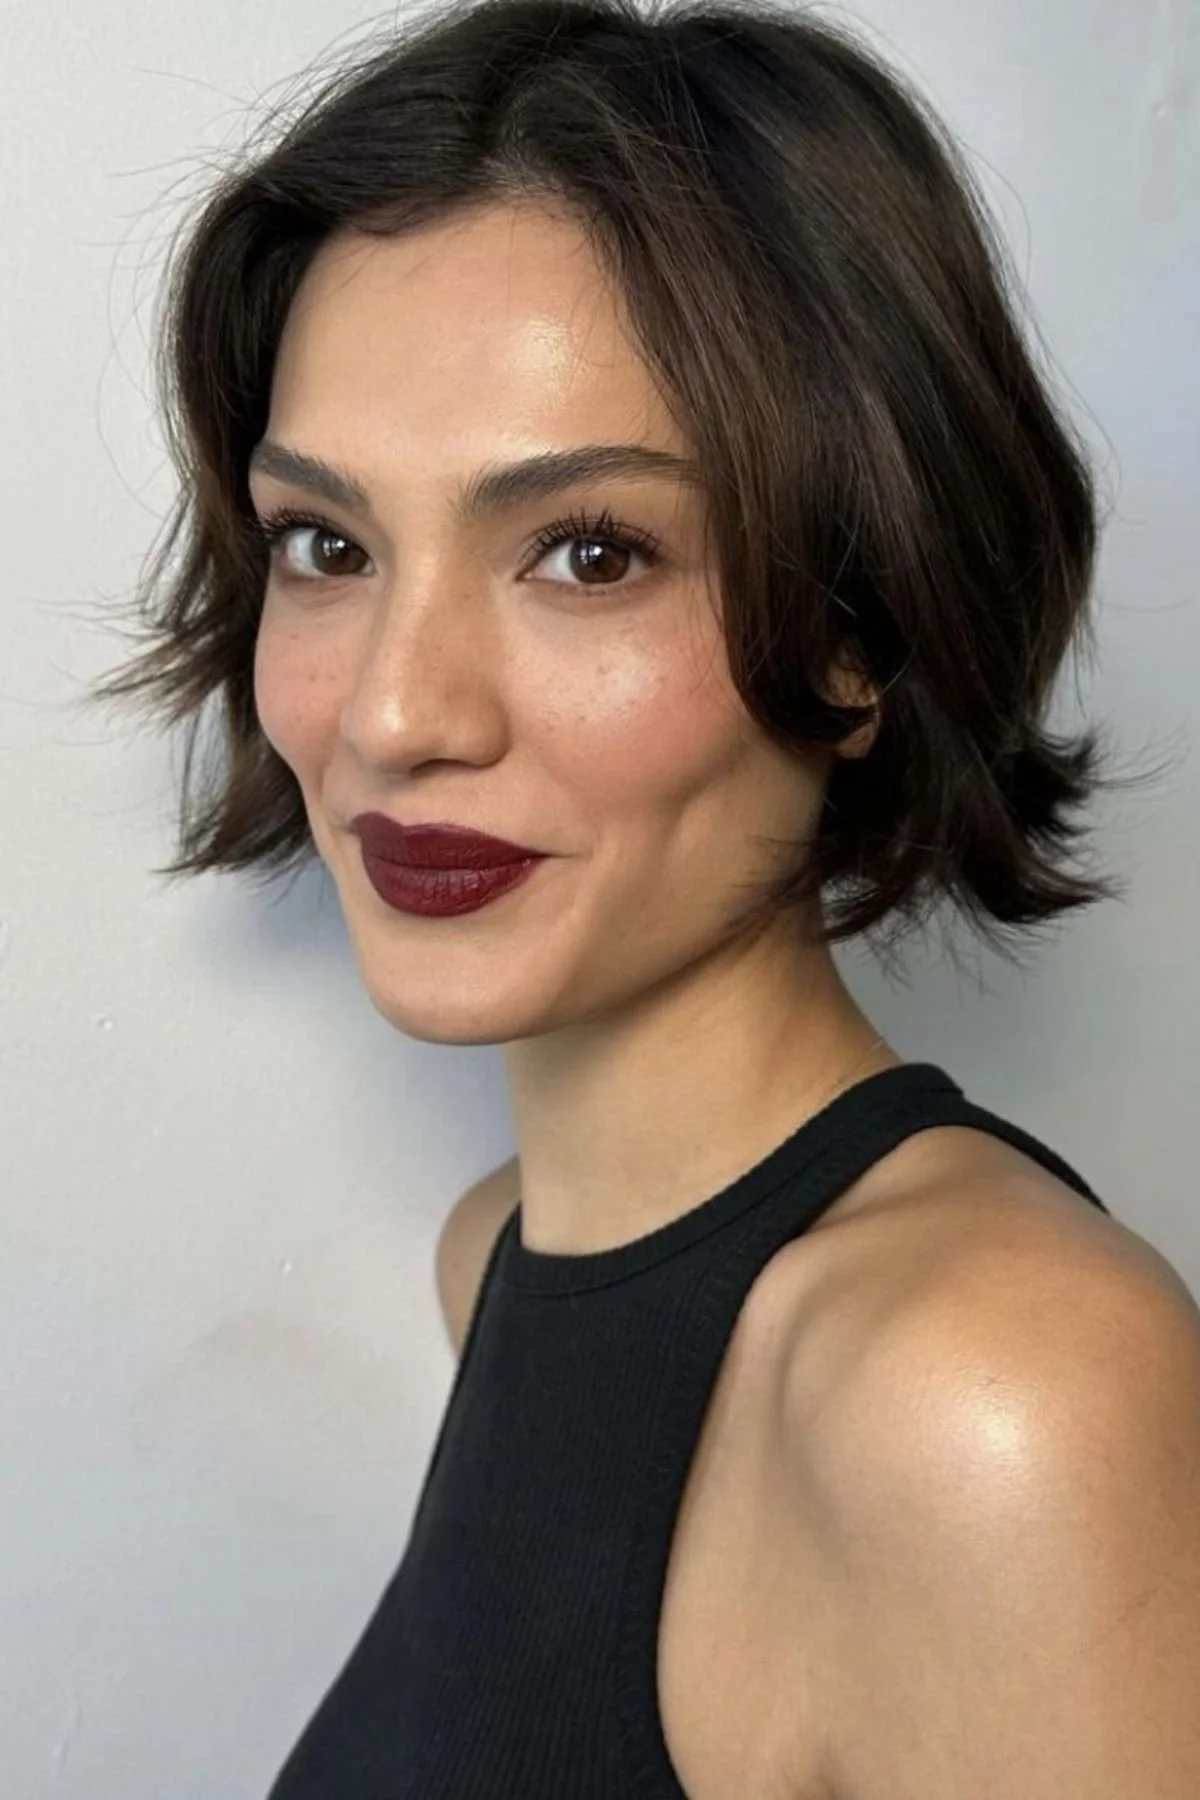
Seasons 2–3: The Rachel
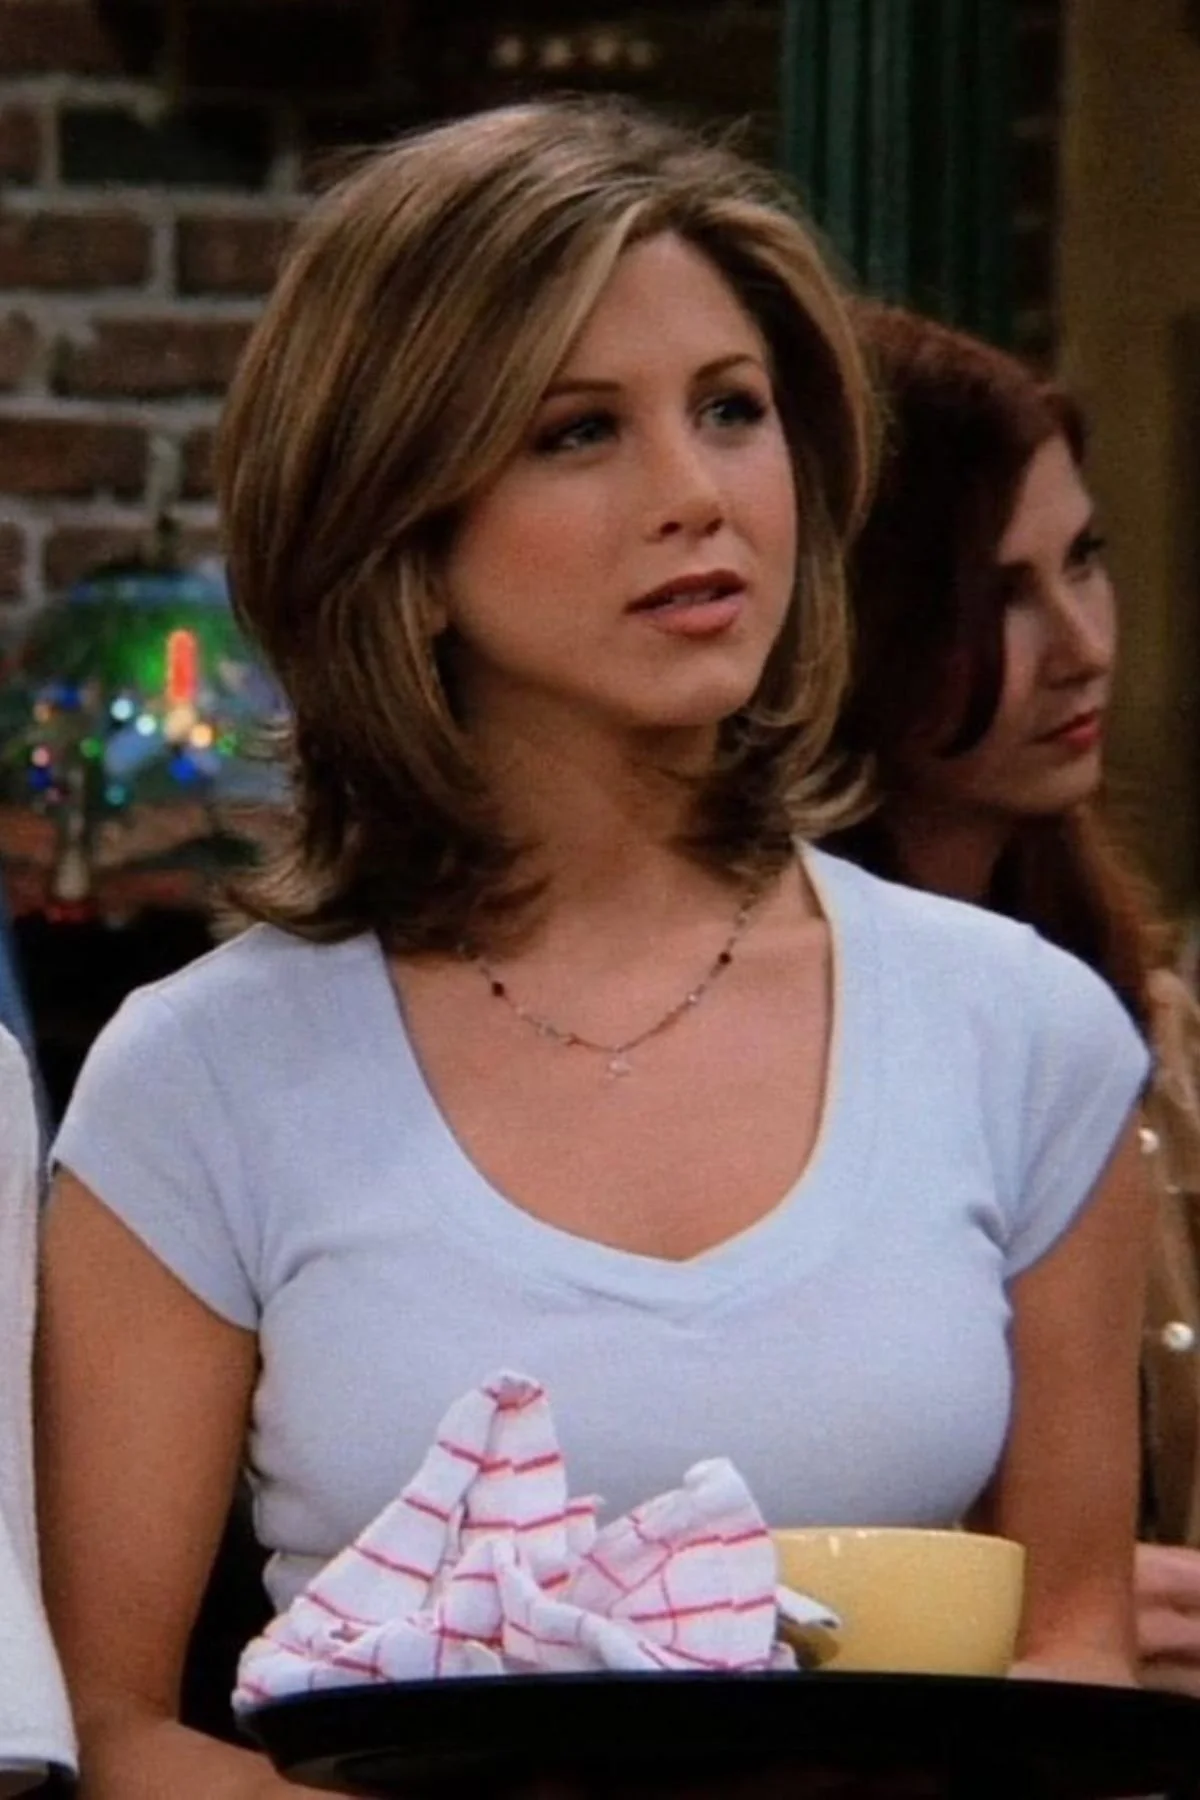
Source: Pinterest
Ahhh, yes! The haircut that defined a decade. “The Rachel” was a layered shag-lob with volume for days, face-framing flip-outs, and a level of bounce that said, “I just left a good date.”
It’s a shaggy, over-directed layered lob with lots of movement and feathered edges. But it’s not for the faint of heart, as this cut needs styling to live its best life.
Modern Tip
Skip the extreme choppiness and go for blended layers if you want less upkeep but the same movement.
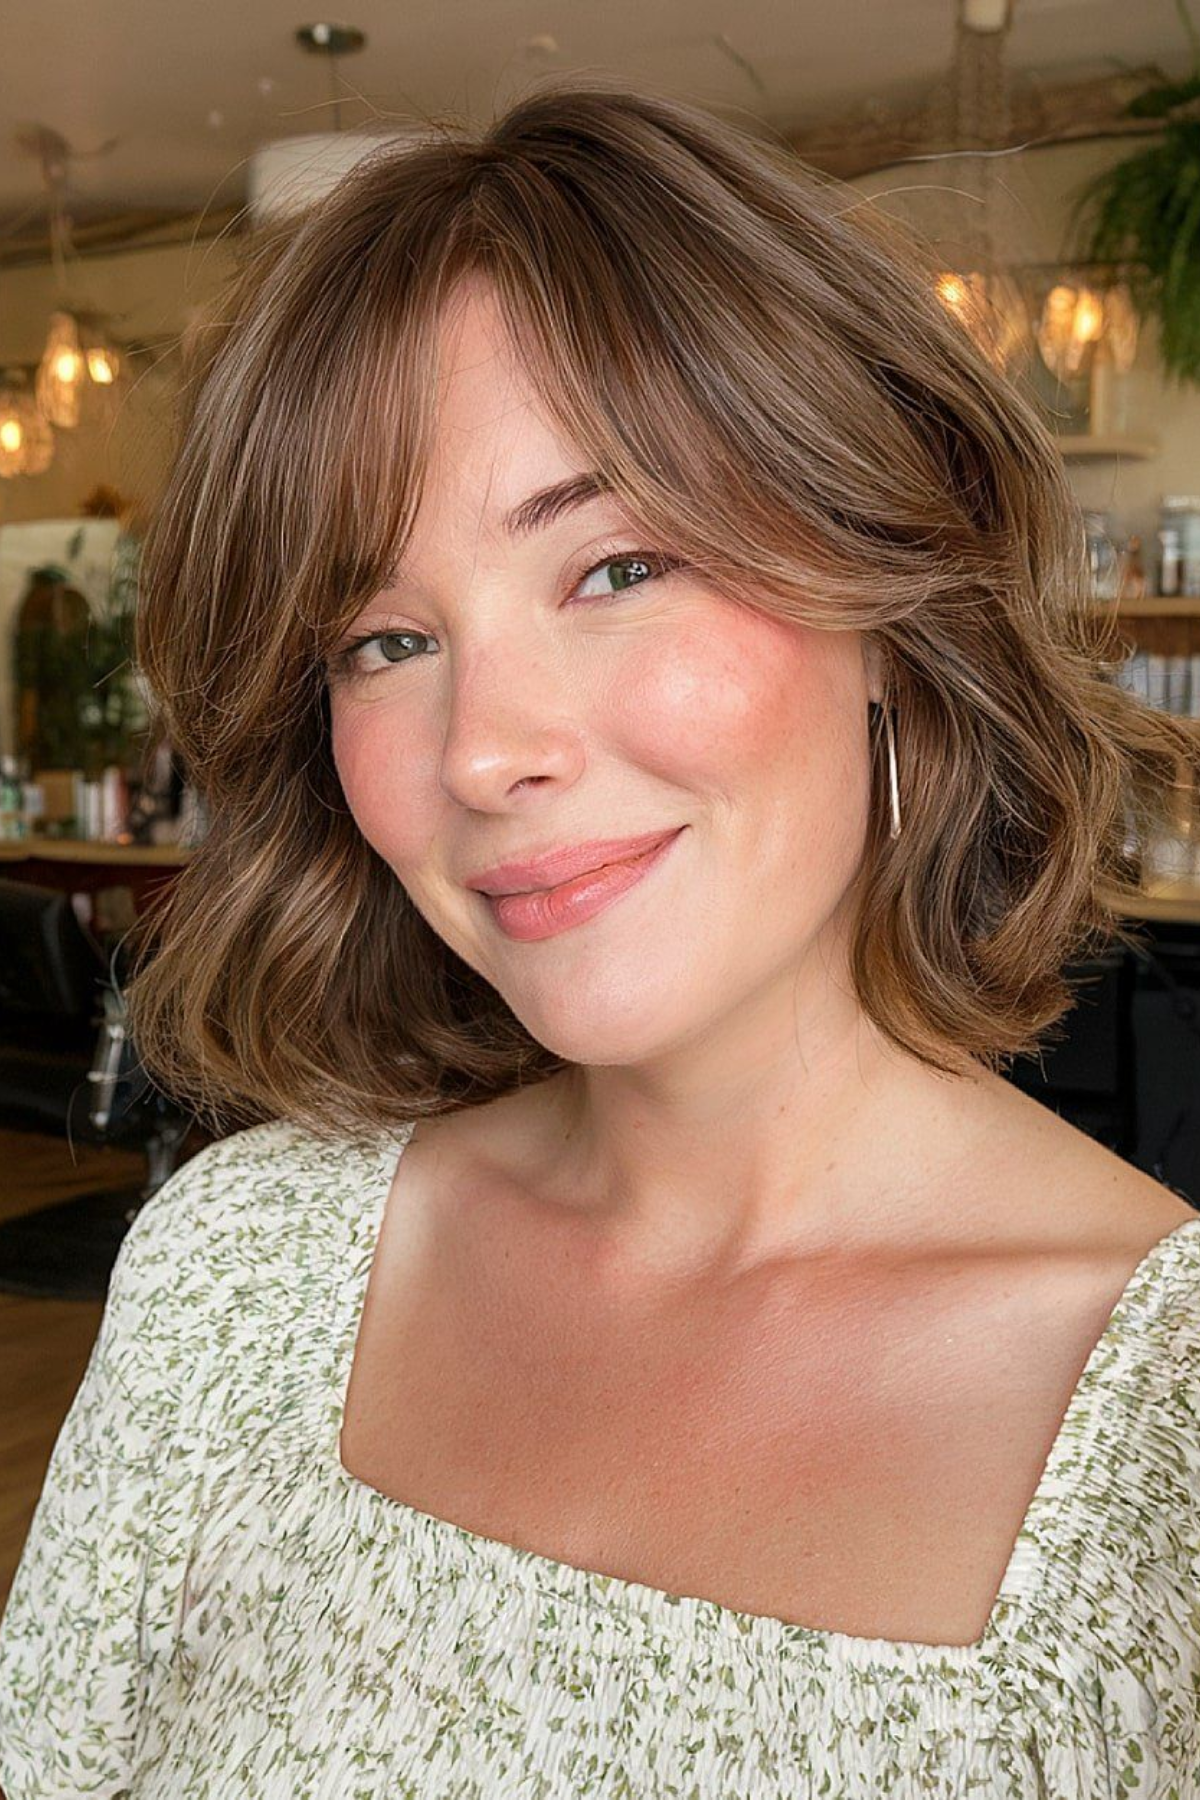
Seasons 4–5: Sleek & Shoulder-Length
Source: Pinterest
By mid-series, Rachel’s haircut started to mellow out. The volume was dialled down, and the layers were more refined, giving her hair a sleek, polished, shoulder-length look that still moved but didn’t scream for attention.
This is the cut to go for if you want “Rachel vibes” with less styling commitment. It’s perfect for busy lifestyles or low-heat routines.
Seasons 6–7: Short & Chic

Source: Pinterest
Then came another big chop. This time, cleaner, sleeker, and a little more grown-up. Rachel’s chin-length, softly layered hair gave off that “I work at Ralph Lauren now” sophistication. It had structure, but still enough softness to frame her face beautifully.
Stylist Tip
If your face shape leans oval or heart-shaped, this cut is especially flattering. Just make sure to keep the layers long enough to handle the Olivia Garden Ceramic + Ion Speed XL or a thermal tool.
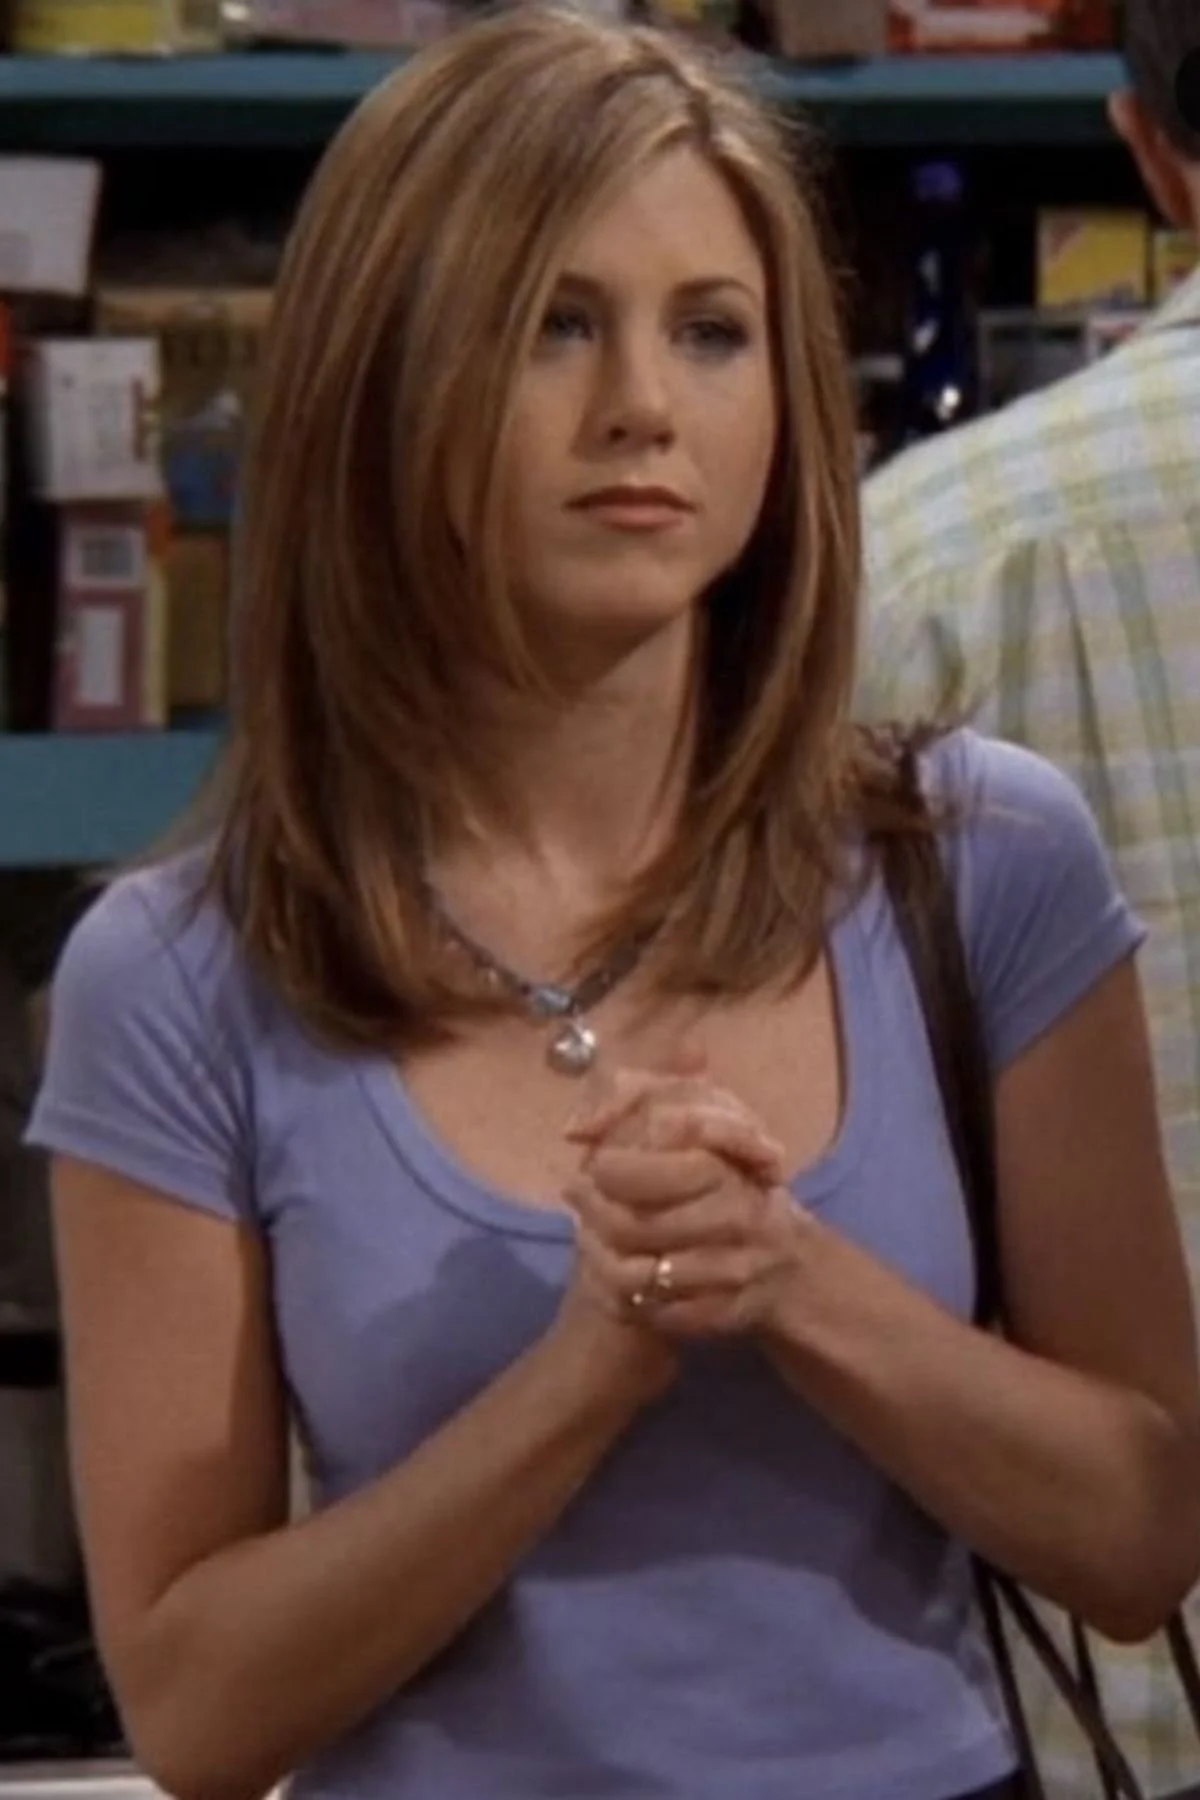
Seasons 8–10: Long & Blended Layers
Source: Pinterest
By the end of the series, Rachel’s look had matured into what we now think of as the ultimate effortless glam: long, caramel-blonde hair with seamless layers and soft shine. No more exaggerated flip-outs. Just fluid movement and picture-perfect polish.
This look works on nearly every hair type. It grows out well, plays nice with heatless styling, and is easy to update with face-framing layers or curtain bangs.
Every one of these hairstyles still works today; you just need to tweak the layers, adjust the length, and match it to your routine.
Want to know exactly what to ask your stylist without sounding like you're quoting a ‘90s DVD commentary? Keep reading.
Not sure which Rachel era actually suits your face shape and texture? Grab my free Haircut Guide before you book, so you walk in with the exact look that works for your hair.
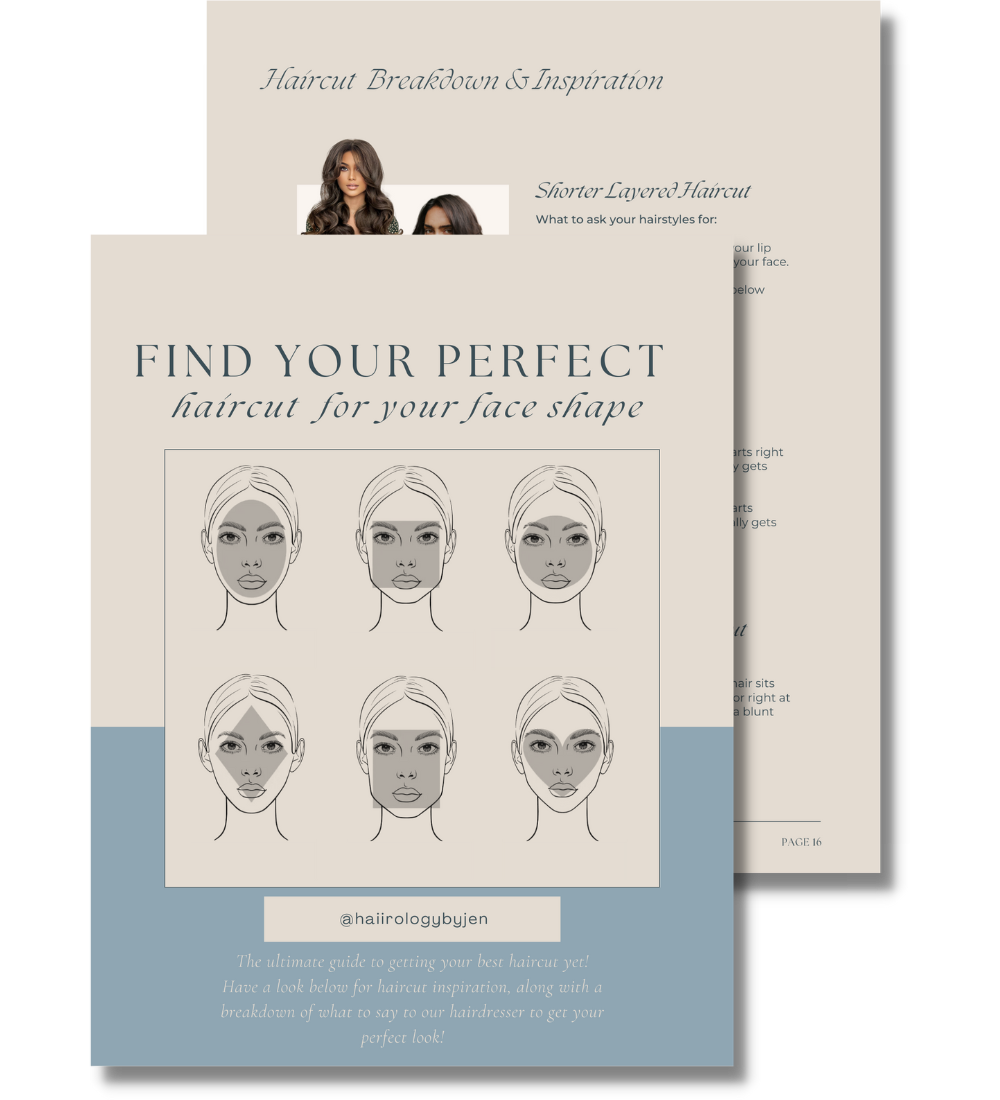
Get Your FREE Haircut Guide
Find the best haircut for your face shape — and know what to ask your stylist for.
- ✓Identify your face shape
- ✓Get personalized haircut ideas
- ✓Learn what to ask your stylist for
No spam, just great hair advice!
Rachel Green Haircut (And What to Ask Your Stylist)
Let me just say this: “The Rachel” isn’t just a haircut, it’s a whole technique. And it changed a lot throughout the seasons of Friends.
So if you walk into the salon and say, “Give me Rachel Green’s haircut,” your stylist’s follow-up should be: “Which season?”
Here’s how to decode it, stylist-to-client.
What ‘The Rachel’ Actually Is (Stylist Translation)
Layers: Short, stacked layers at the crown for lift and volume.
Length: Slightly graduated lob with the front longer than the back.
Finish: Flipped-out ends styled with a round brush or blow-dryer.
Face-Framing: Long, sculpted layers that curve in toward the jawline.
How It Evolved (And Why That Matters Today)
As the seasons went on, the choppiness got toned down. The haircut softened:
In Season 3, it leaned more sleek
By Season 5–6, it had longer blended layers
In Season 8+, it was a layered blowout shape with natural volume
So when a client shows me a reference pic, I always ask:
“Do you want the volume and flick of Season 2, or the smoother, longer layers from later?”
What to Ask Your Stylist Instead
Don’t just say “The Rachel”, say:
“I want face-framing layers that start around my cheekbones or jawline.”
“Let’s do volume near the crown, but still easy to style at home.”
“I’m okay with flipped-out ends, but I want them to be subtle and moderate.”
Show a picture (yes, even one from this post) and let your stylist personalize it to your texture, density, and routine.
Should You Try the Rachel Look? Here’s Who It Suits Best
Listen! The Rachel might be iconic, but it’s not a one-size-fits-all situation. Whether you’re thinking about trying the original 90s blowout or a modern layered version, it all depends on your hair type, lifestyle, and styling habits.
Here’s how to figure out if this style is your next move:
Go for it if:
- ▪ You love a bouncy blowout and don’t mind using a round brush or blow-dry tool.
- ▪ You have straight to wavy hair that holds shape well.
- ▪ You want a haircut that frames your face and adds lift.
- ▪ You enjoy a little volume and want to look put together even on “meh” days.
Maybe skip it (or modify it) if:
- ▪ You hate heat tools or styling every day.
- ▪ Your hair is super thick, coarse, or curly and tends to puff with layers.
- ▪ You prefer a wash-and-go look with no round brushes in sight.
- ▪ You want something ultra-low maintenance.
My Stylist Take
If you’re not into daily blowouts, ask your stylist for long, blended layers with internal shaping instead of the heavy face-framing flicks. That way, you still get movement but just without the commitment.
Still unsure?
Screenshot your fave look from this post and show it to your stylist (or DM it to me, happy to help).
My Go-To Tools & Products to Nail the Rachel Green 90s Blowout
You can’t get the hairstyles of Rachel Green in Friends without the right tools, and no, your flat iron isn’t going to cut it here (literally).
Here’s everything I use to recreate that volume, shine, and perfect flick:
| Product | Best For | Buy Here |
|---|---|---|
| Olivia Garden Ceramic + Ion Speed XL 1 3/4" | Lift at the roots and flipped ends like Rachel's signature flick | Buy |
| Shark FlexFusion Air Styling & Drying System | Directing airflow for a glassy, salon-style finish | Buy |
| Kitsch Ceramic Thermal Hair Rollers | Setting volume in the bangs while your hair cools for that face-framing lift | Buy |
| BondiBoost Infrared Bounce Brush | Smoothing the layers and adding a soft curve to the ends | Buy |
| TRESemme Keratin Smooth Weightless Finishing Hairspray | A smooth, light-hold finish without the crunch | Buy |
Answering Your Top Rachel Green Hair Questions (From DMs + Clients)
Rachel Green Haircut
Why did Rachel cut her hair in Season 7?
It was a real-life decision by Jennifer Aniston. She wanted a fresh change, and it gave us that sleek, chin-length layered cut that’s still trending.
Can this look work with curls or frizz-prone hair?
Yes, but it takes prep! Smooth the Bumble and Bumble Straight Blow Dry or the Color Wow One Minute Transformation Styling Cream through damp hair before styling.
Do I need layers for this to work?
Yes. The entire shape depends on movement, and layers give you that. Even Rachel Green's hair had invisible internal layers.
What is Rachel Green’s haircut called?
Technically, it’s a shaggy layered lob with flipped ends. Most stylists know it as “The Rachel.”
How is Rachel’s hair so shiny in Friends?
High-gloss finishes, smoothing serums, and blowouts with tension. No shortcuts, but very doable with the right products.
How did Rachel Green do her hair?
Lots of round brushing, sectioning, and setting with rollers. It was the 90s, so she had volume for days.
Did Jennifer Aniston like The Rachel cut?
Not really! She’s said it was “the ugliest haircut” and hard to maintain. But the world loved it anyway. (And so do my clients.)
Here’s What I Love (and Don’t) About Rachel Green Hairstyles
What I Love:
Always flattering; face-framing layers FTW
Versatile for work or casual
Gives instant “put-together” energy
Grows out beautifully with trims
What I Don’t:
Needs blow-drying or heat to style properly
Can get puffy on thick or curly hair
Requires trims every 6–8 weeks to keep its shape
Real talk
I’ve recreated these cuts for hundreds of clients. They’re iconic for a reason, but don’t let Instagram fool you. The blowout is the real star.
| Festive Hair Inspo: From Holiday Chic to Bridal Elegance |
|---|
| Get ready to dazzle this season with hairstyle inspiration fit for festive parties, celebrity glam, and your walk down the aisle: From red carpet sparkle to romantic wedding sophistication, these posts will ensure your hair steals the spotlight. |
Let’s Connect (And Tag Me When You Try It!)
Tried the look?
Or thinking about cutting your hair into a new version of “The Rachel”?
I want to see it.
DM or tag me on Instagram →@HaiirologyByJen
Shop all the tools I used above (links are in this post!)
Need help picking a haircut that works for your texture? Grab my free Haircut Guide.
Whether you're recreating the hairstyles of Rachel Green in Friends or just stealing her shine, I’m here for it, and I’ll help you every step of the way.
Get Your FREE Haircut Guide
Find the best haircut for your face shape — and know what to ask your stylist for.
- ✓Identify your face shape
- ✓Get personalized haircut ideas
- ✓Learn what to ask your stylist for
No spam, just great hair advice!


Struggling with styling? Discover low-maintenance haircuts for women over 40 that add volume, flatter your face, and save time every day.